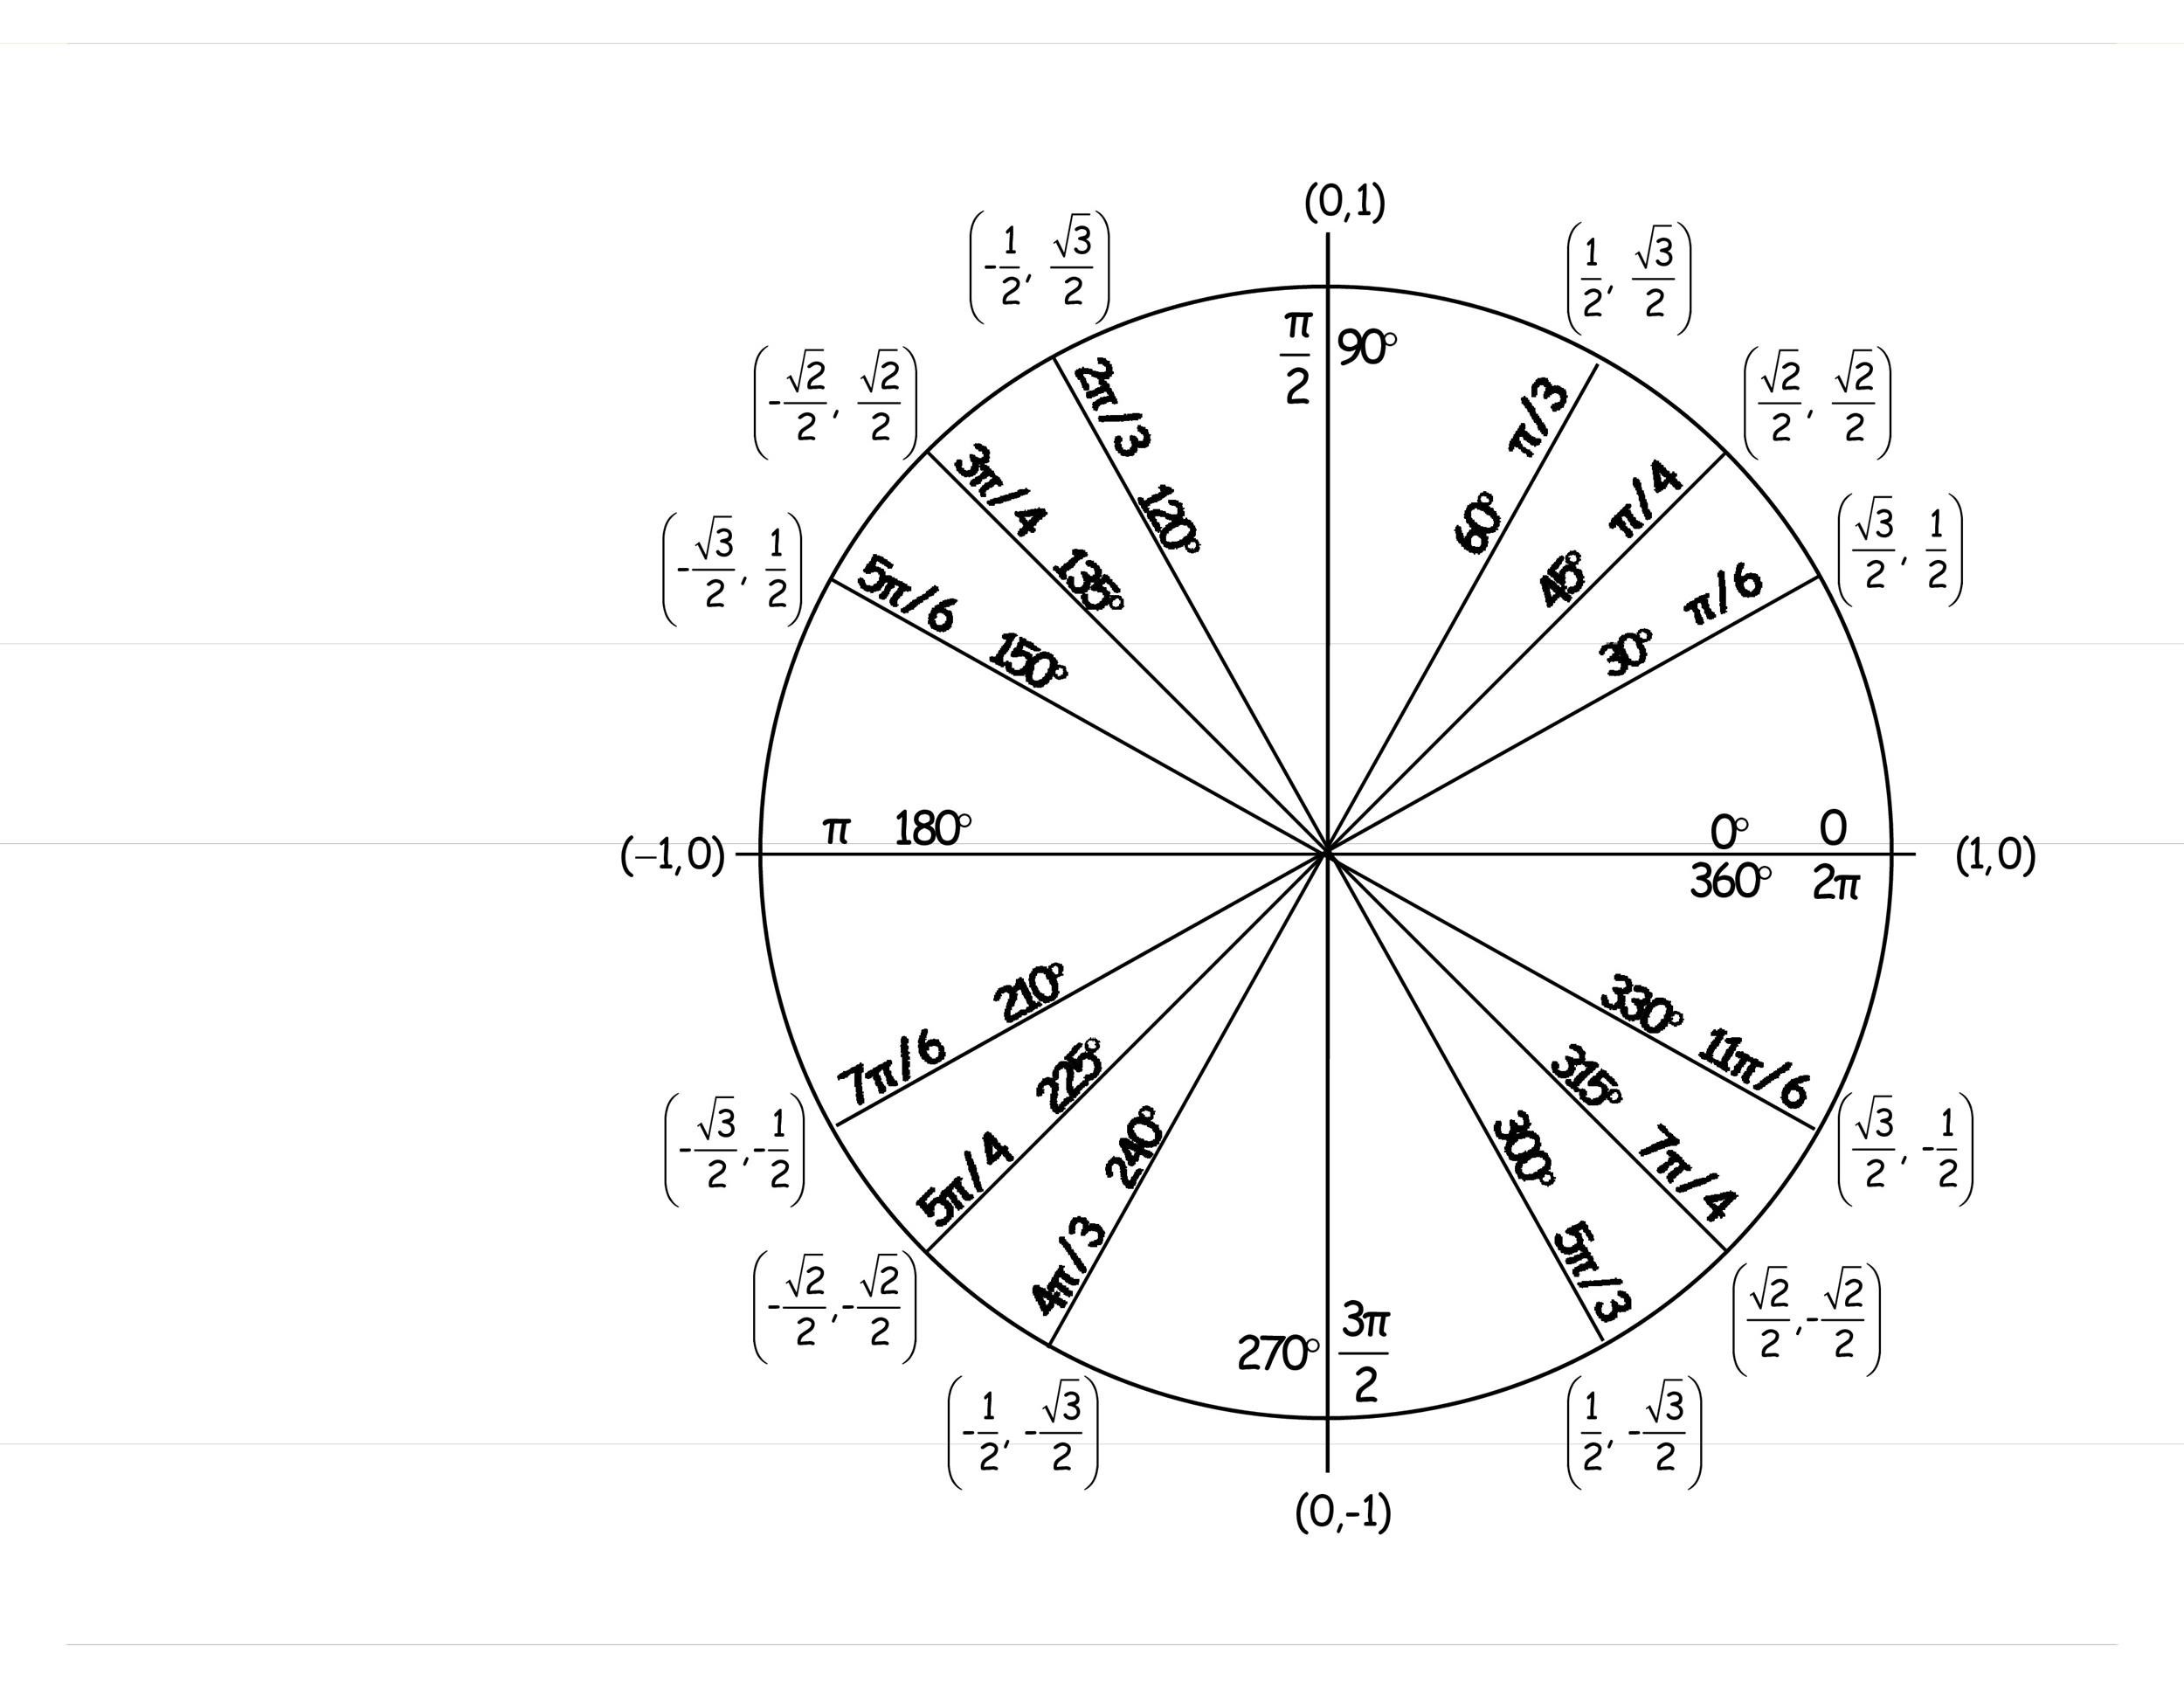
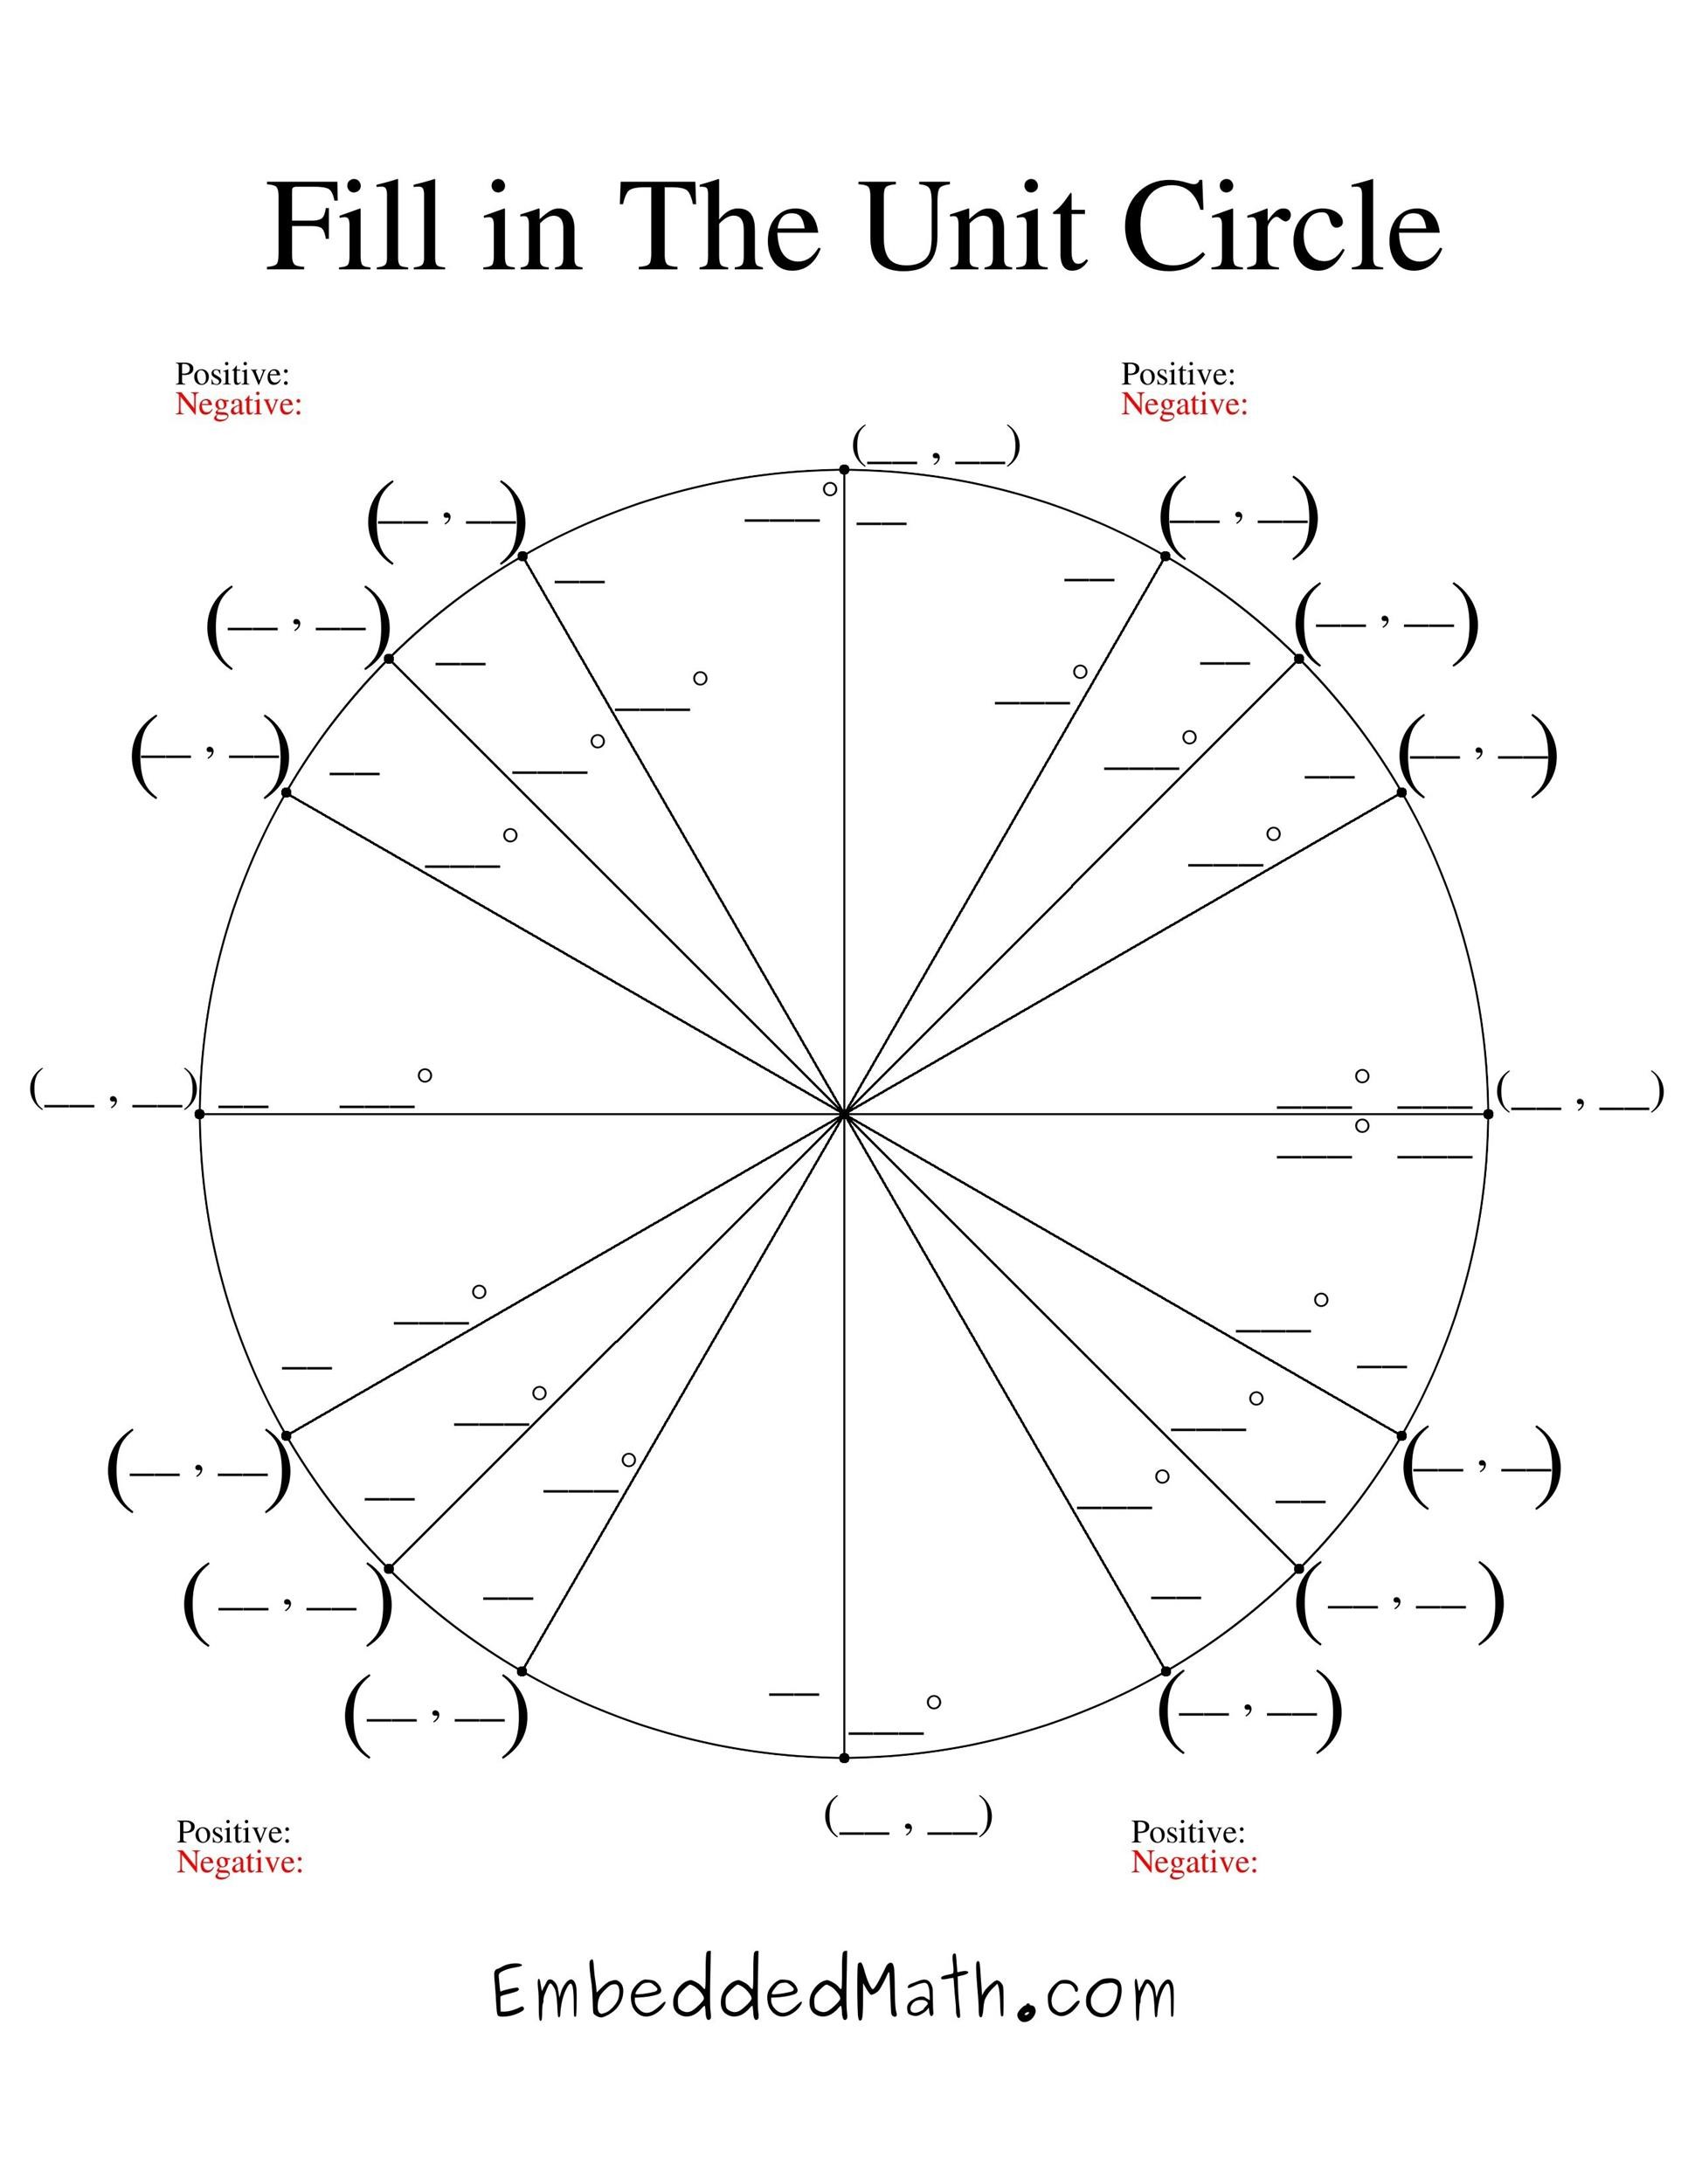
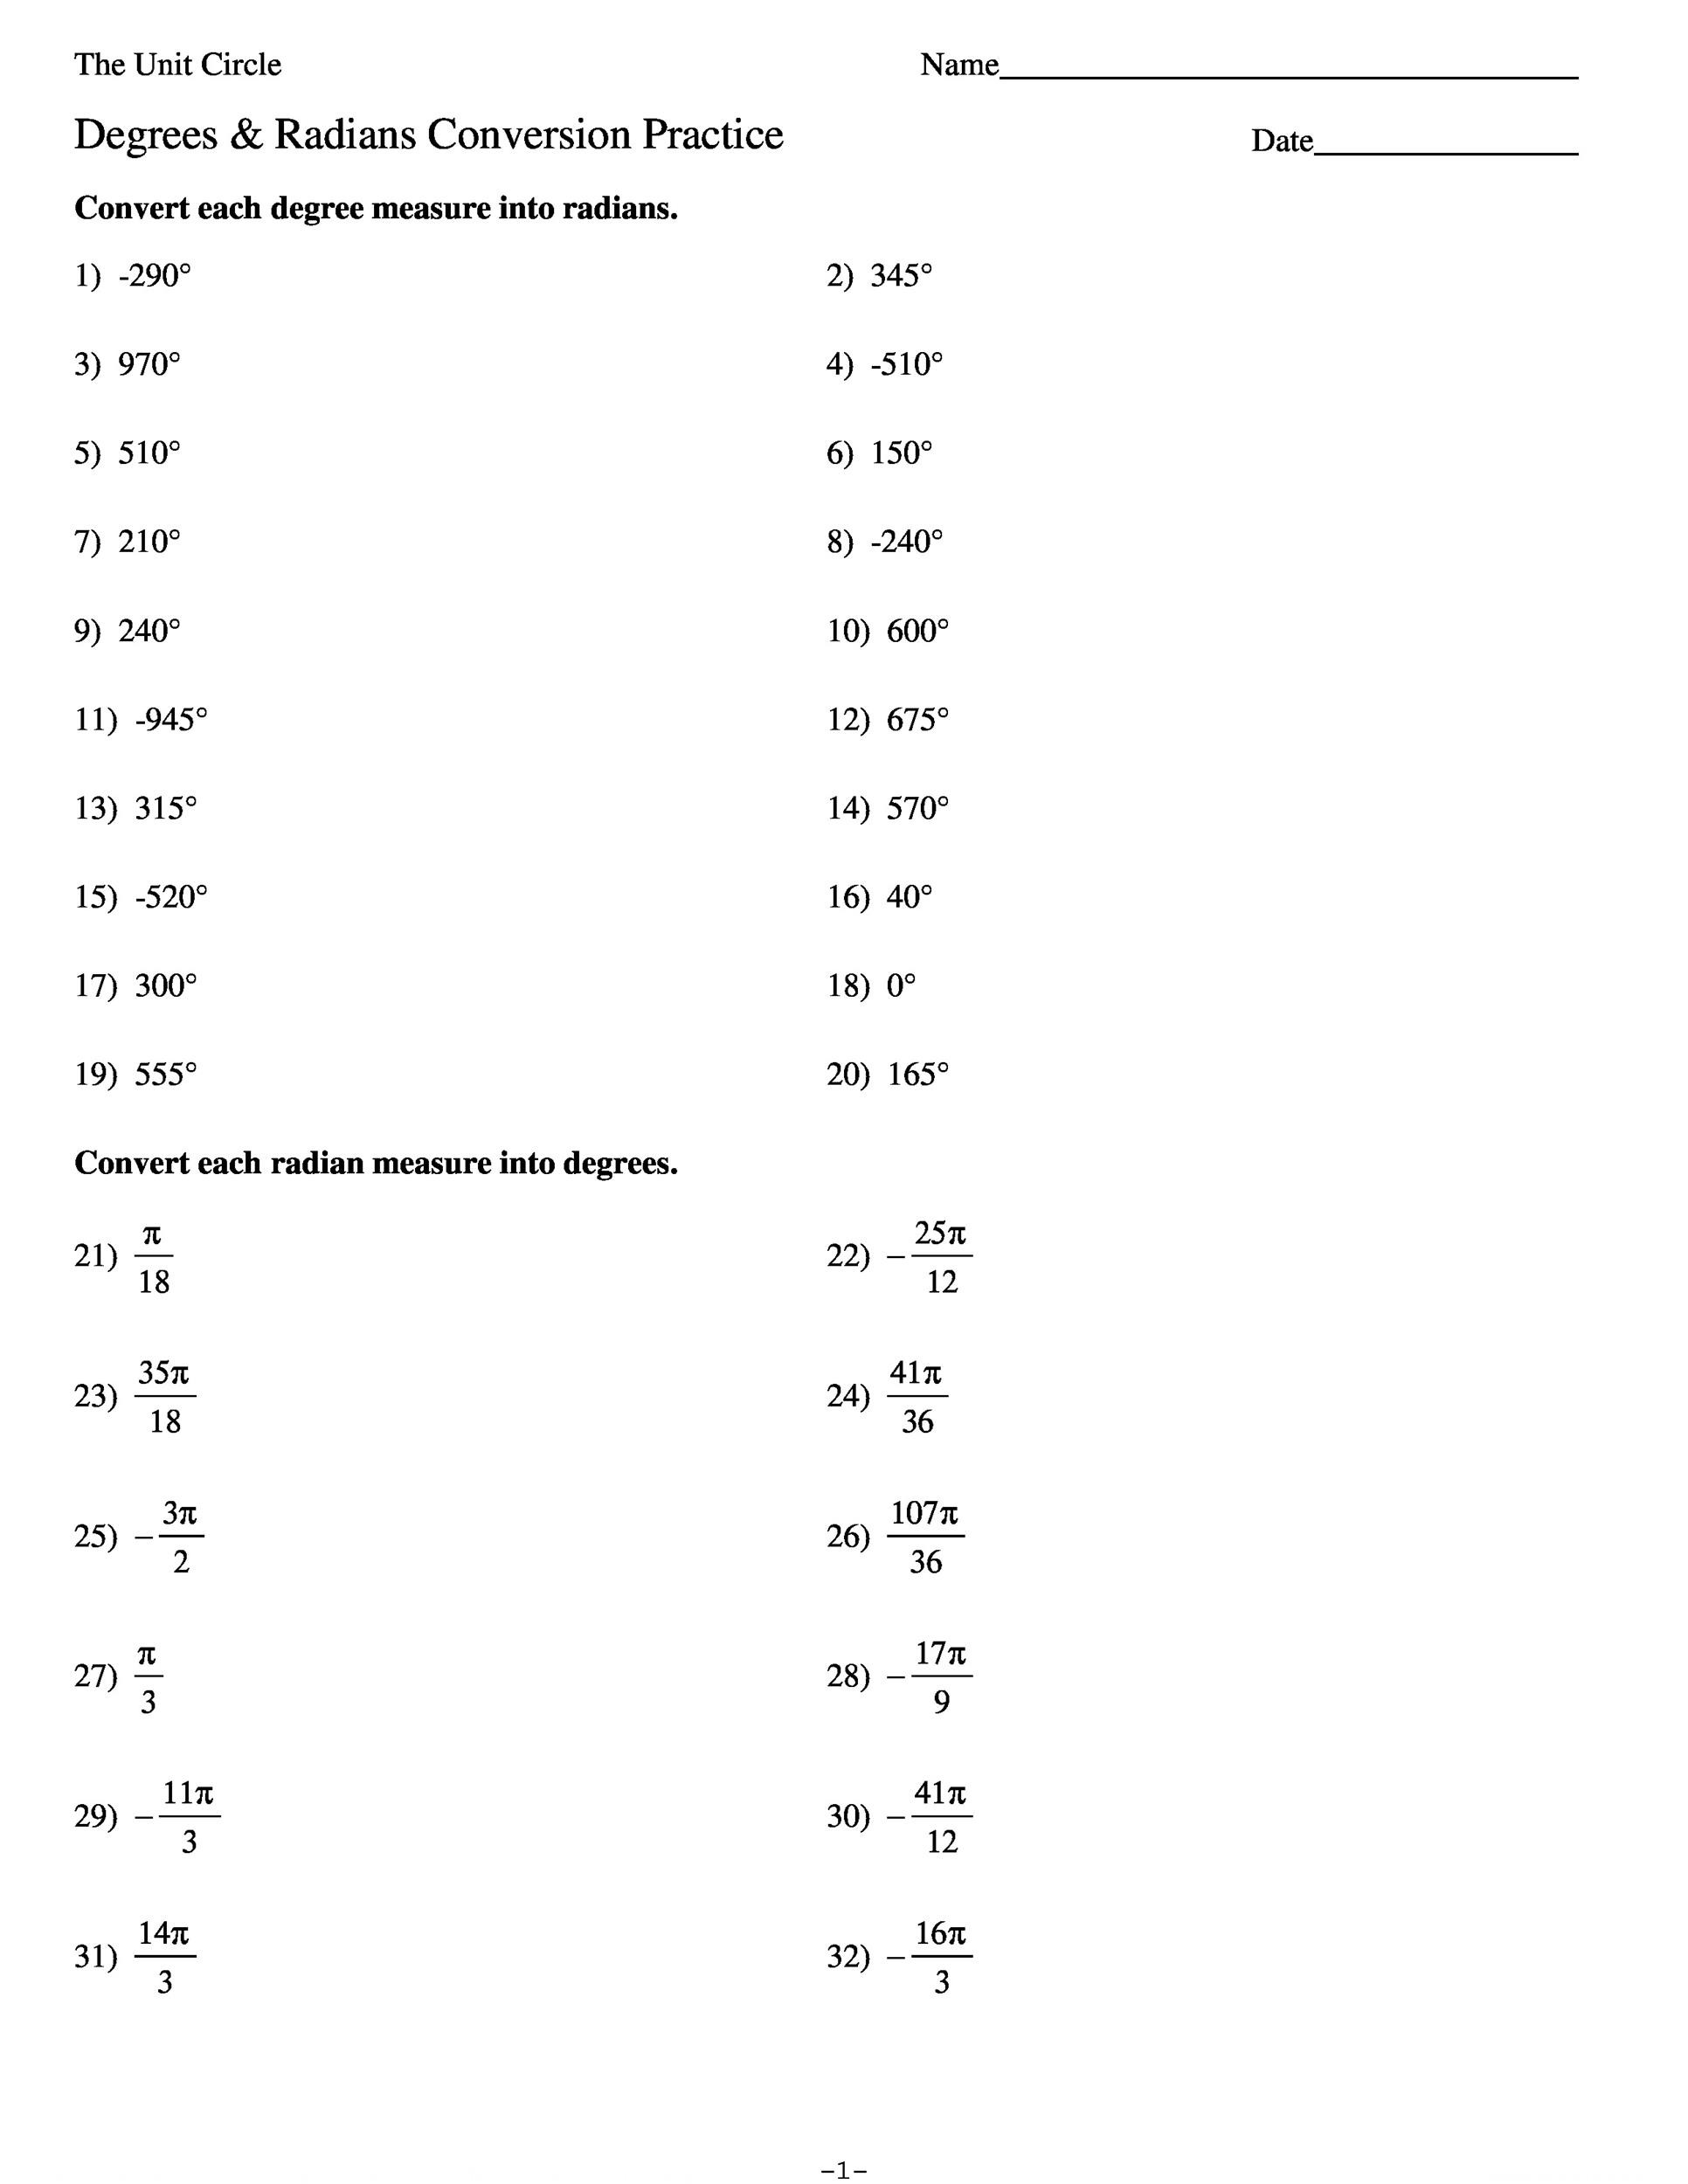
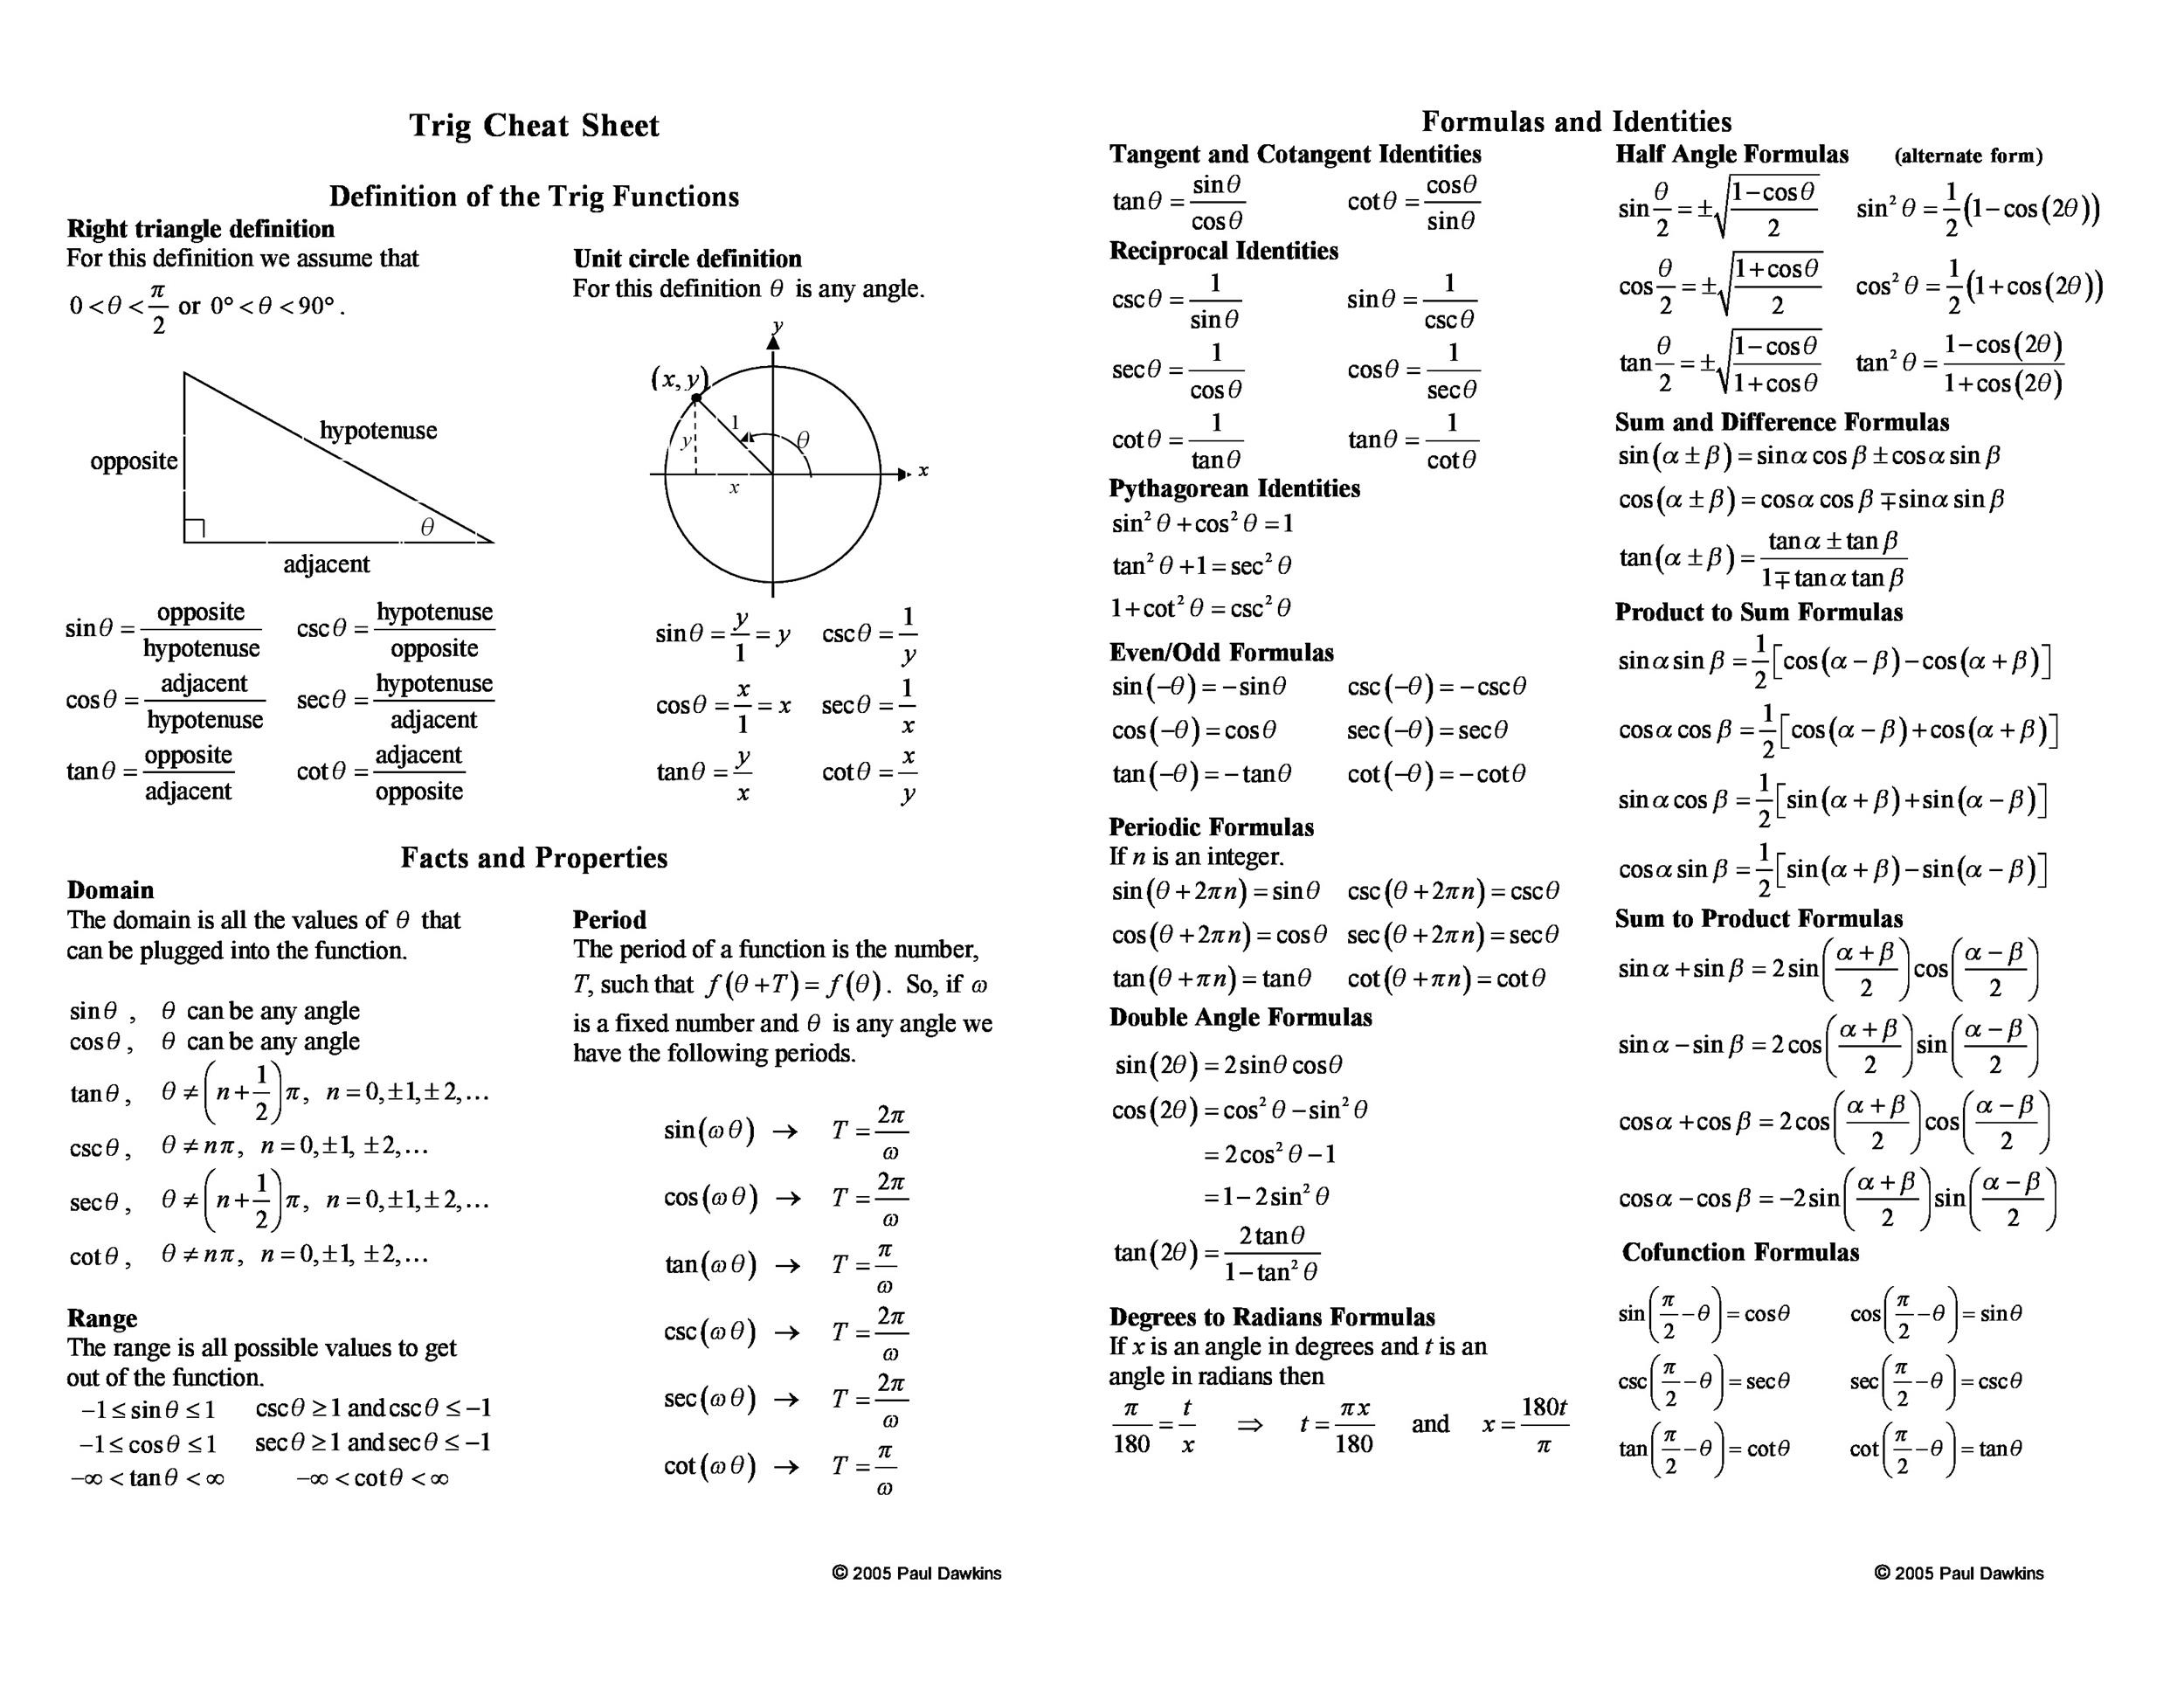
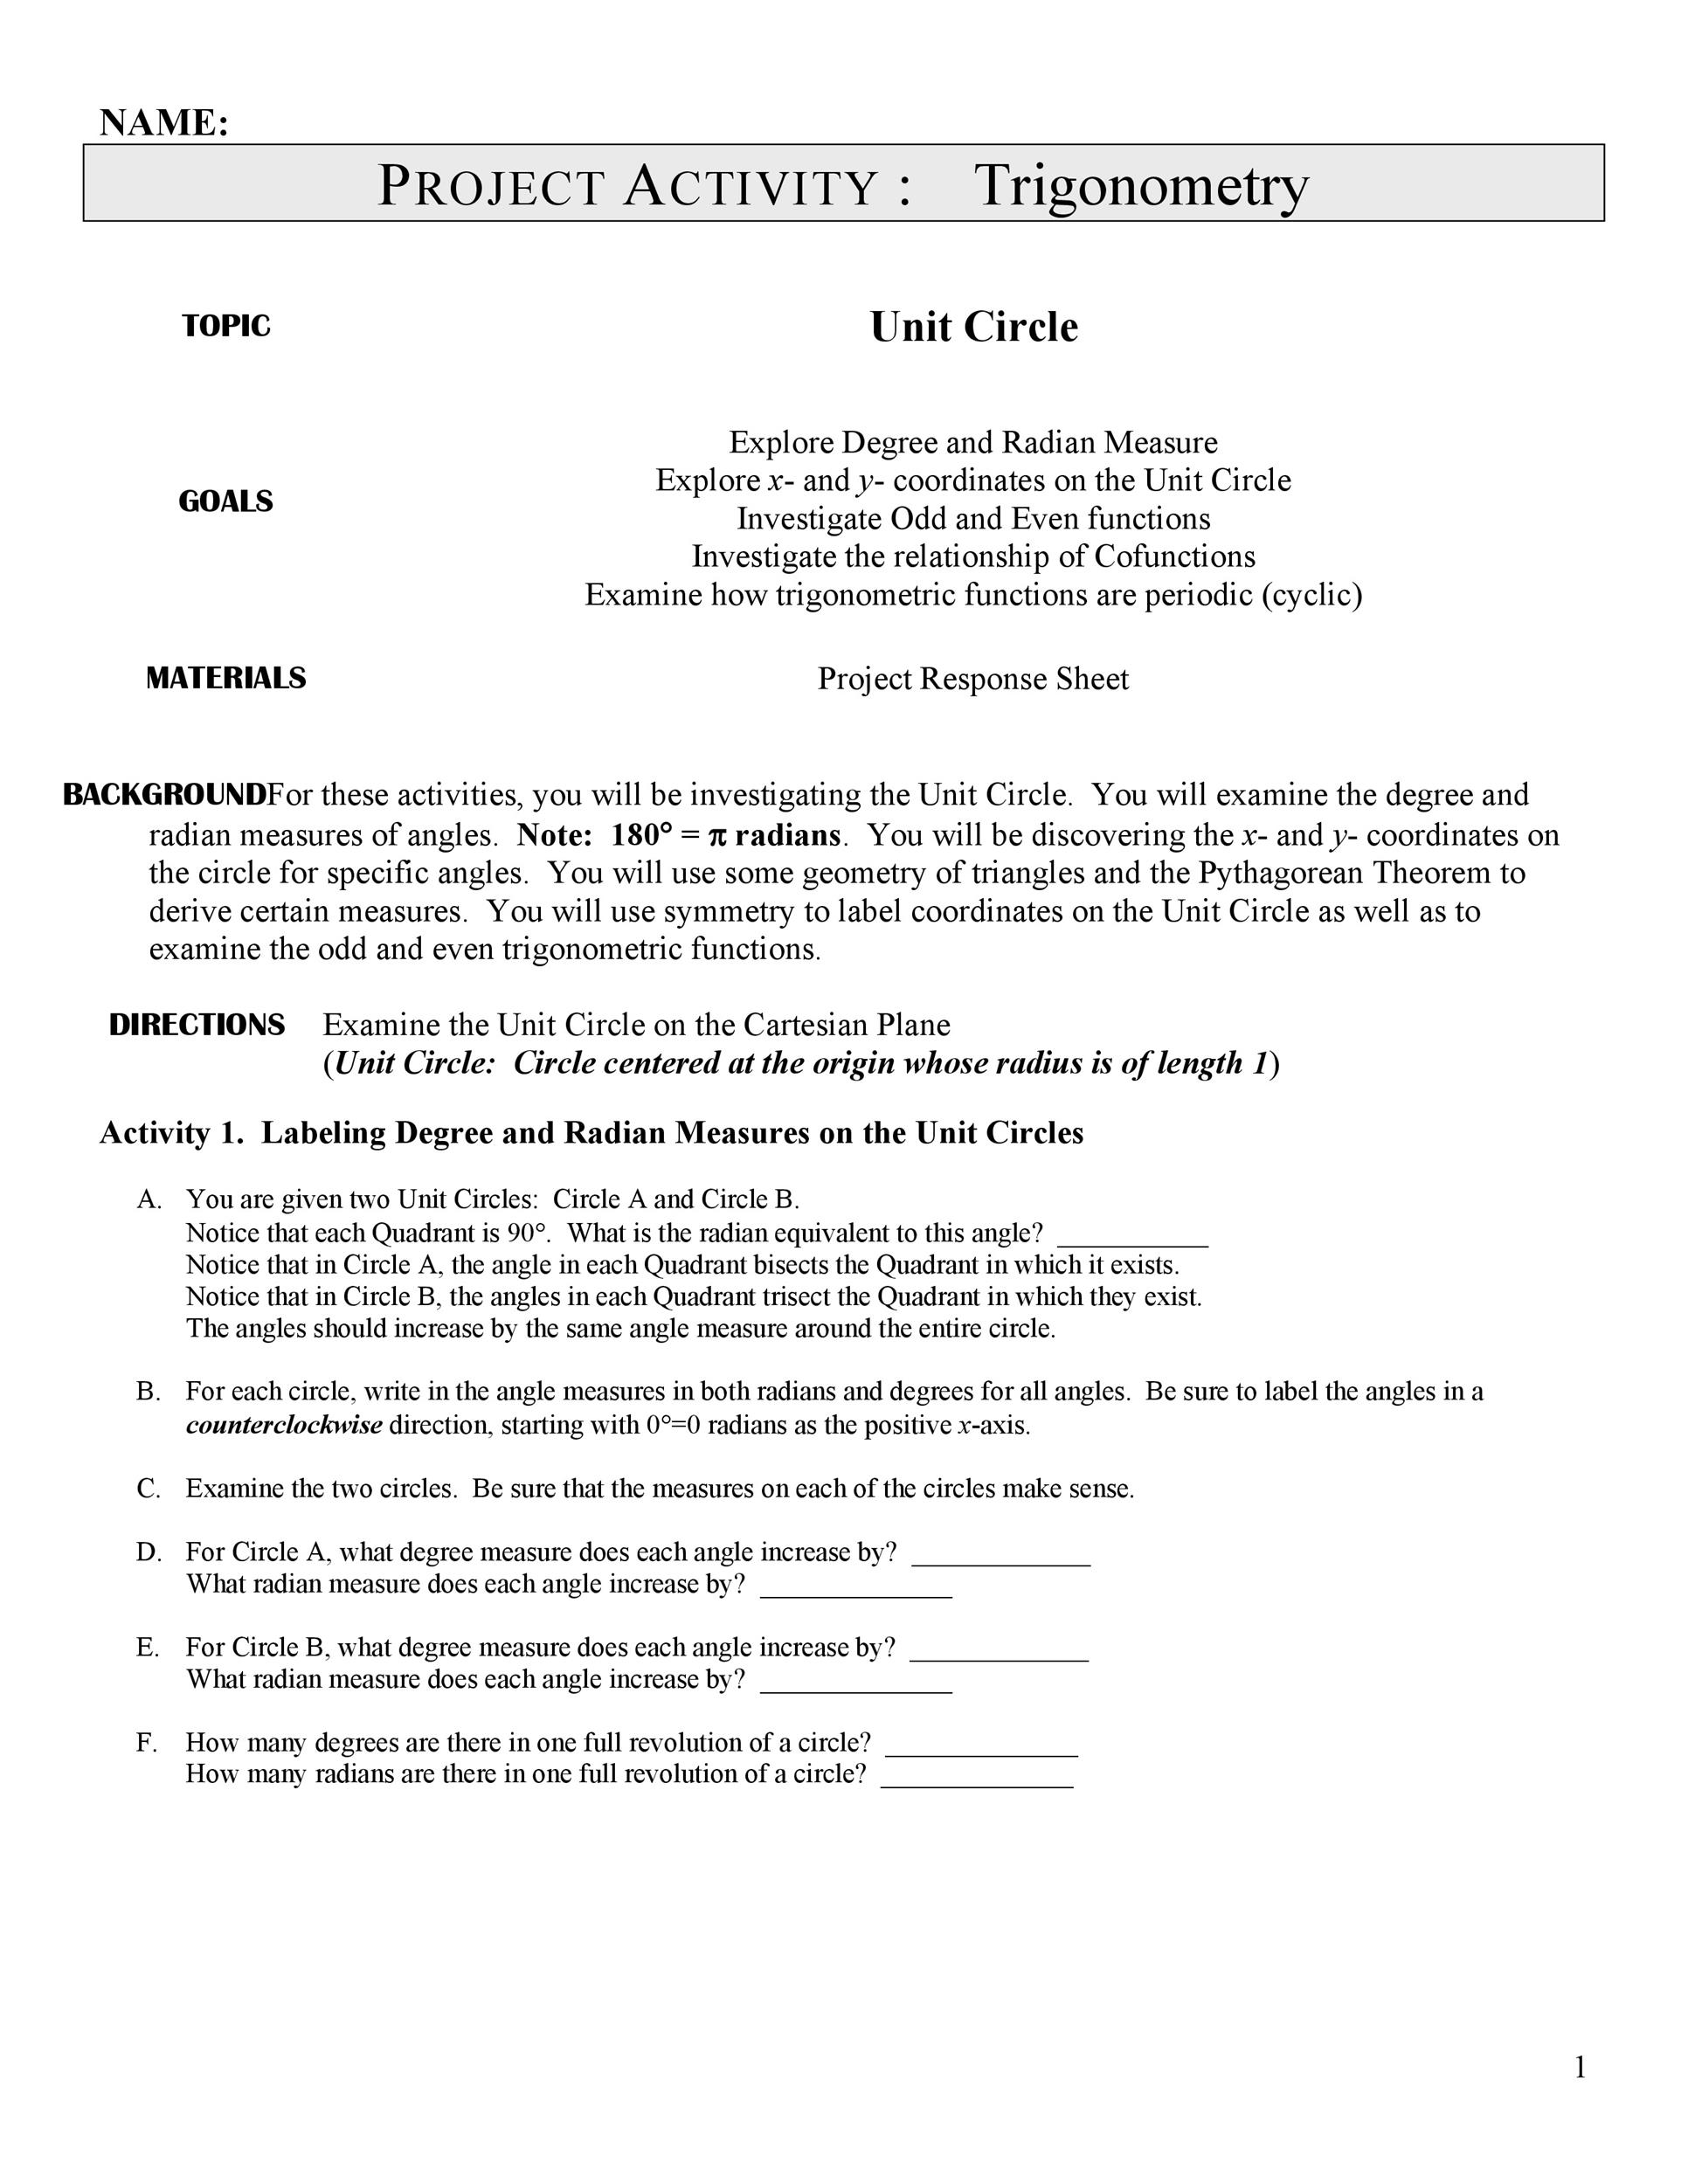
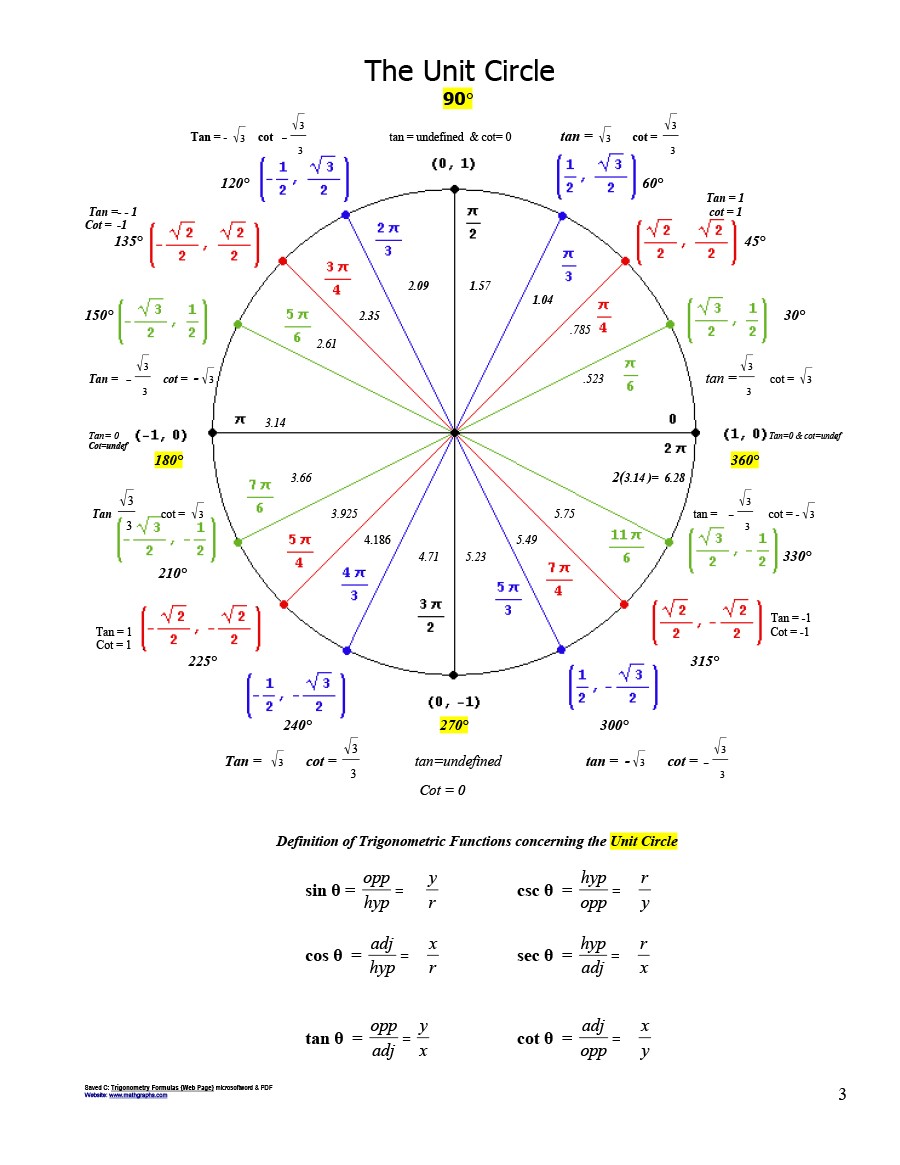
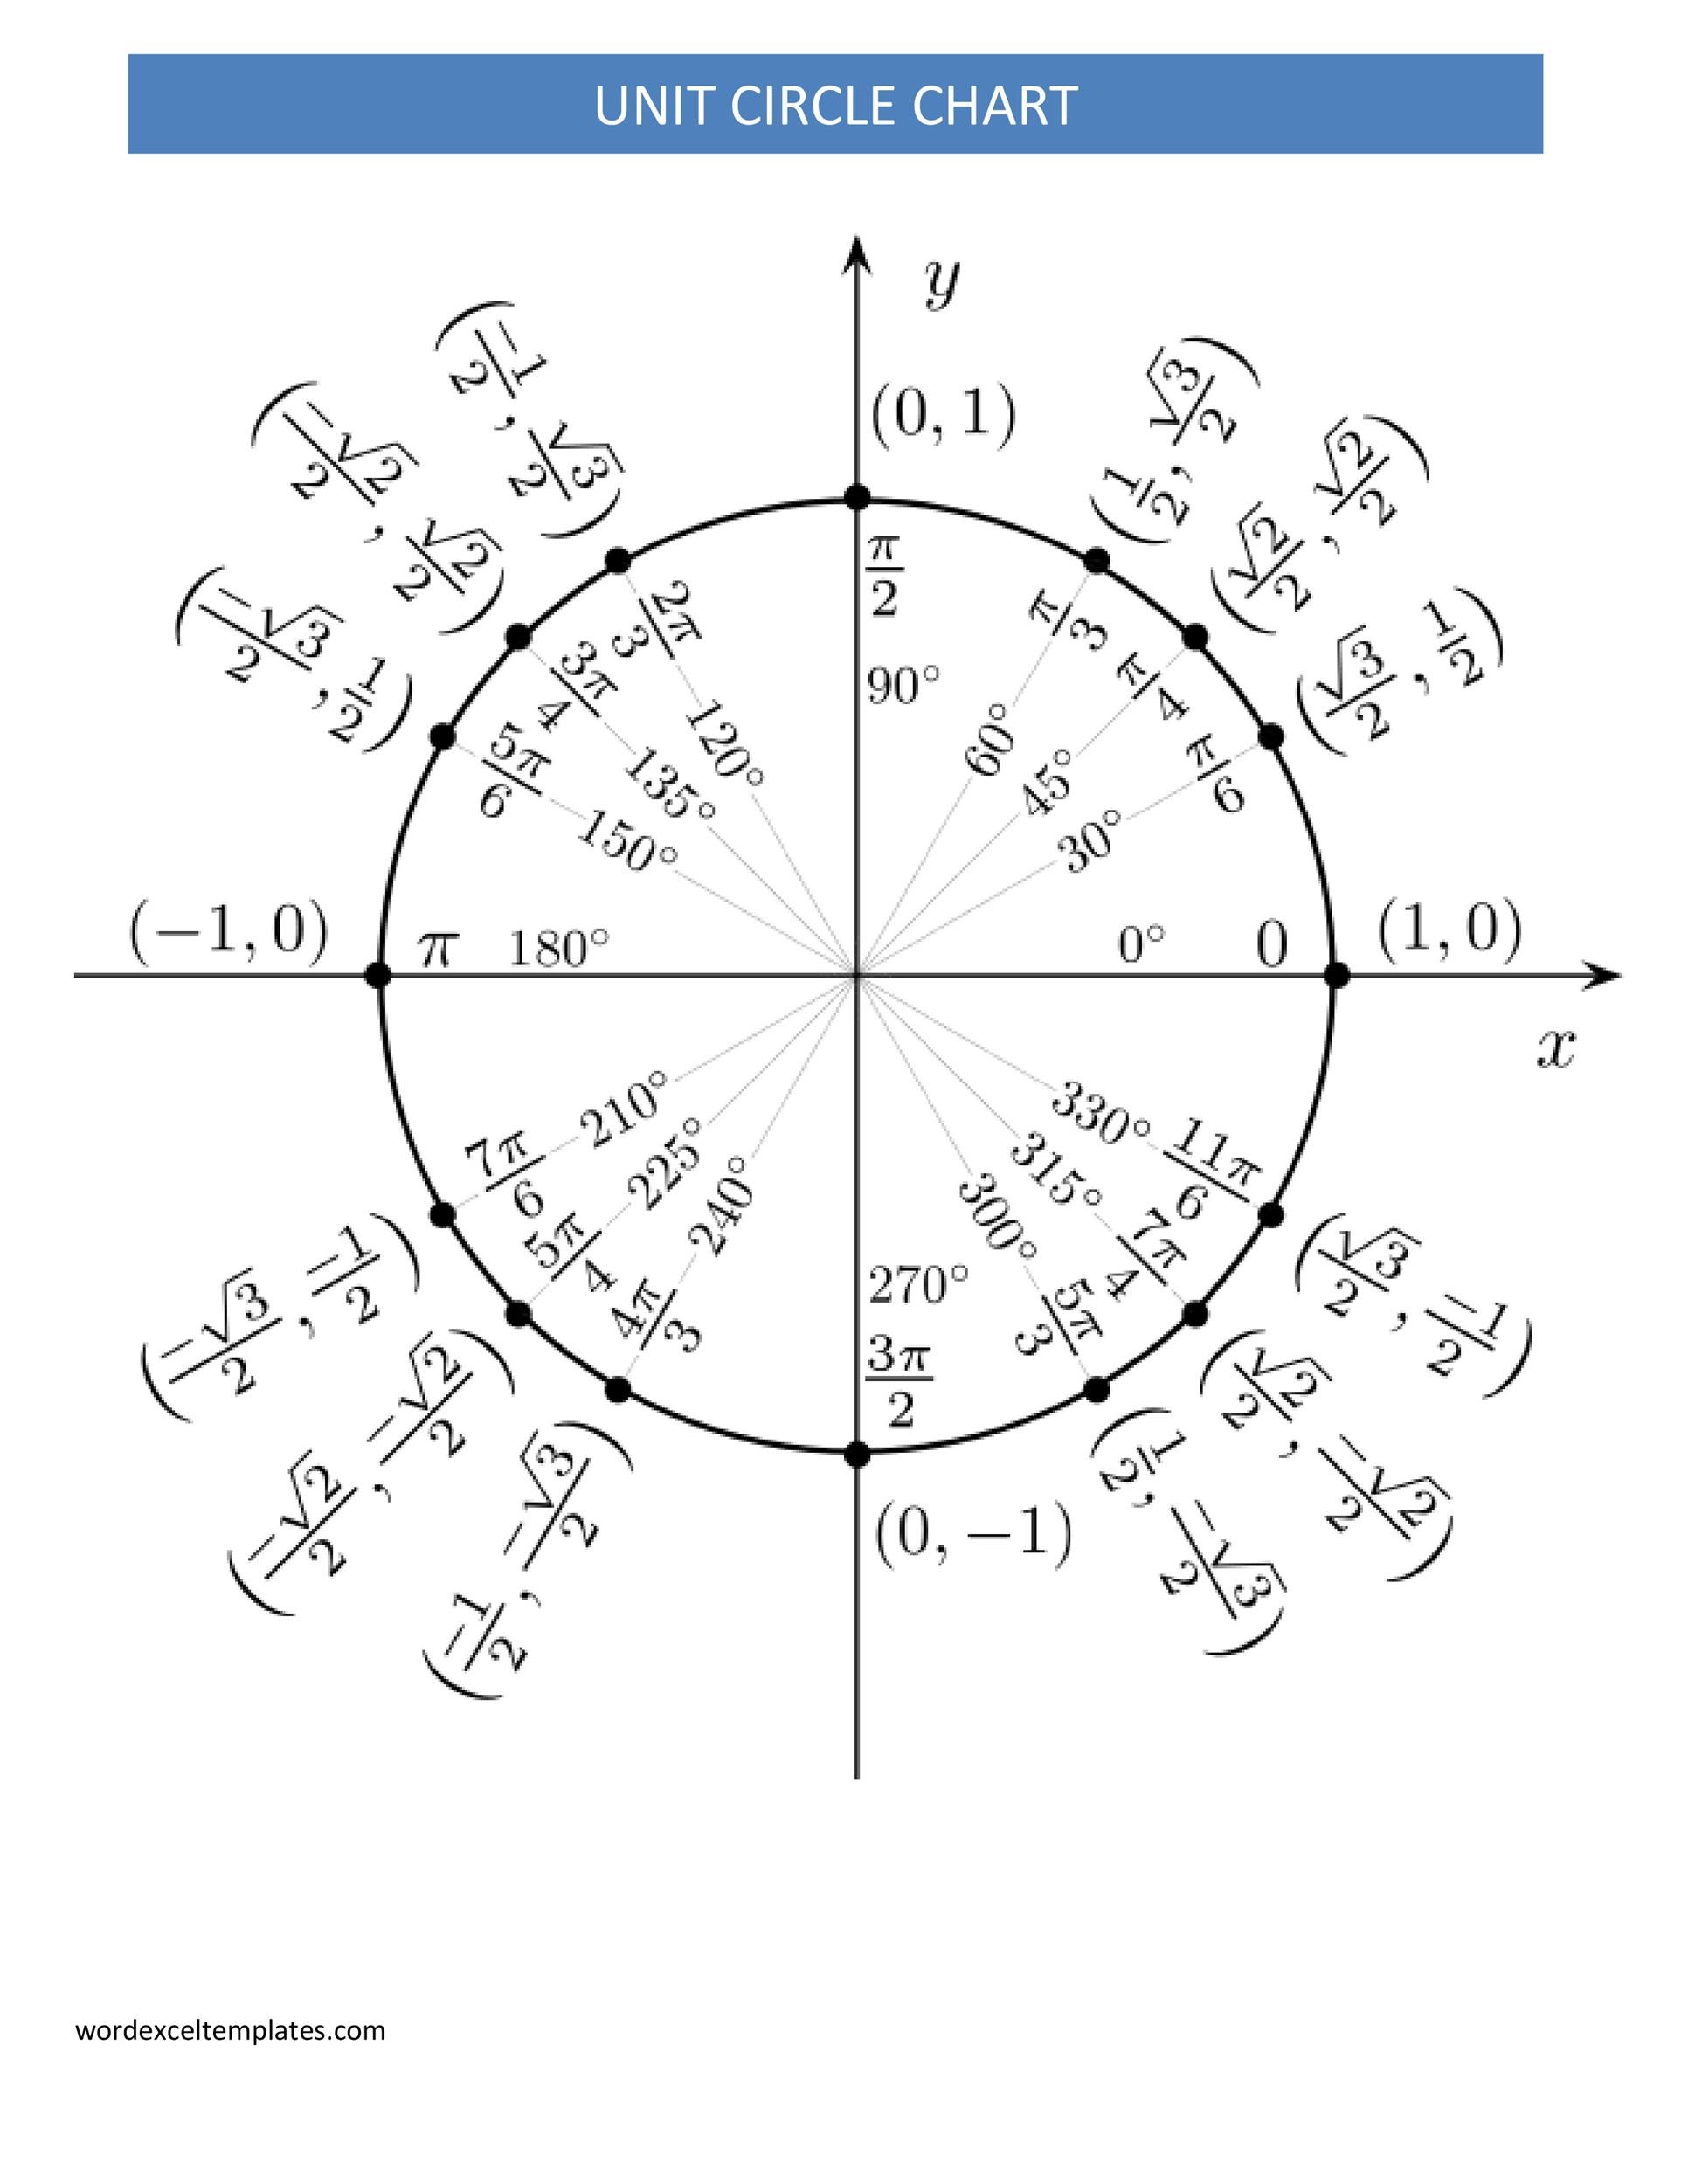
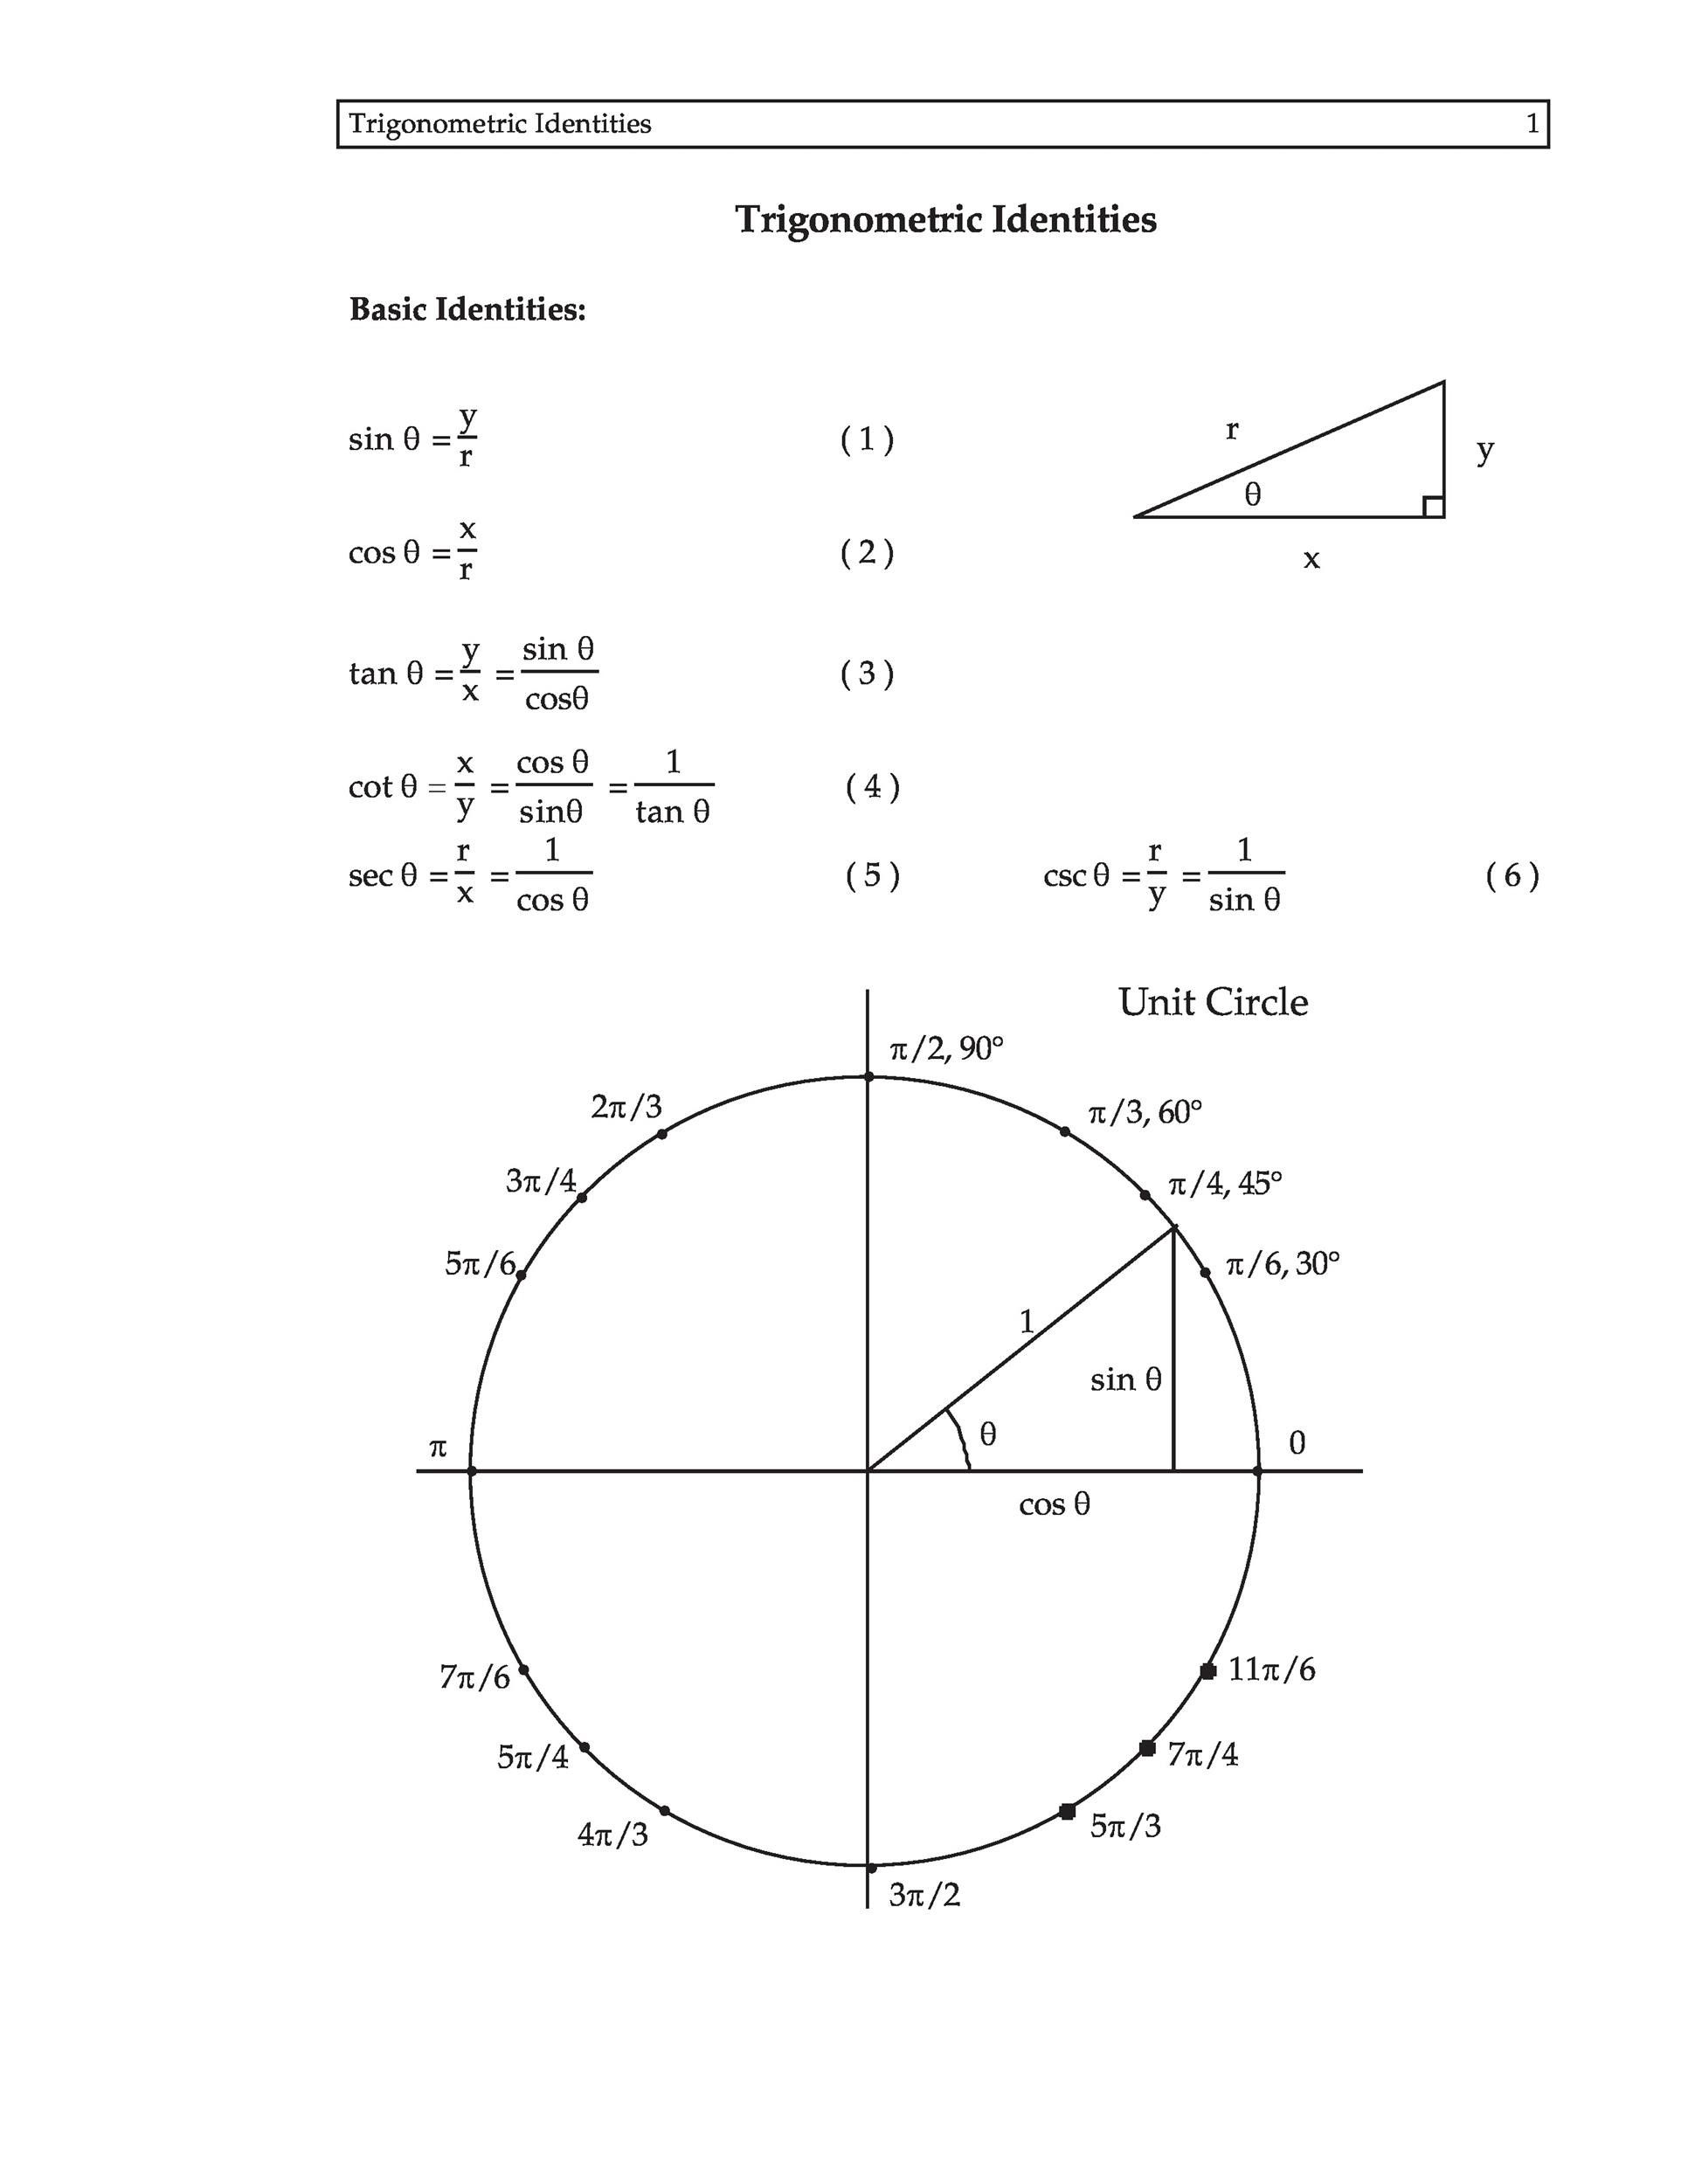
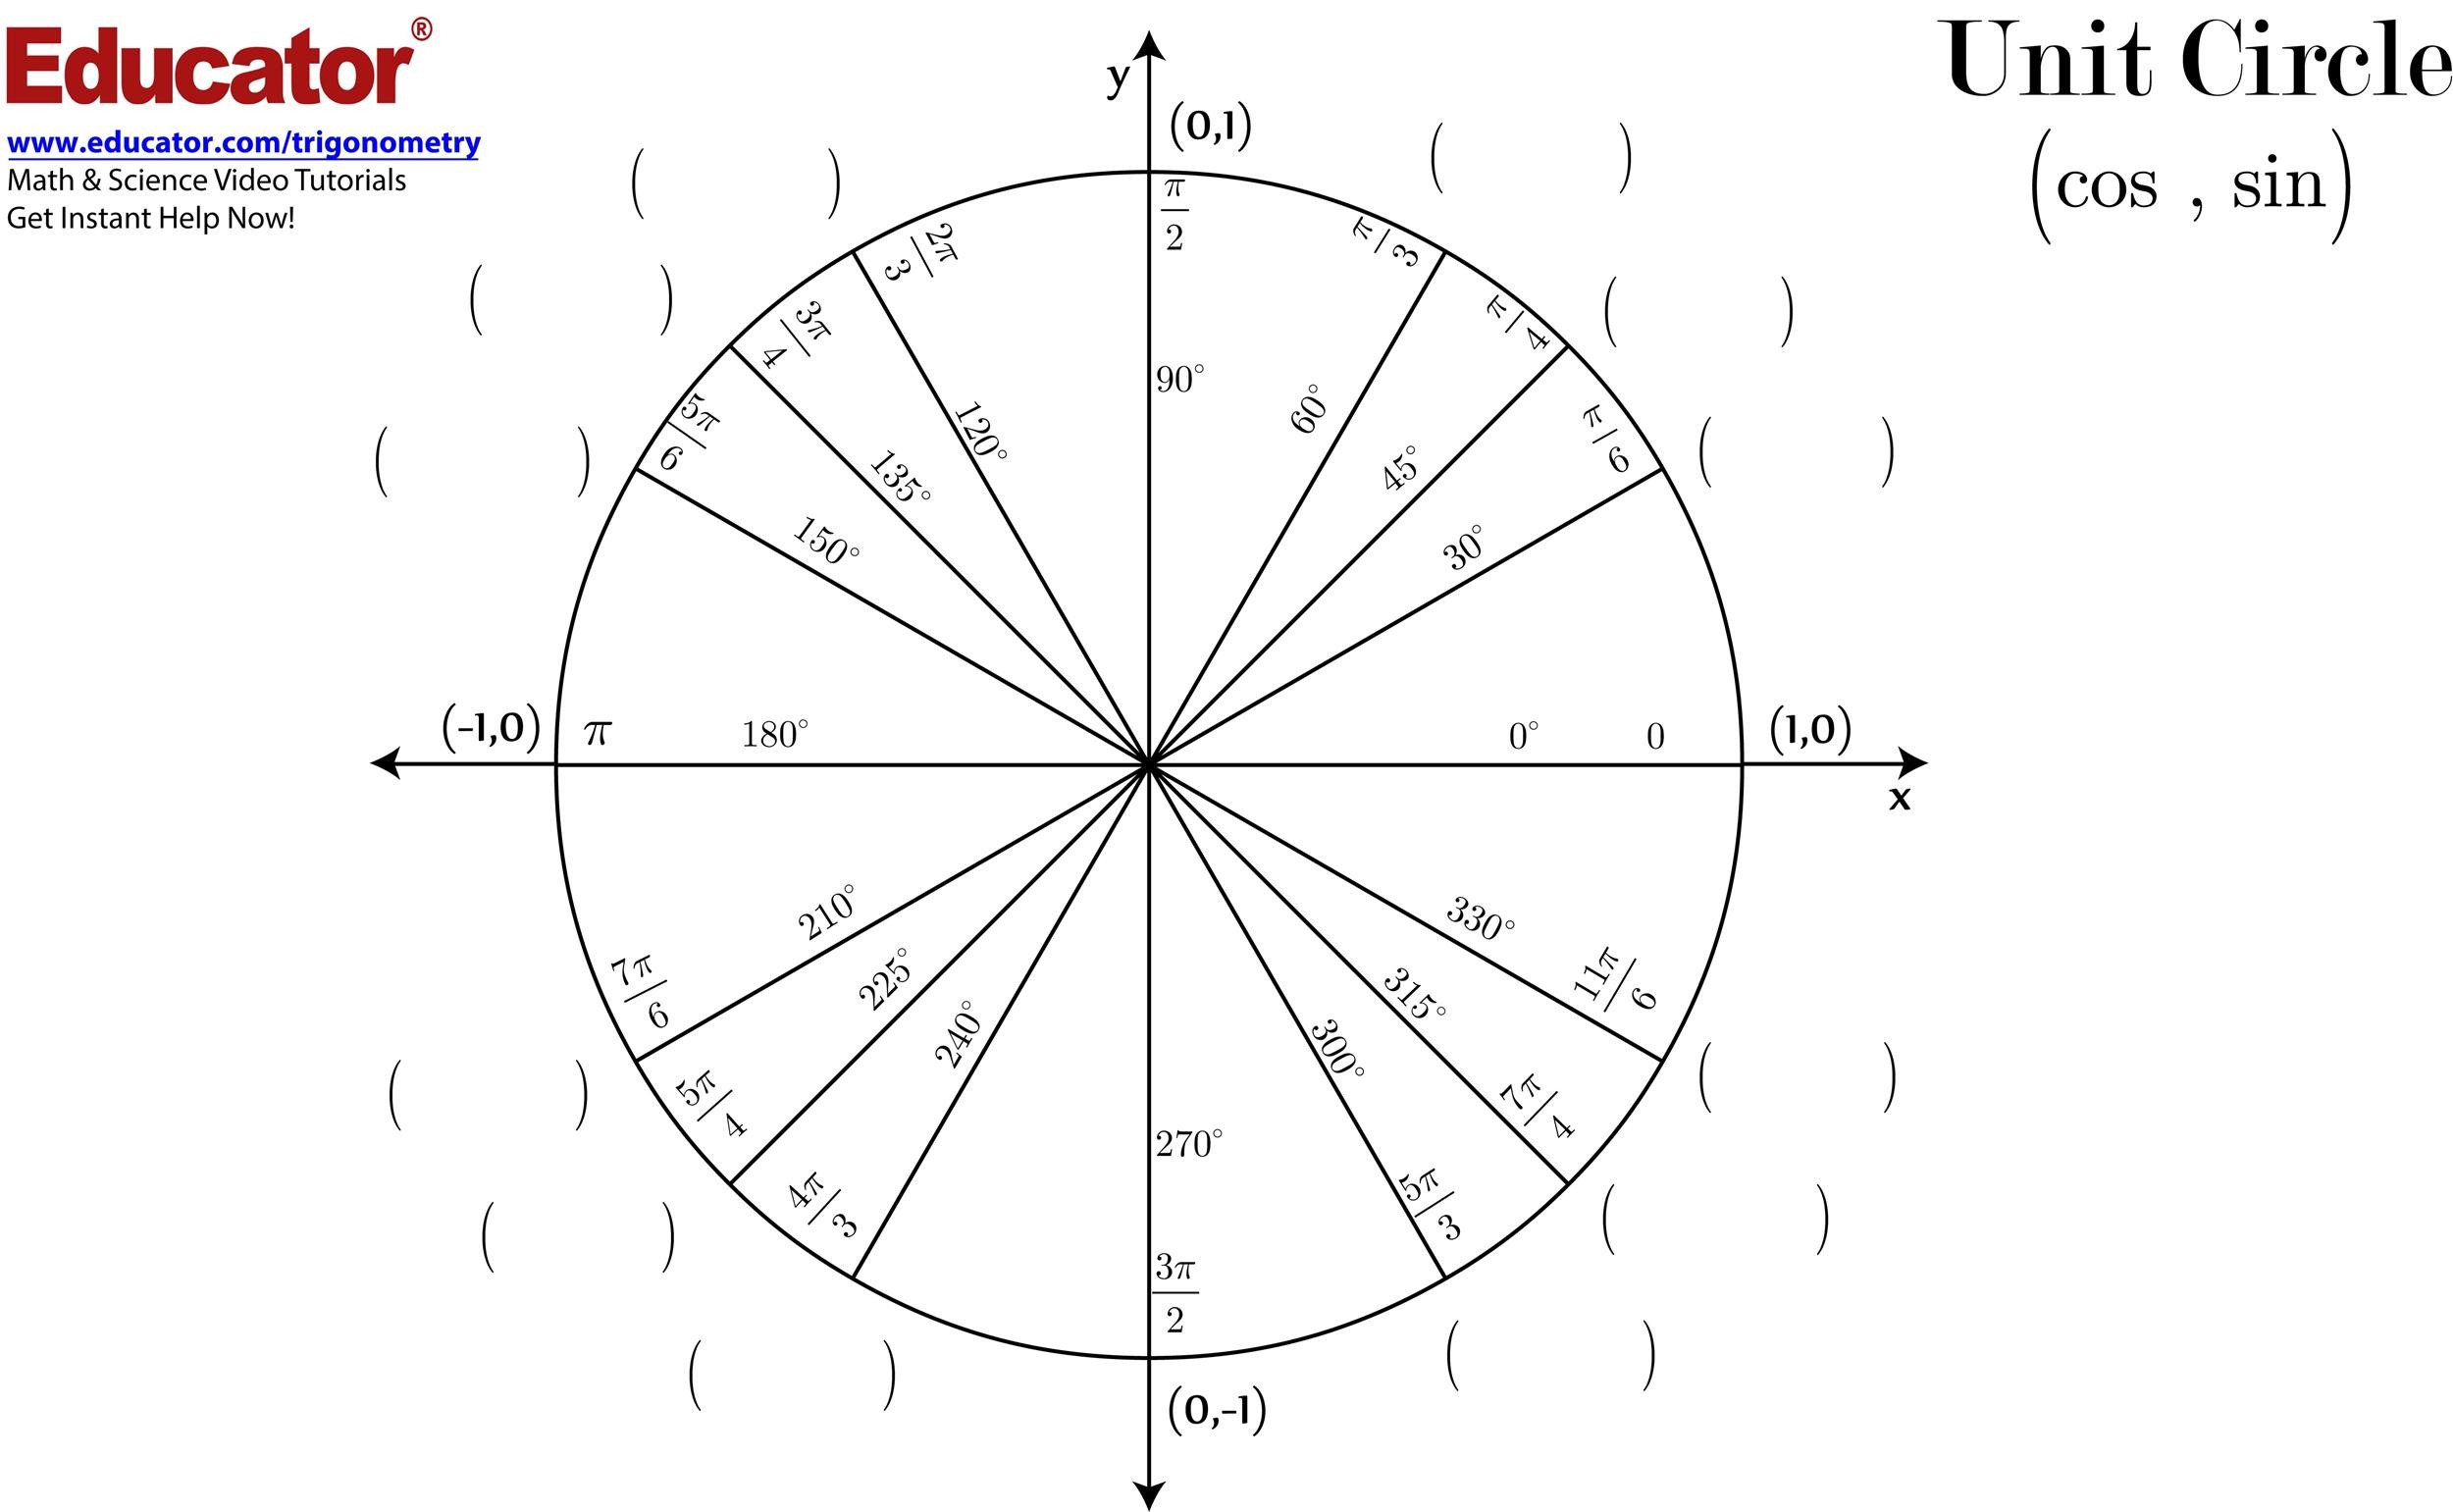
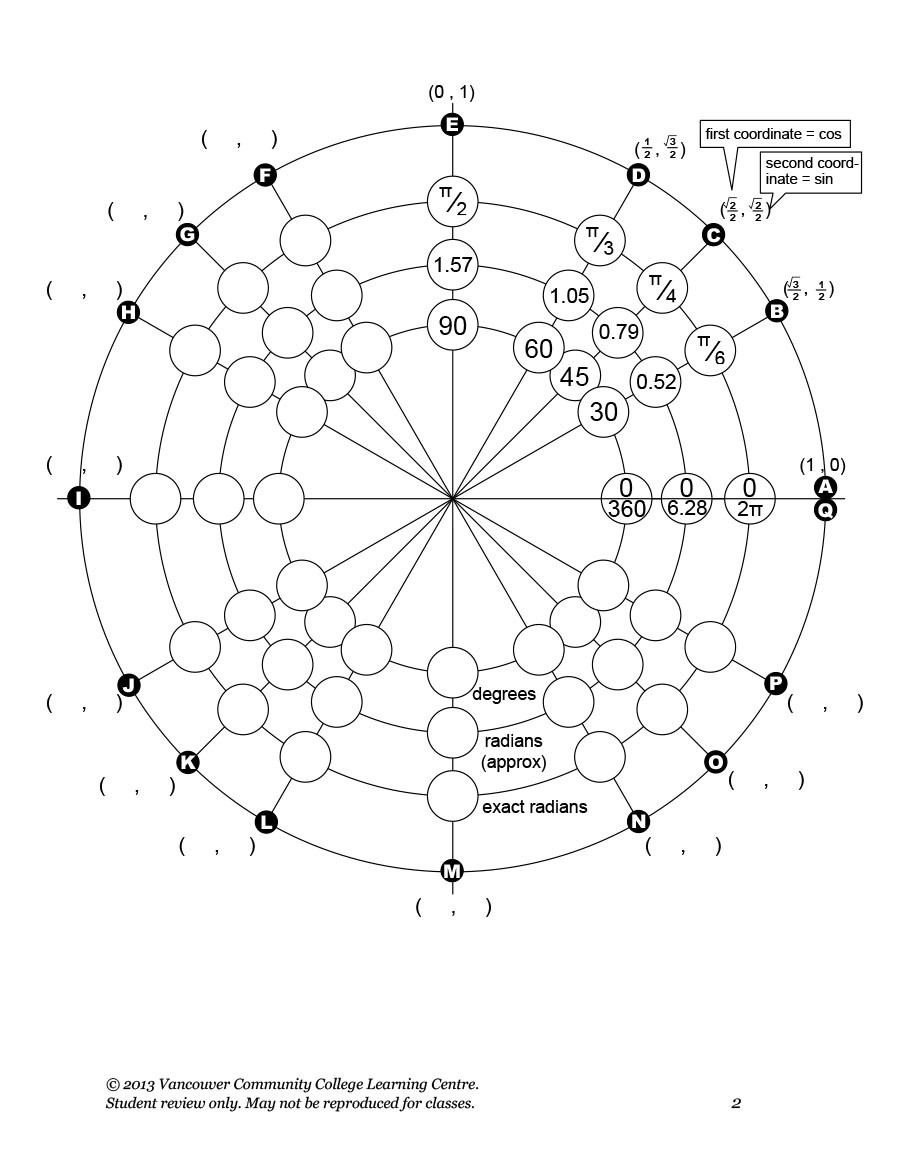
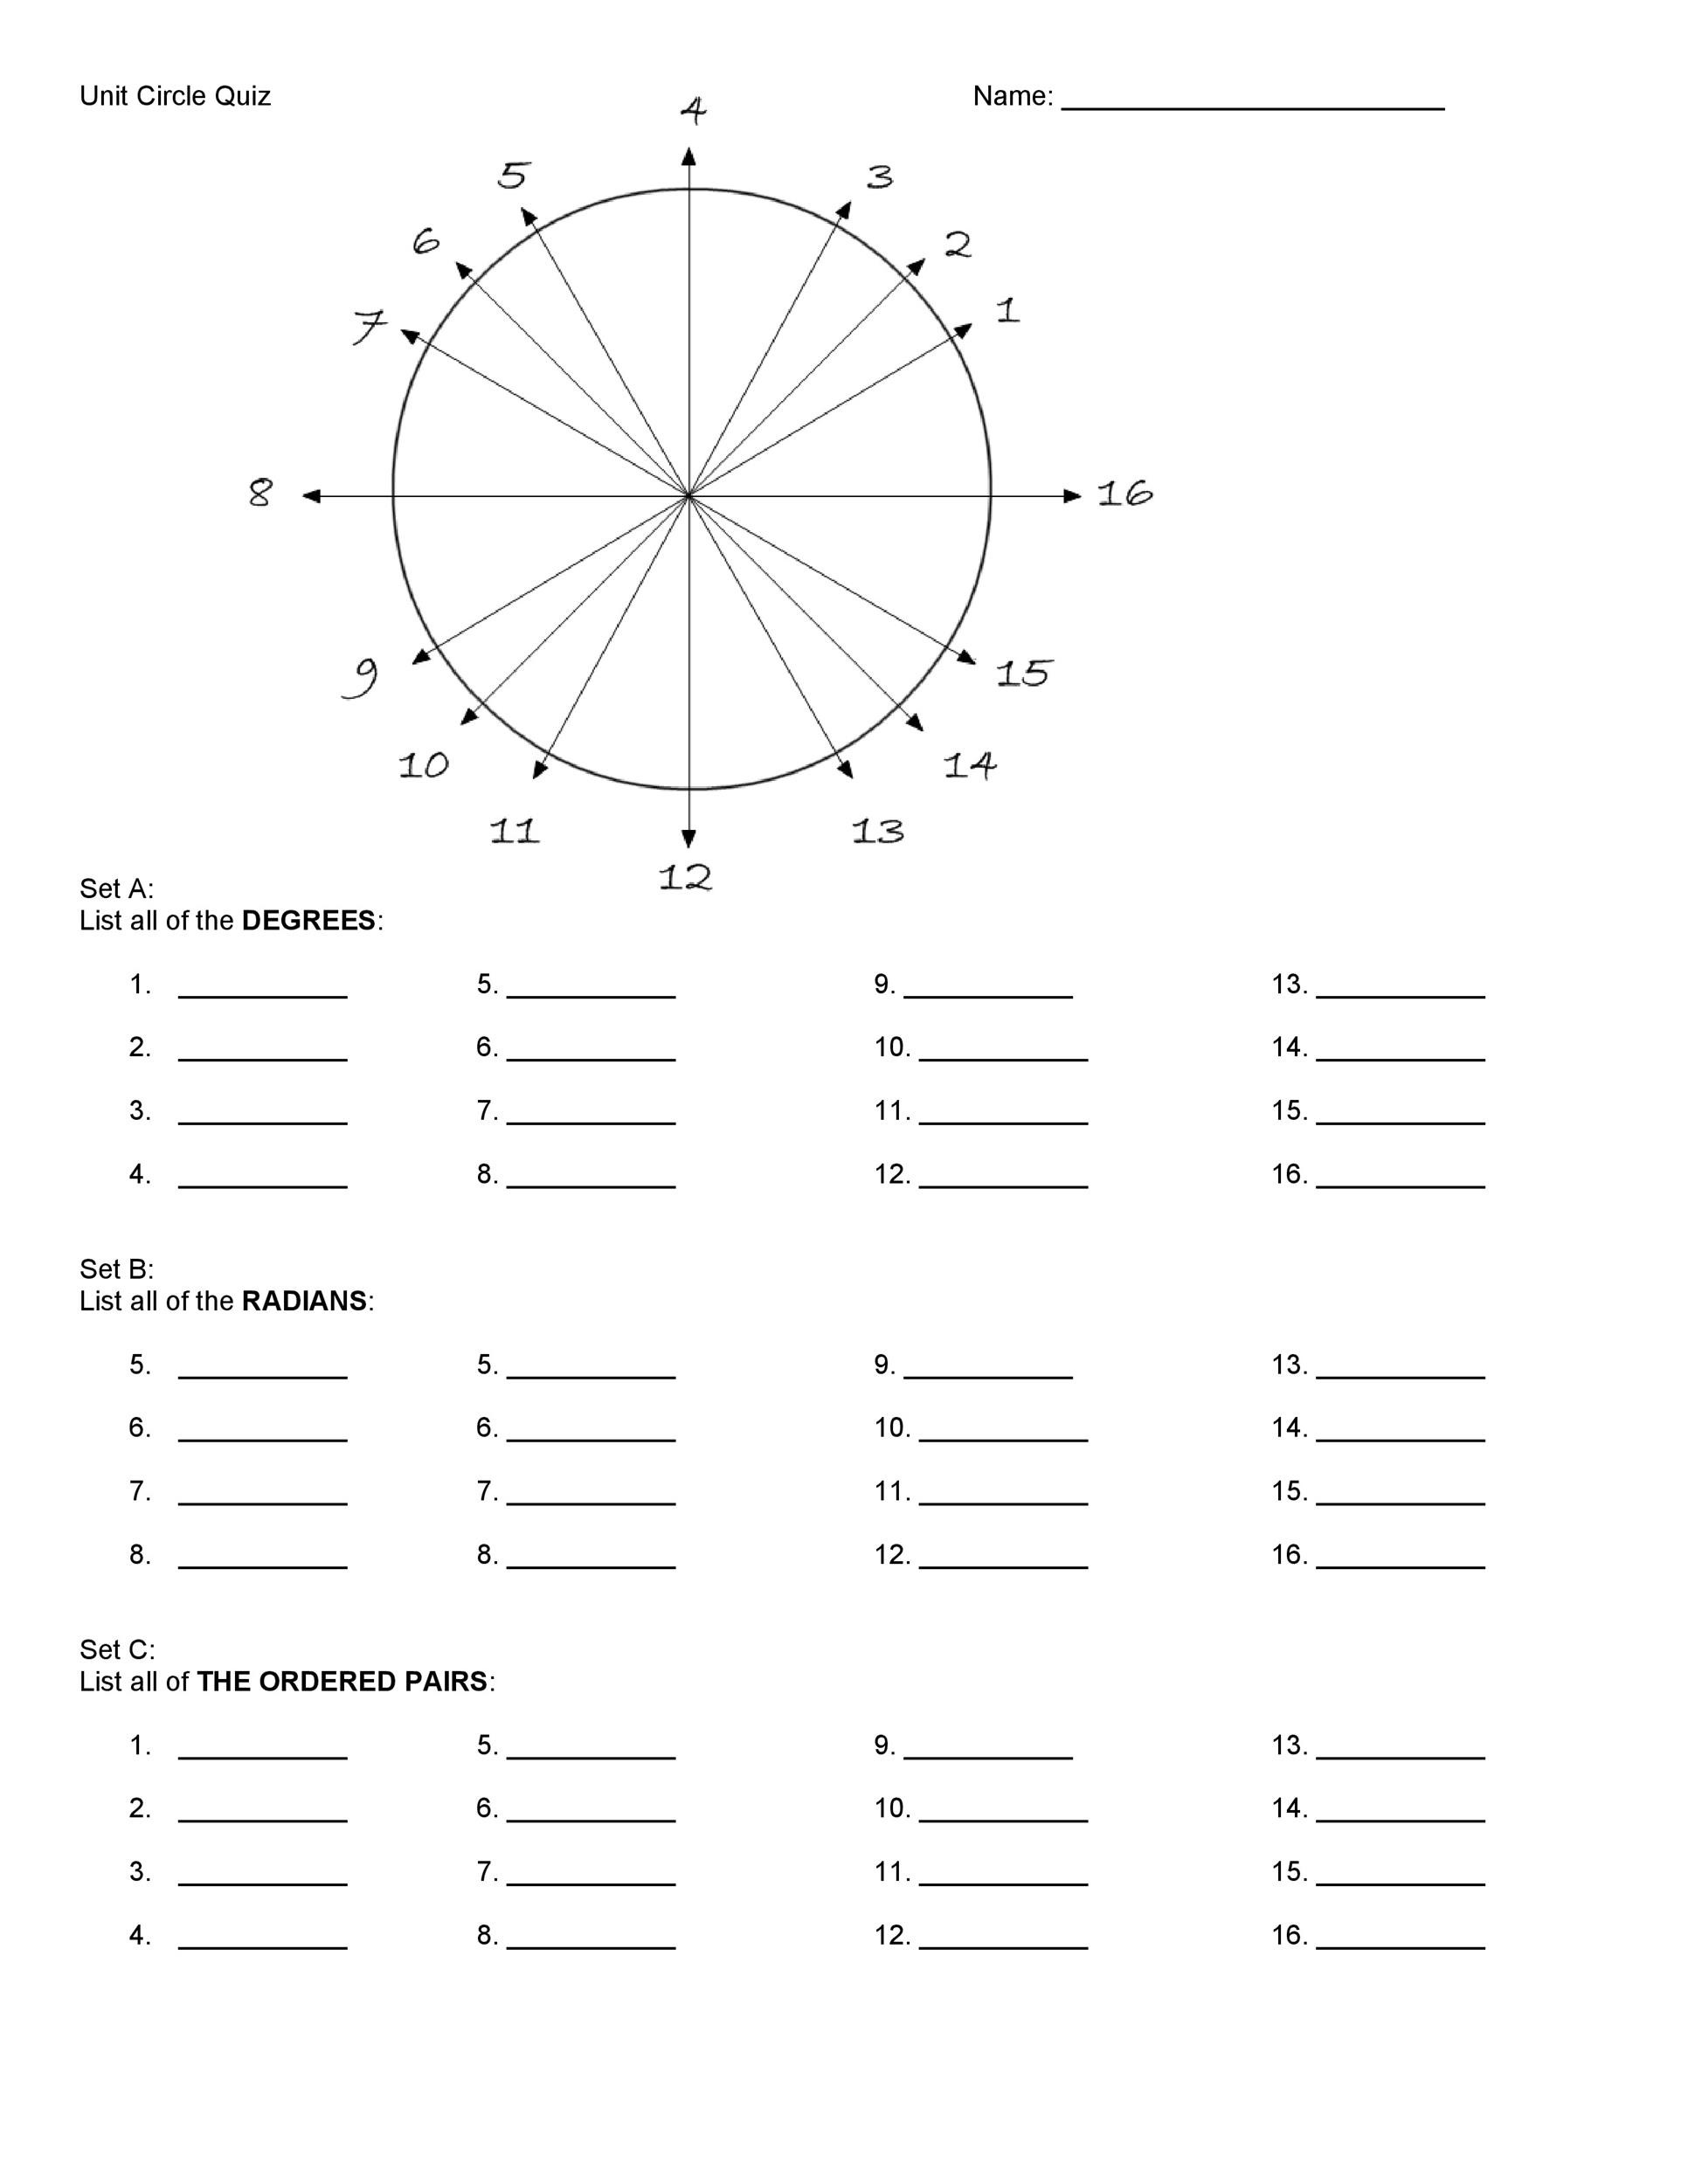
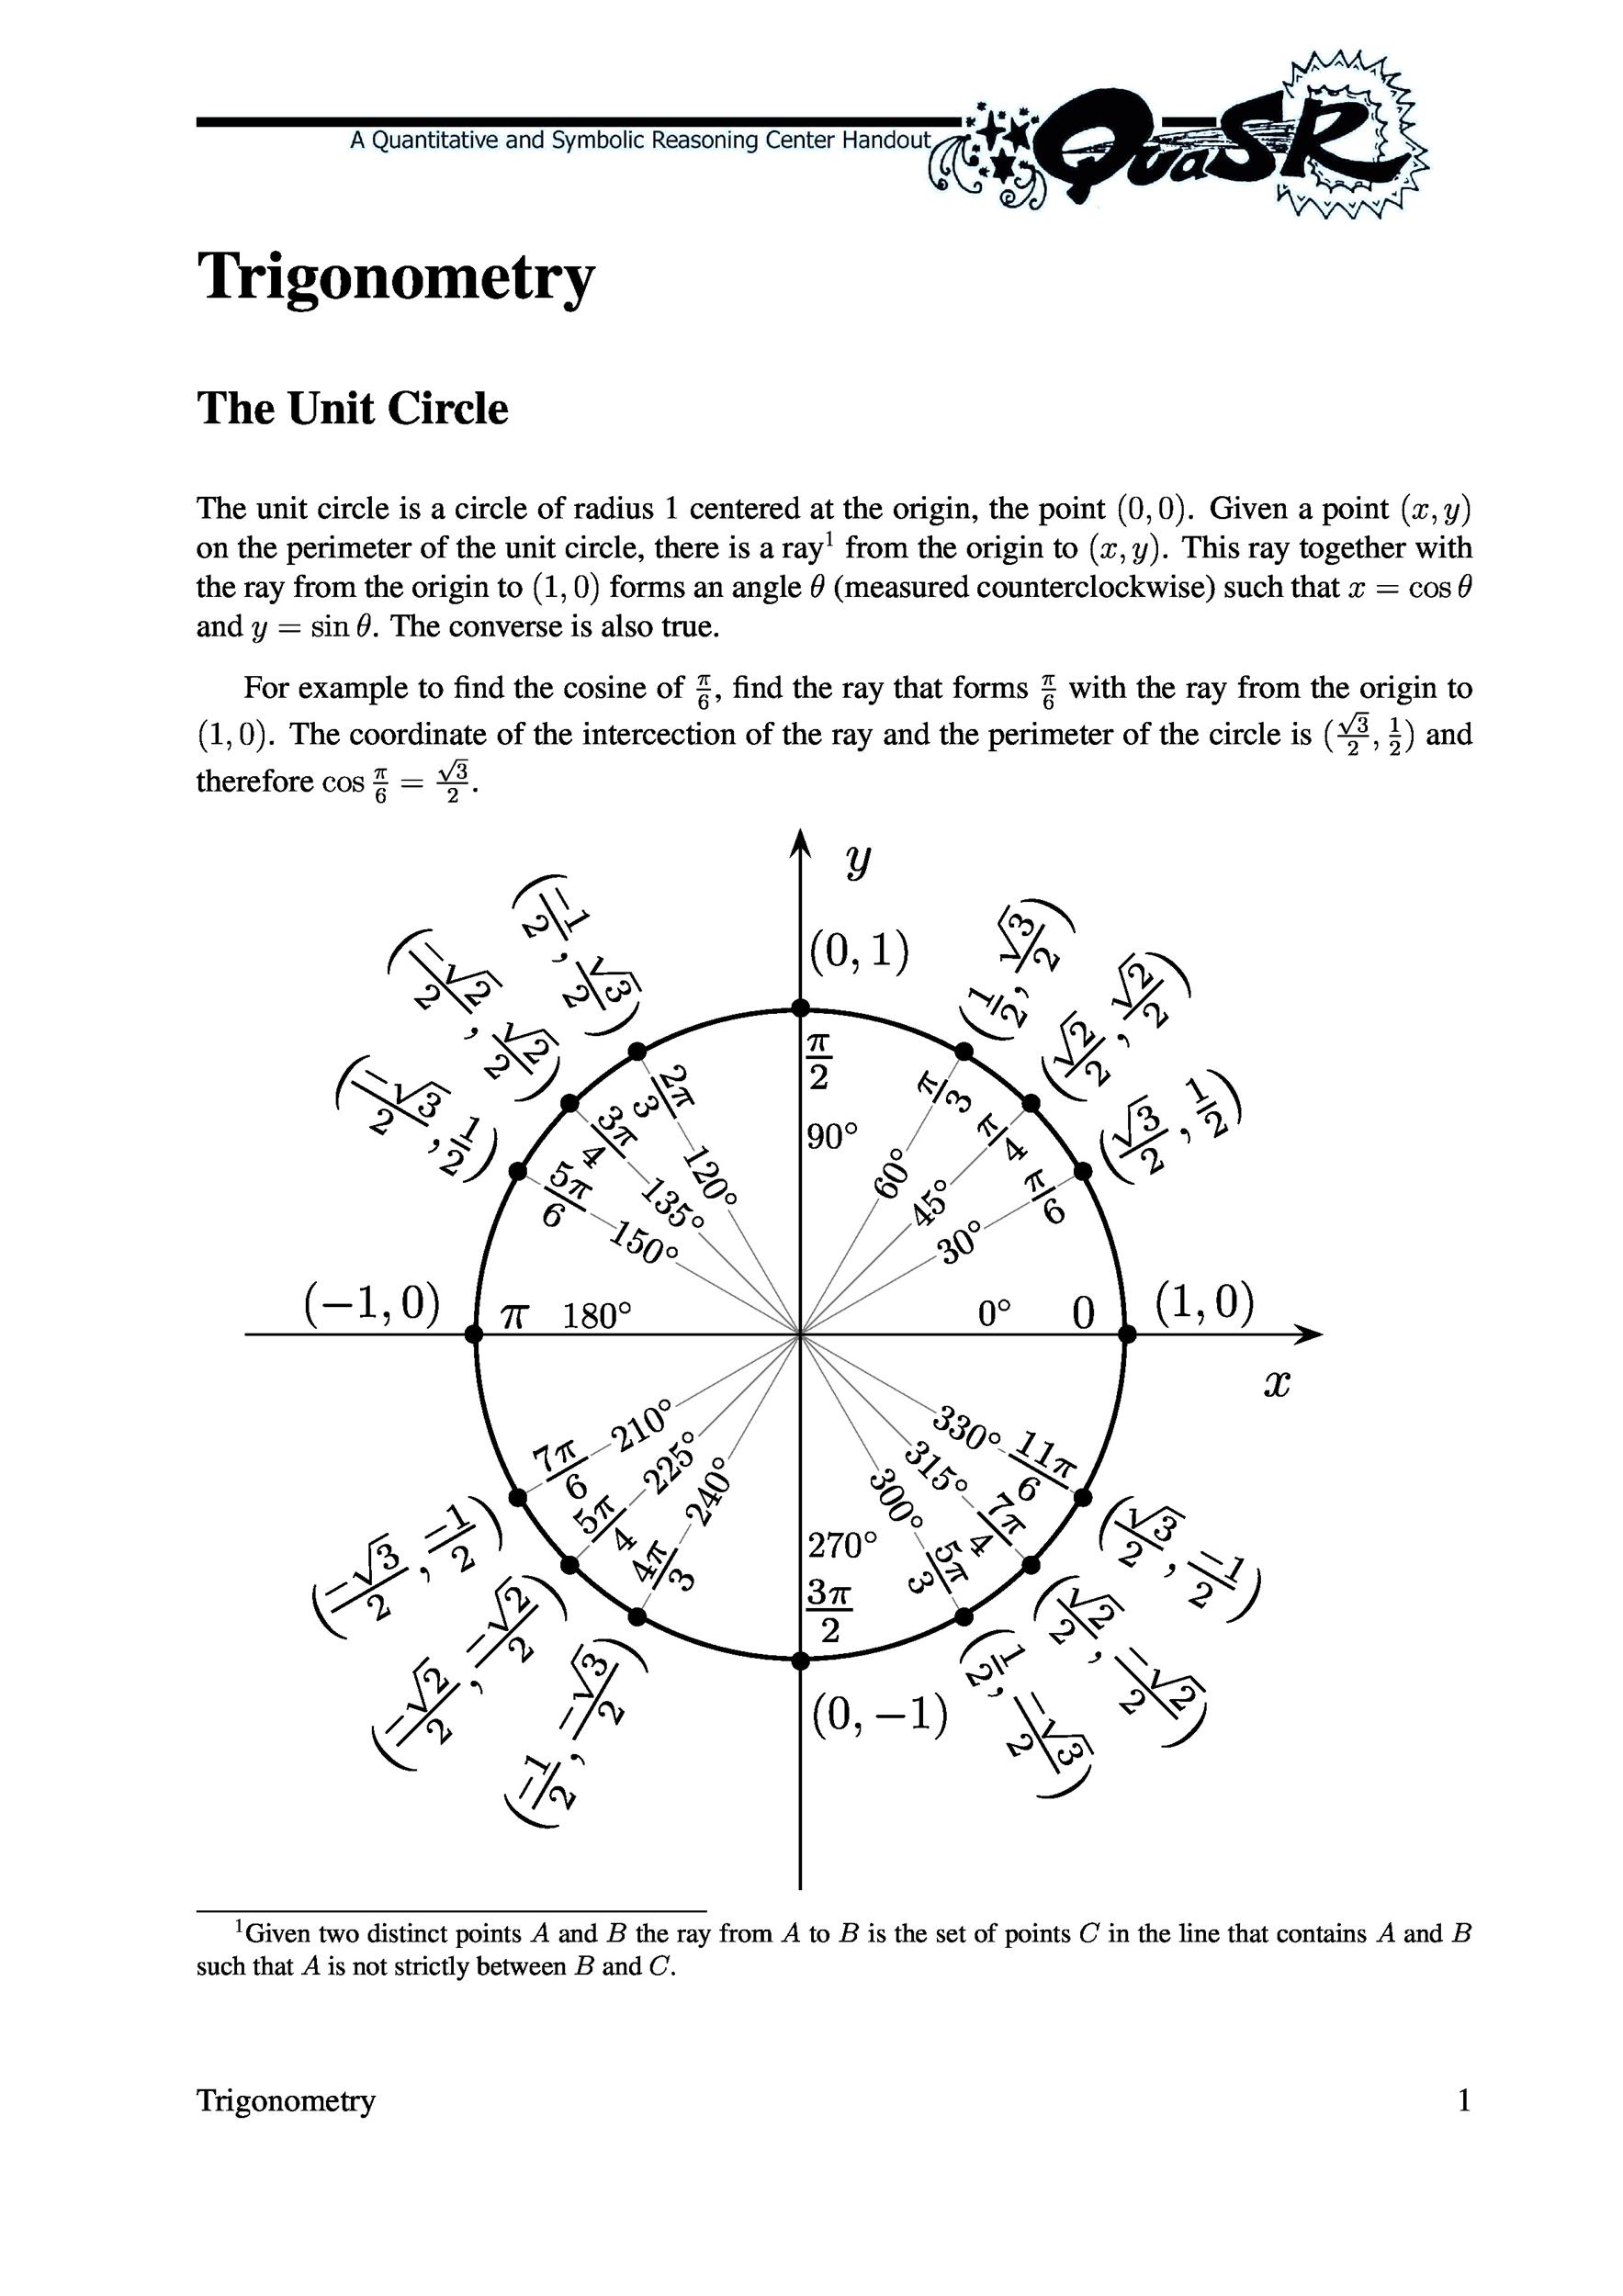
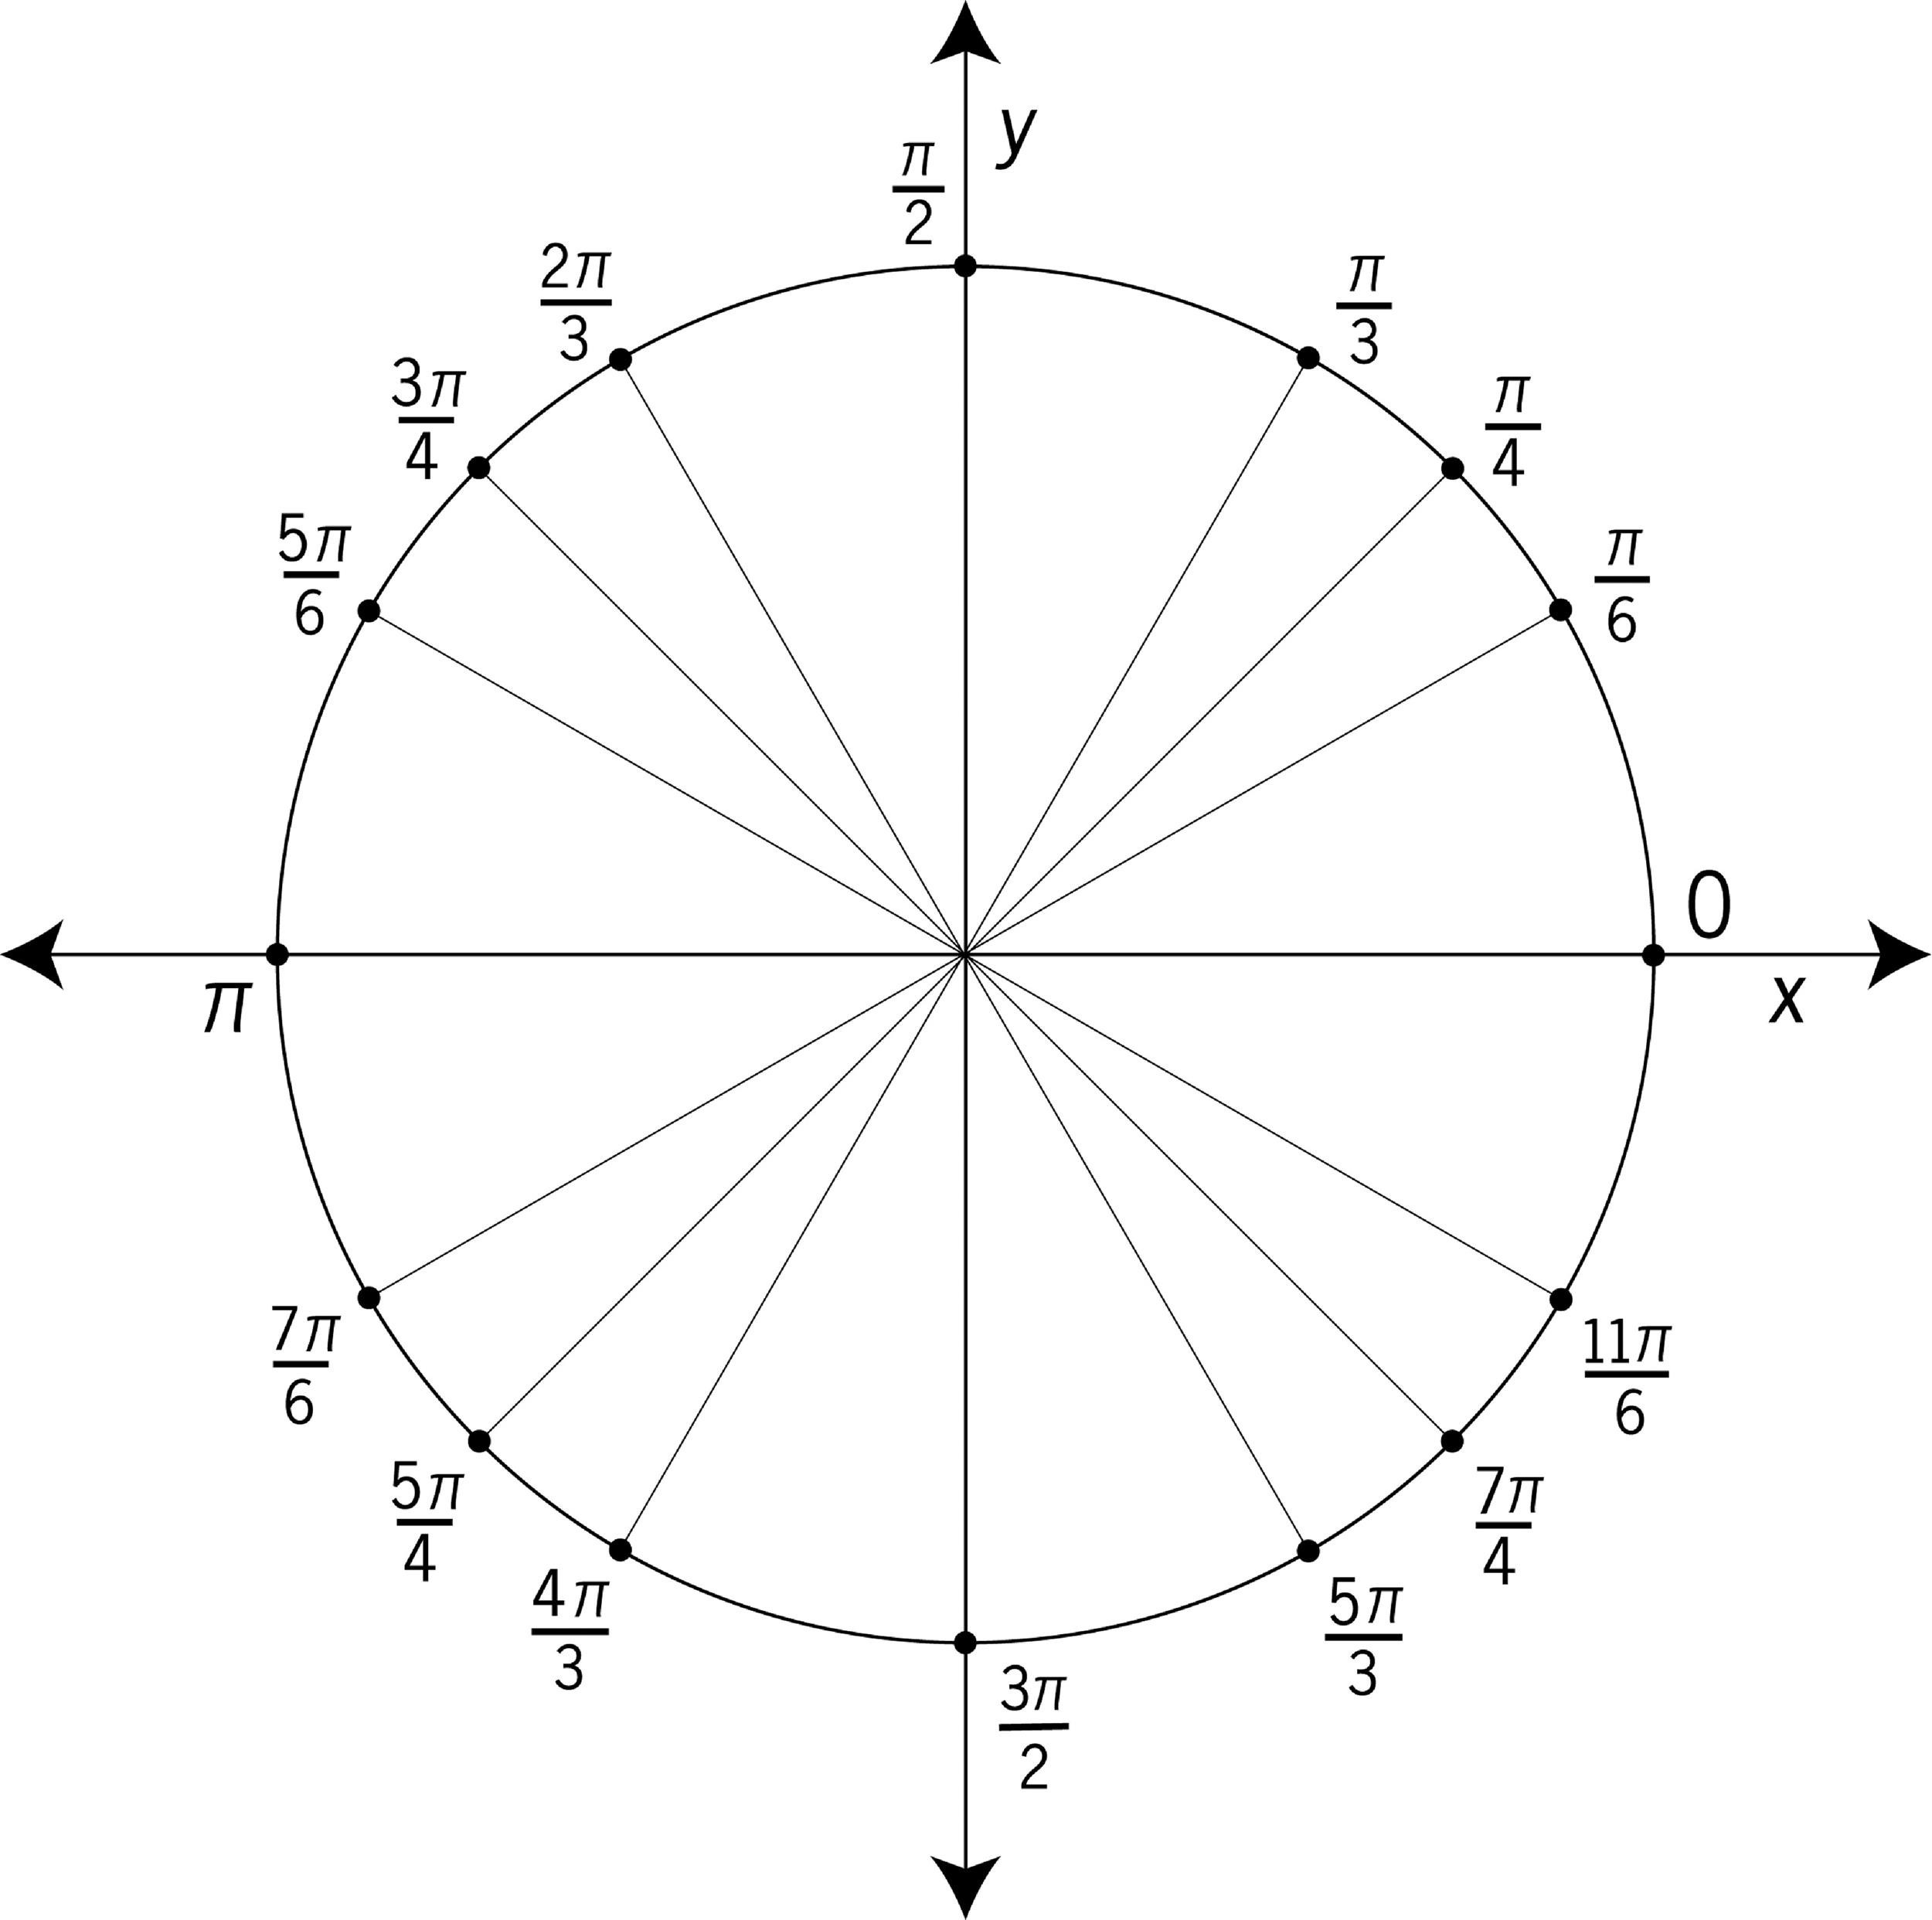
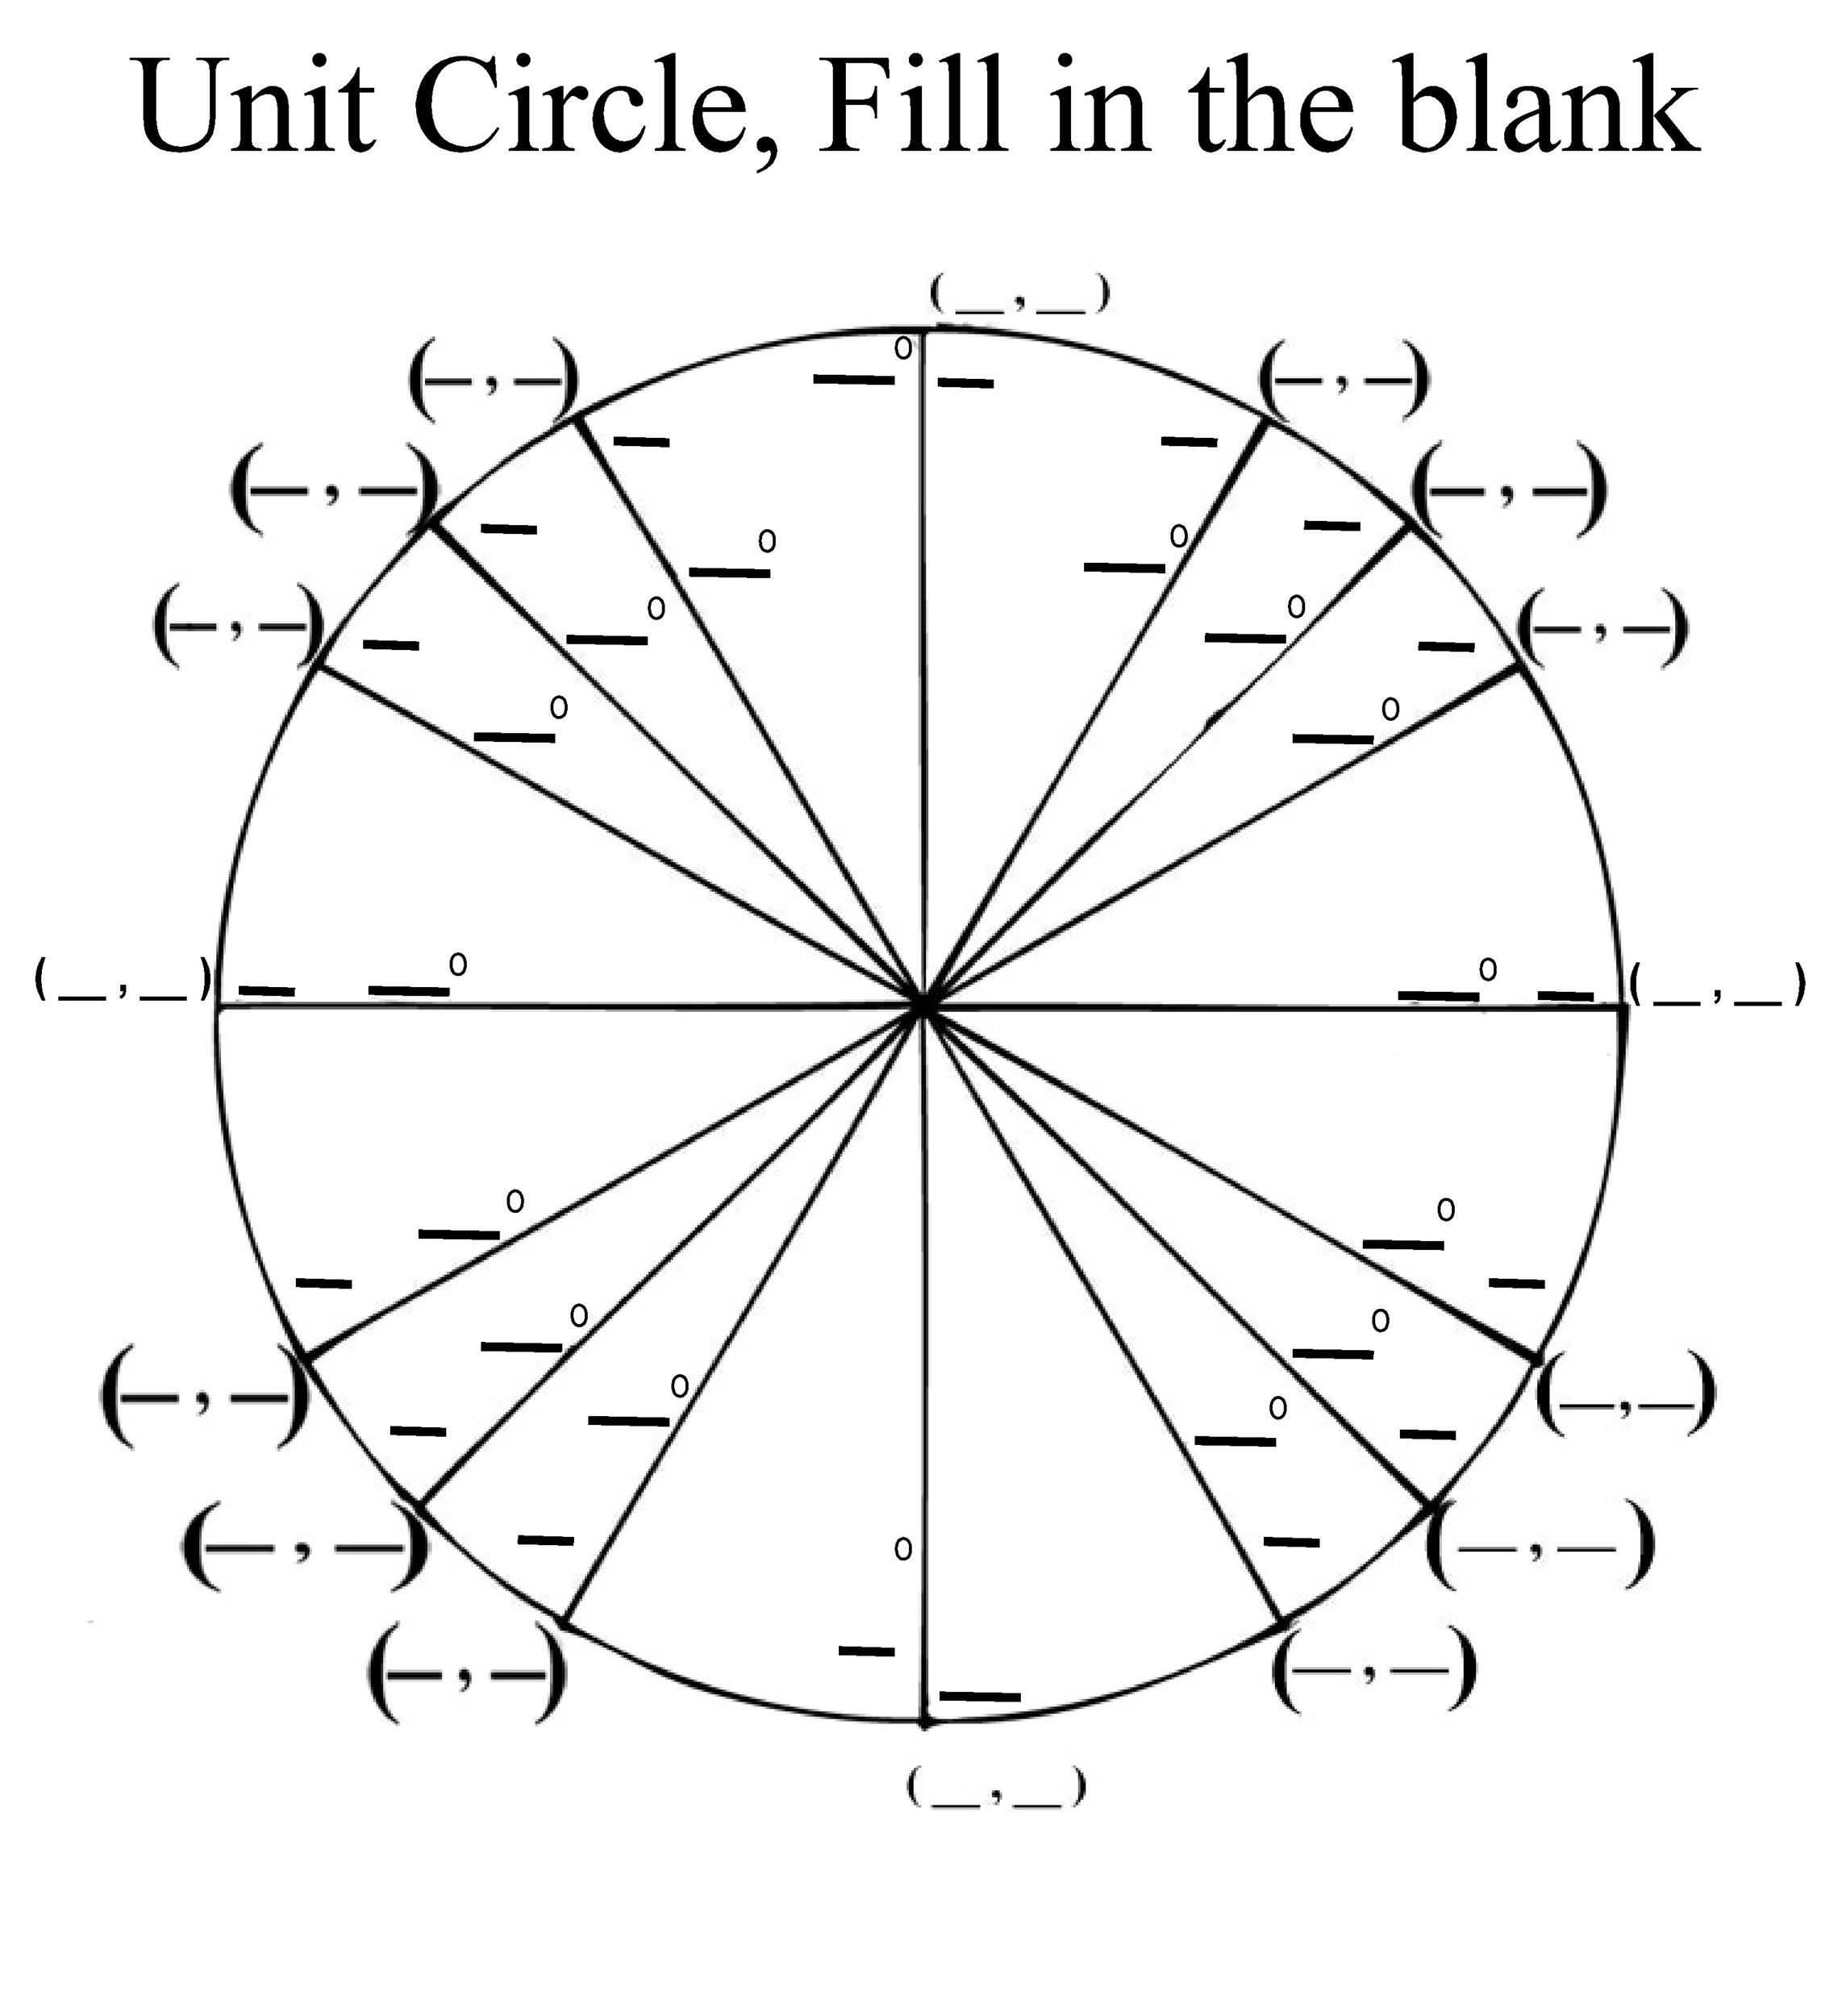
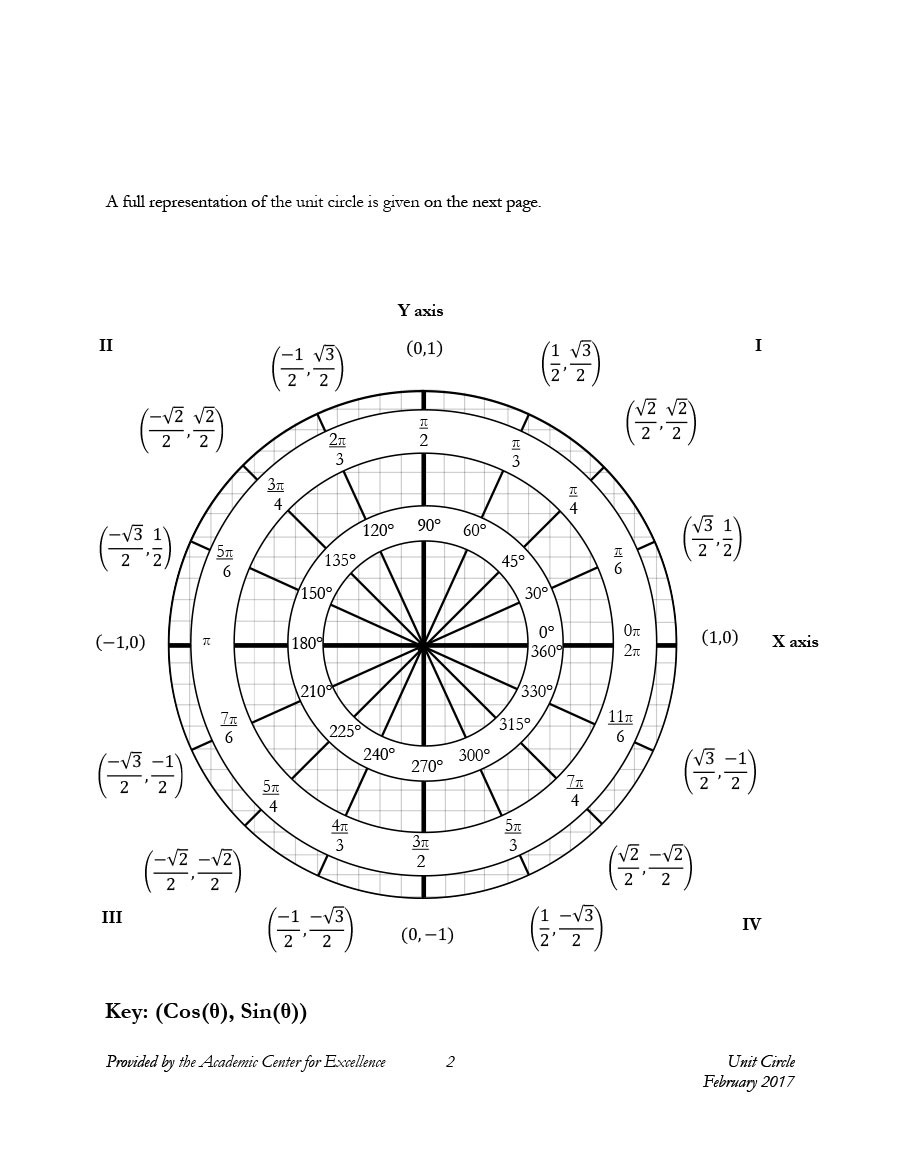
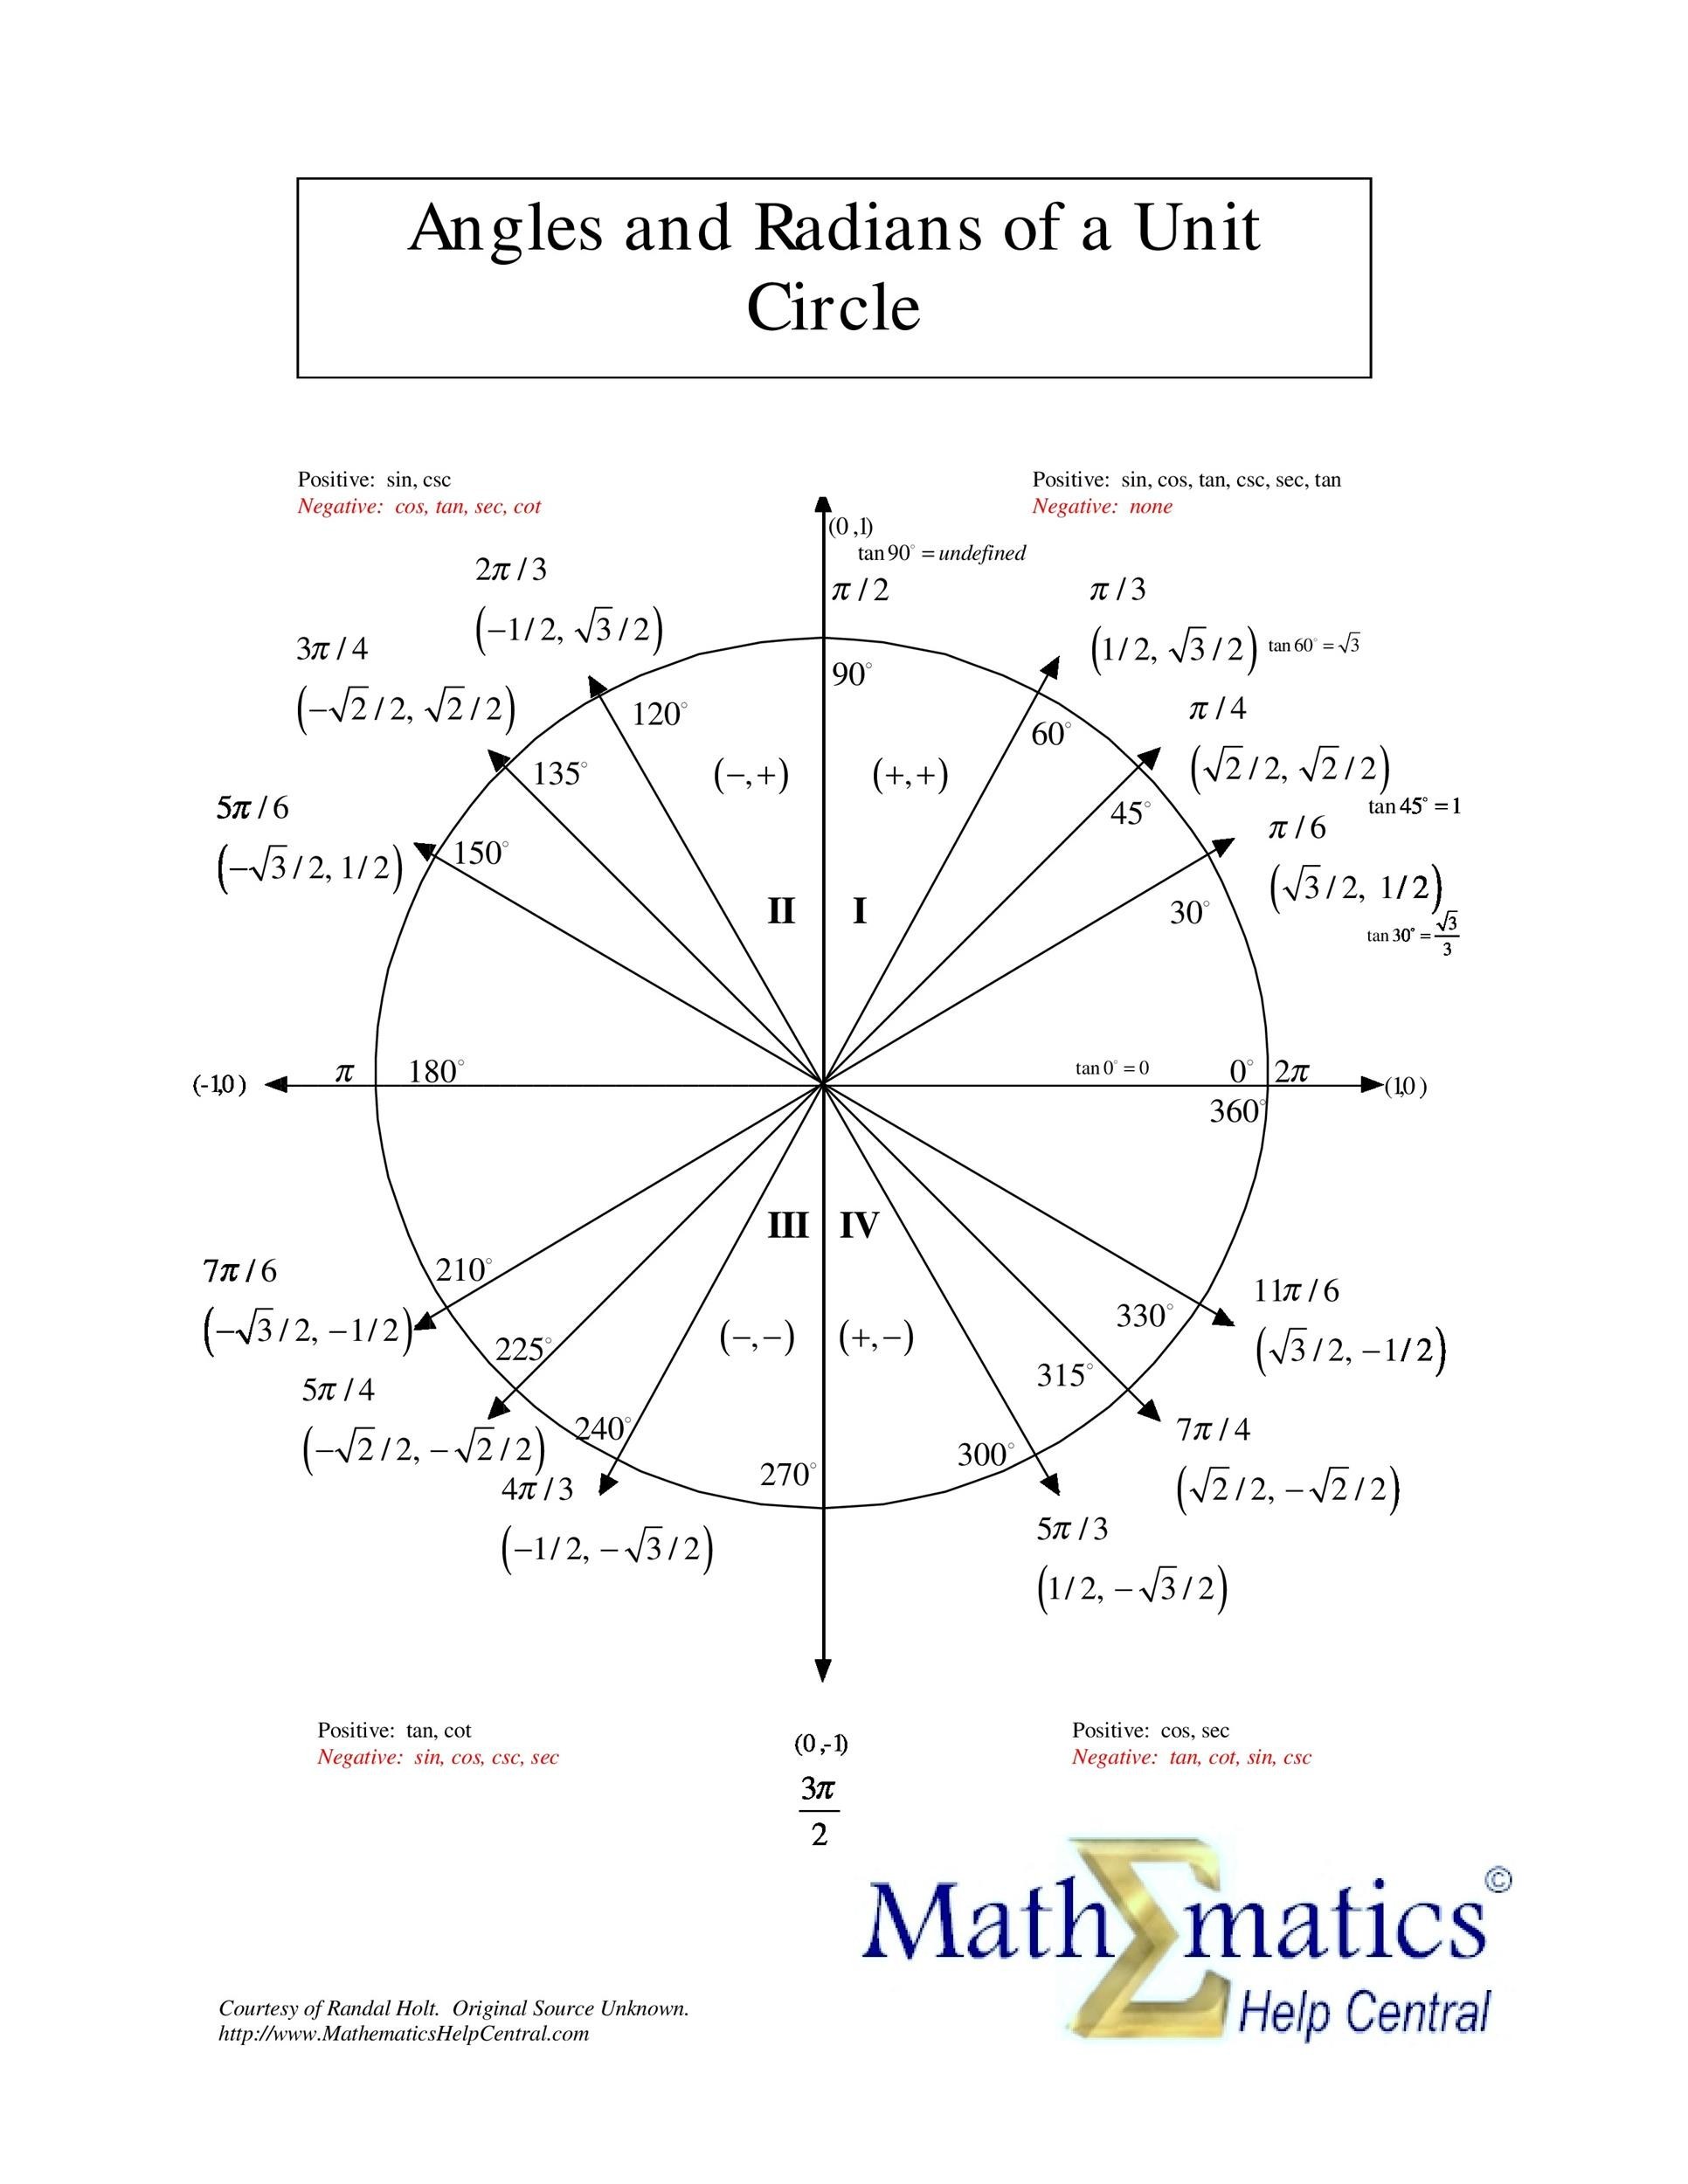
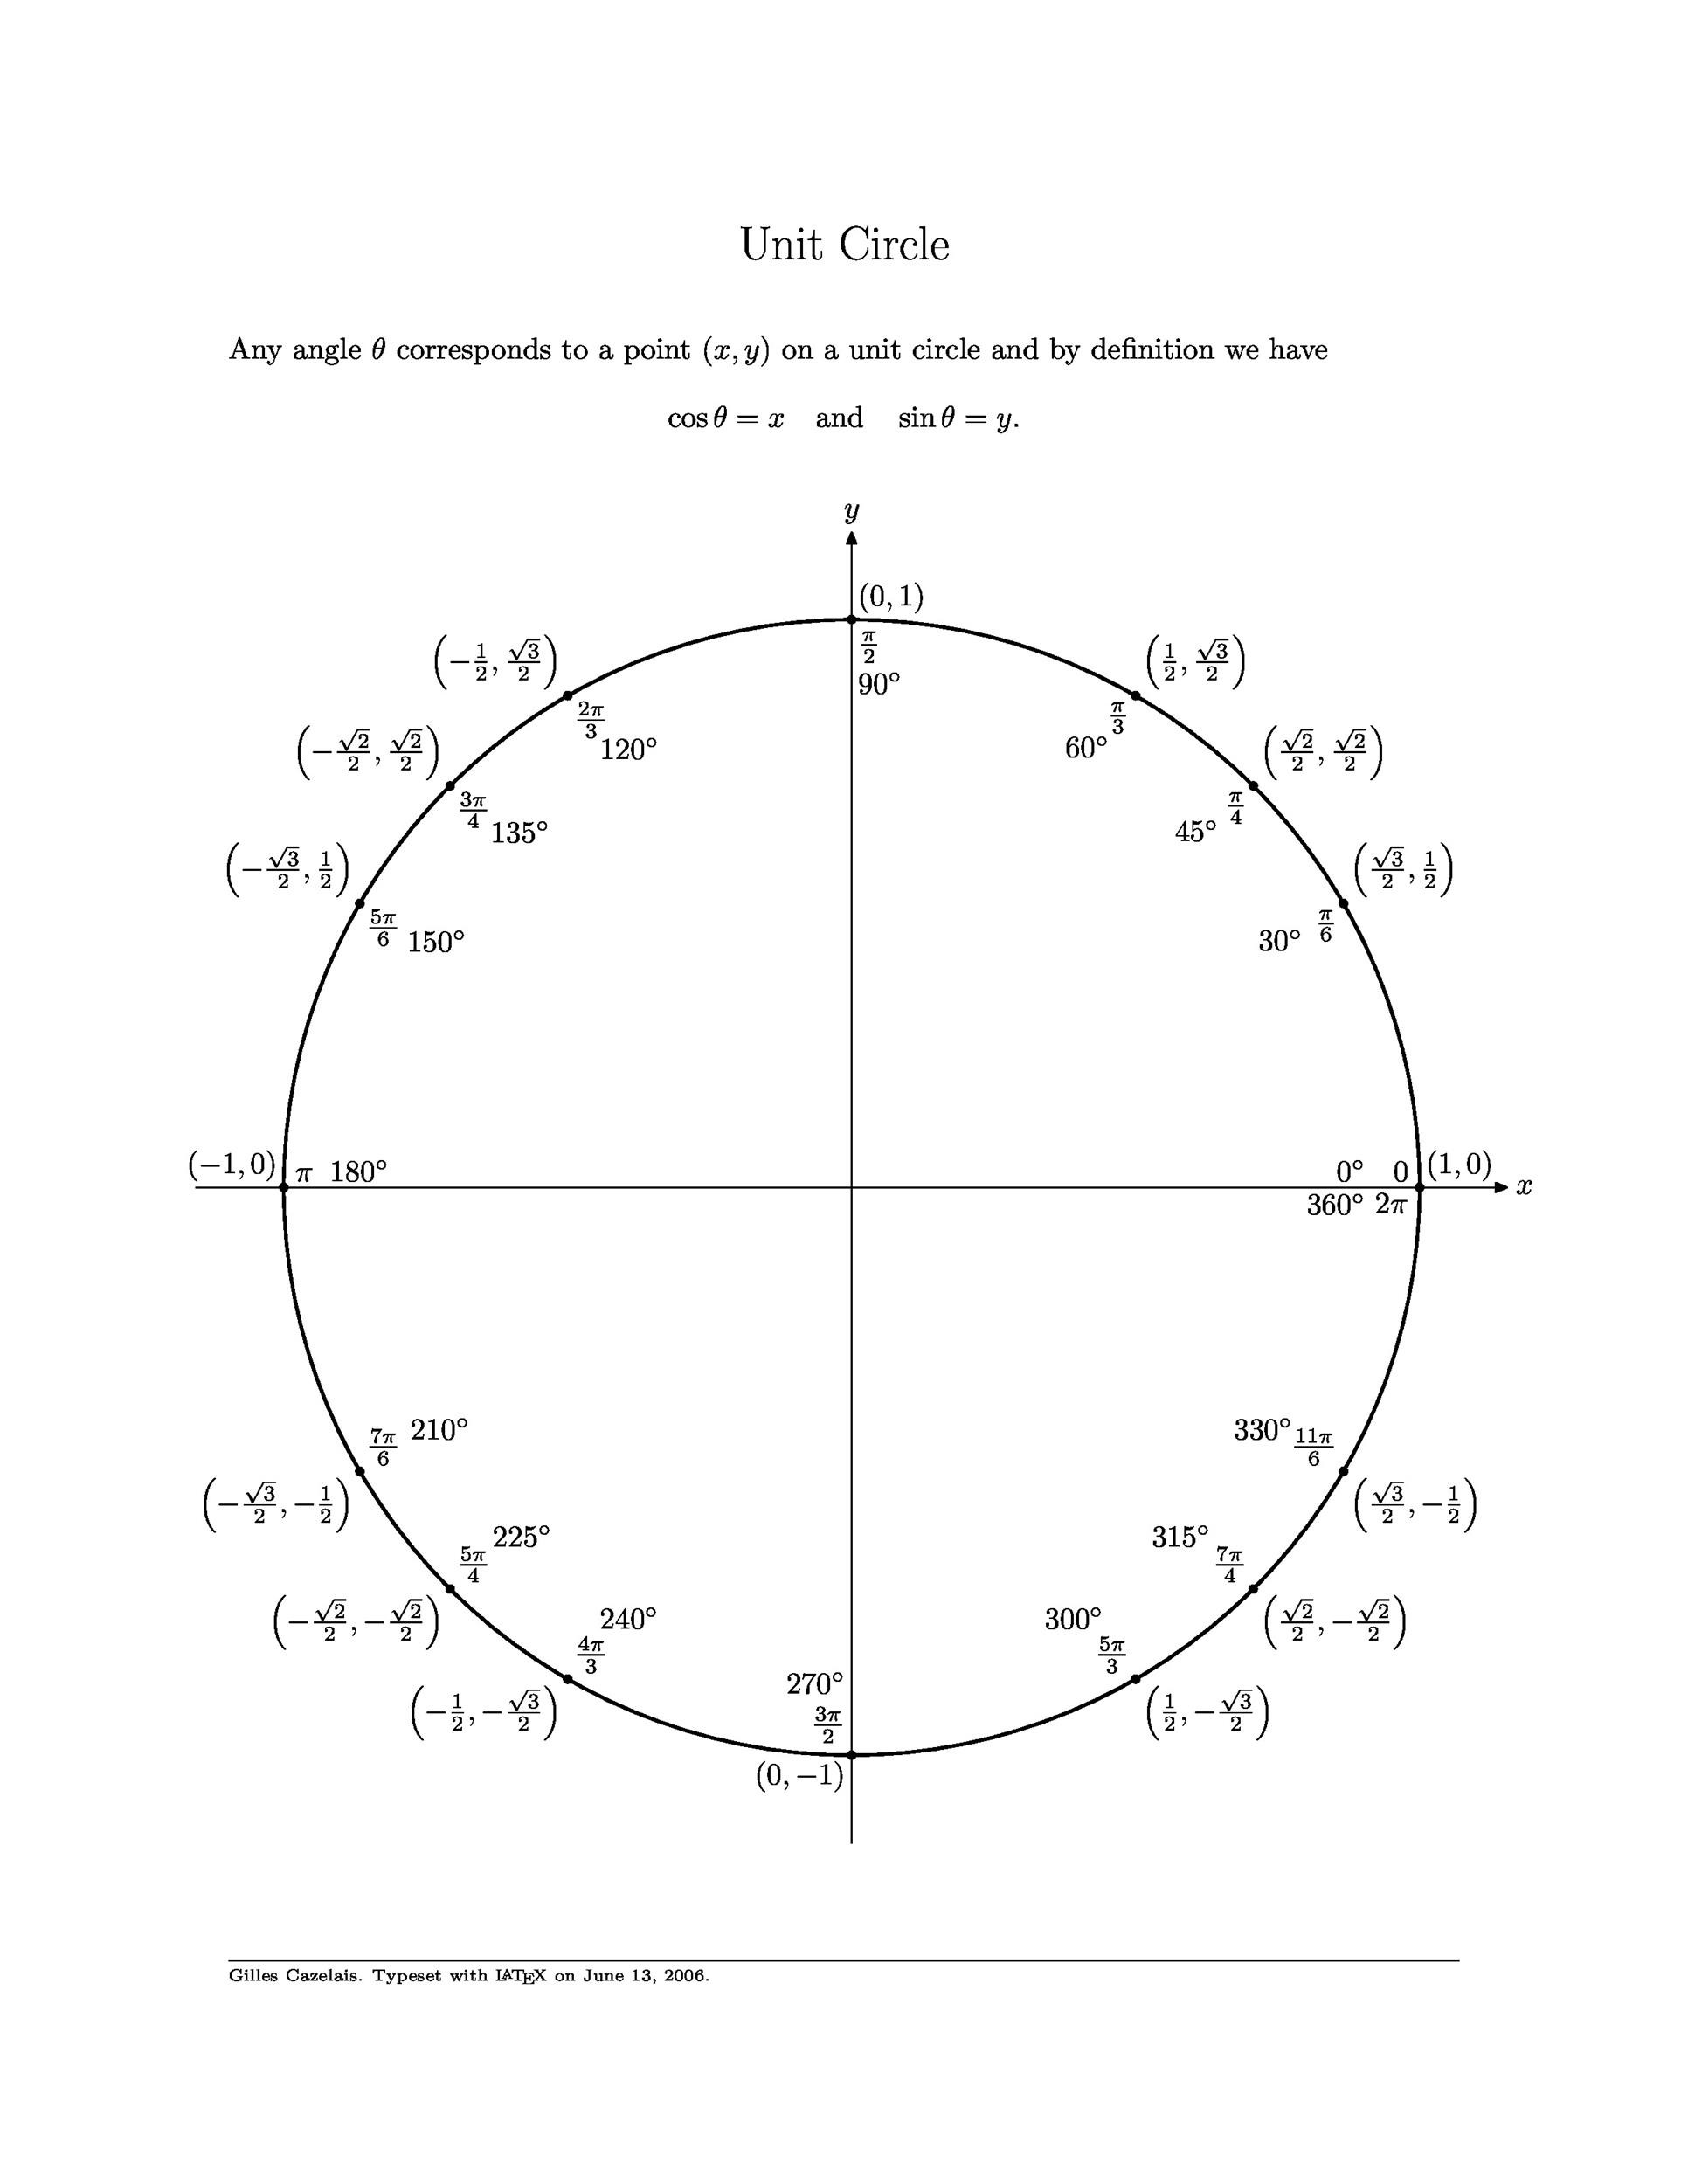
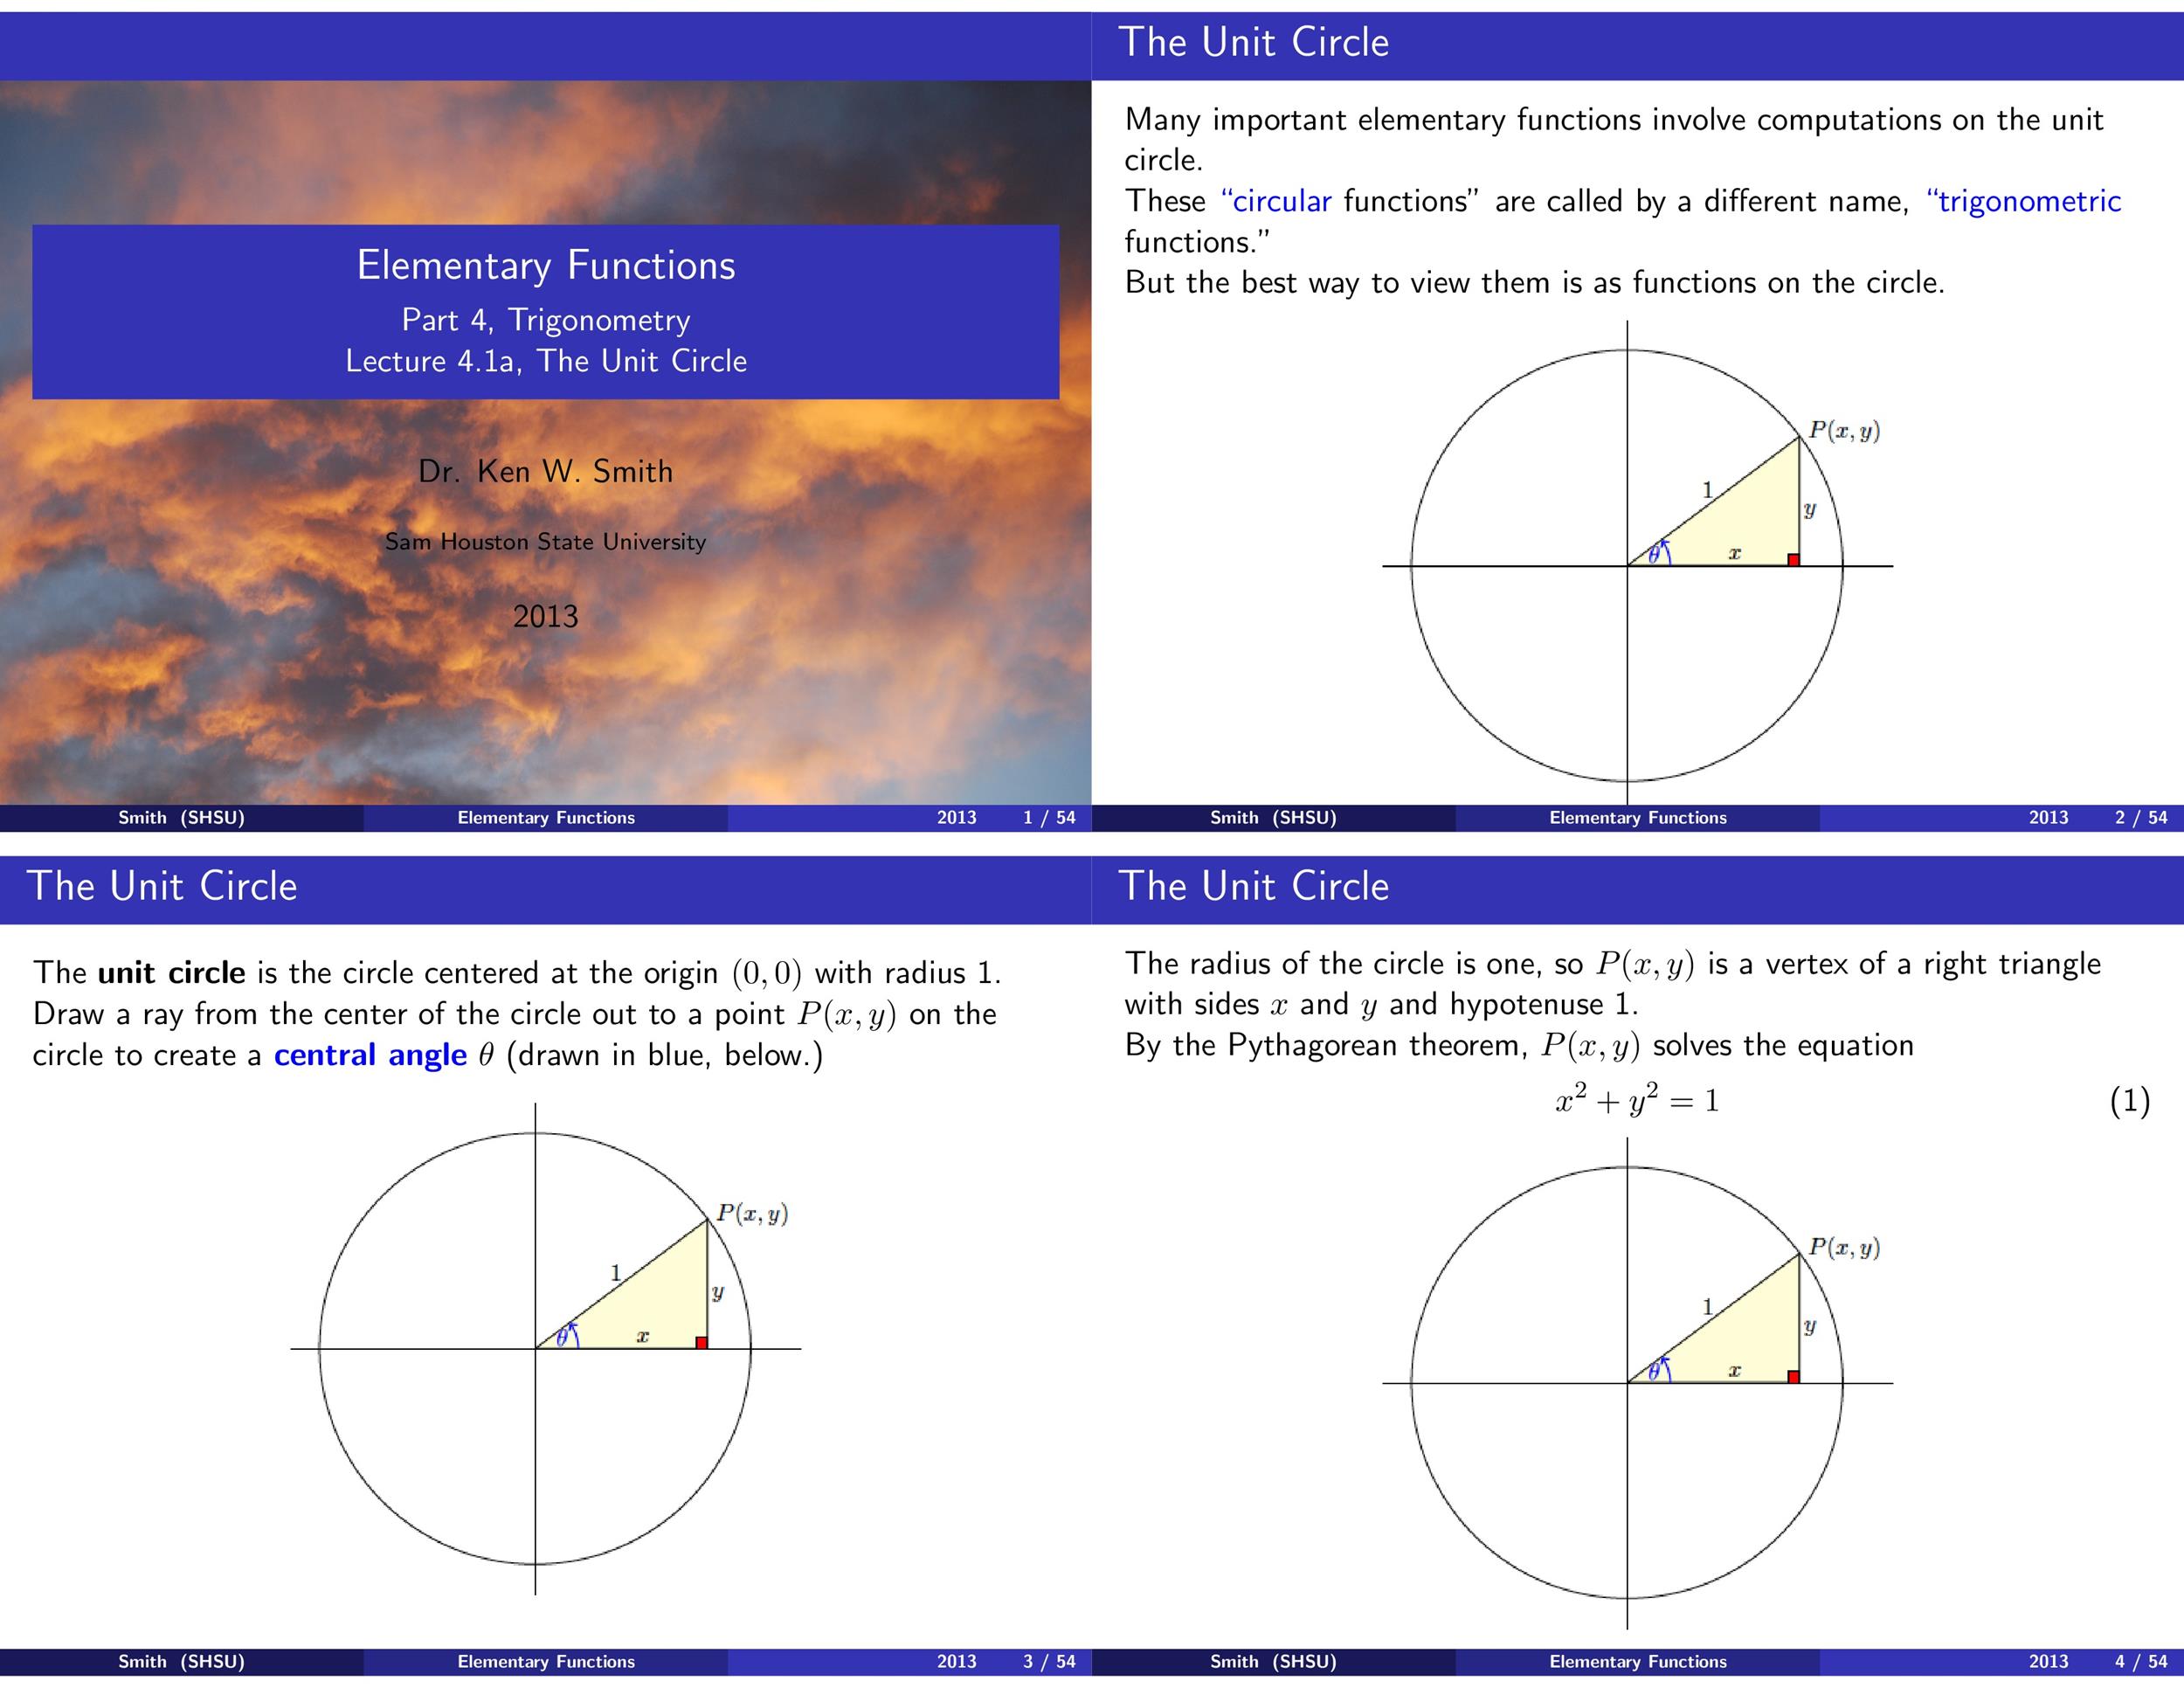
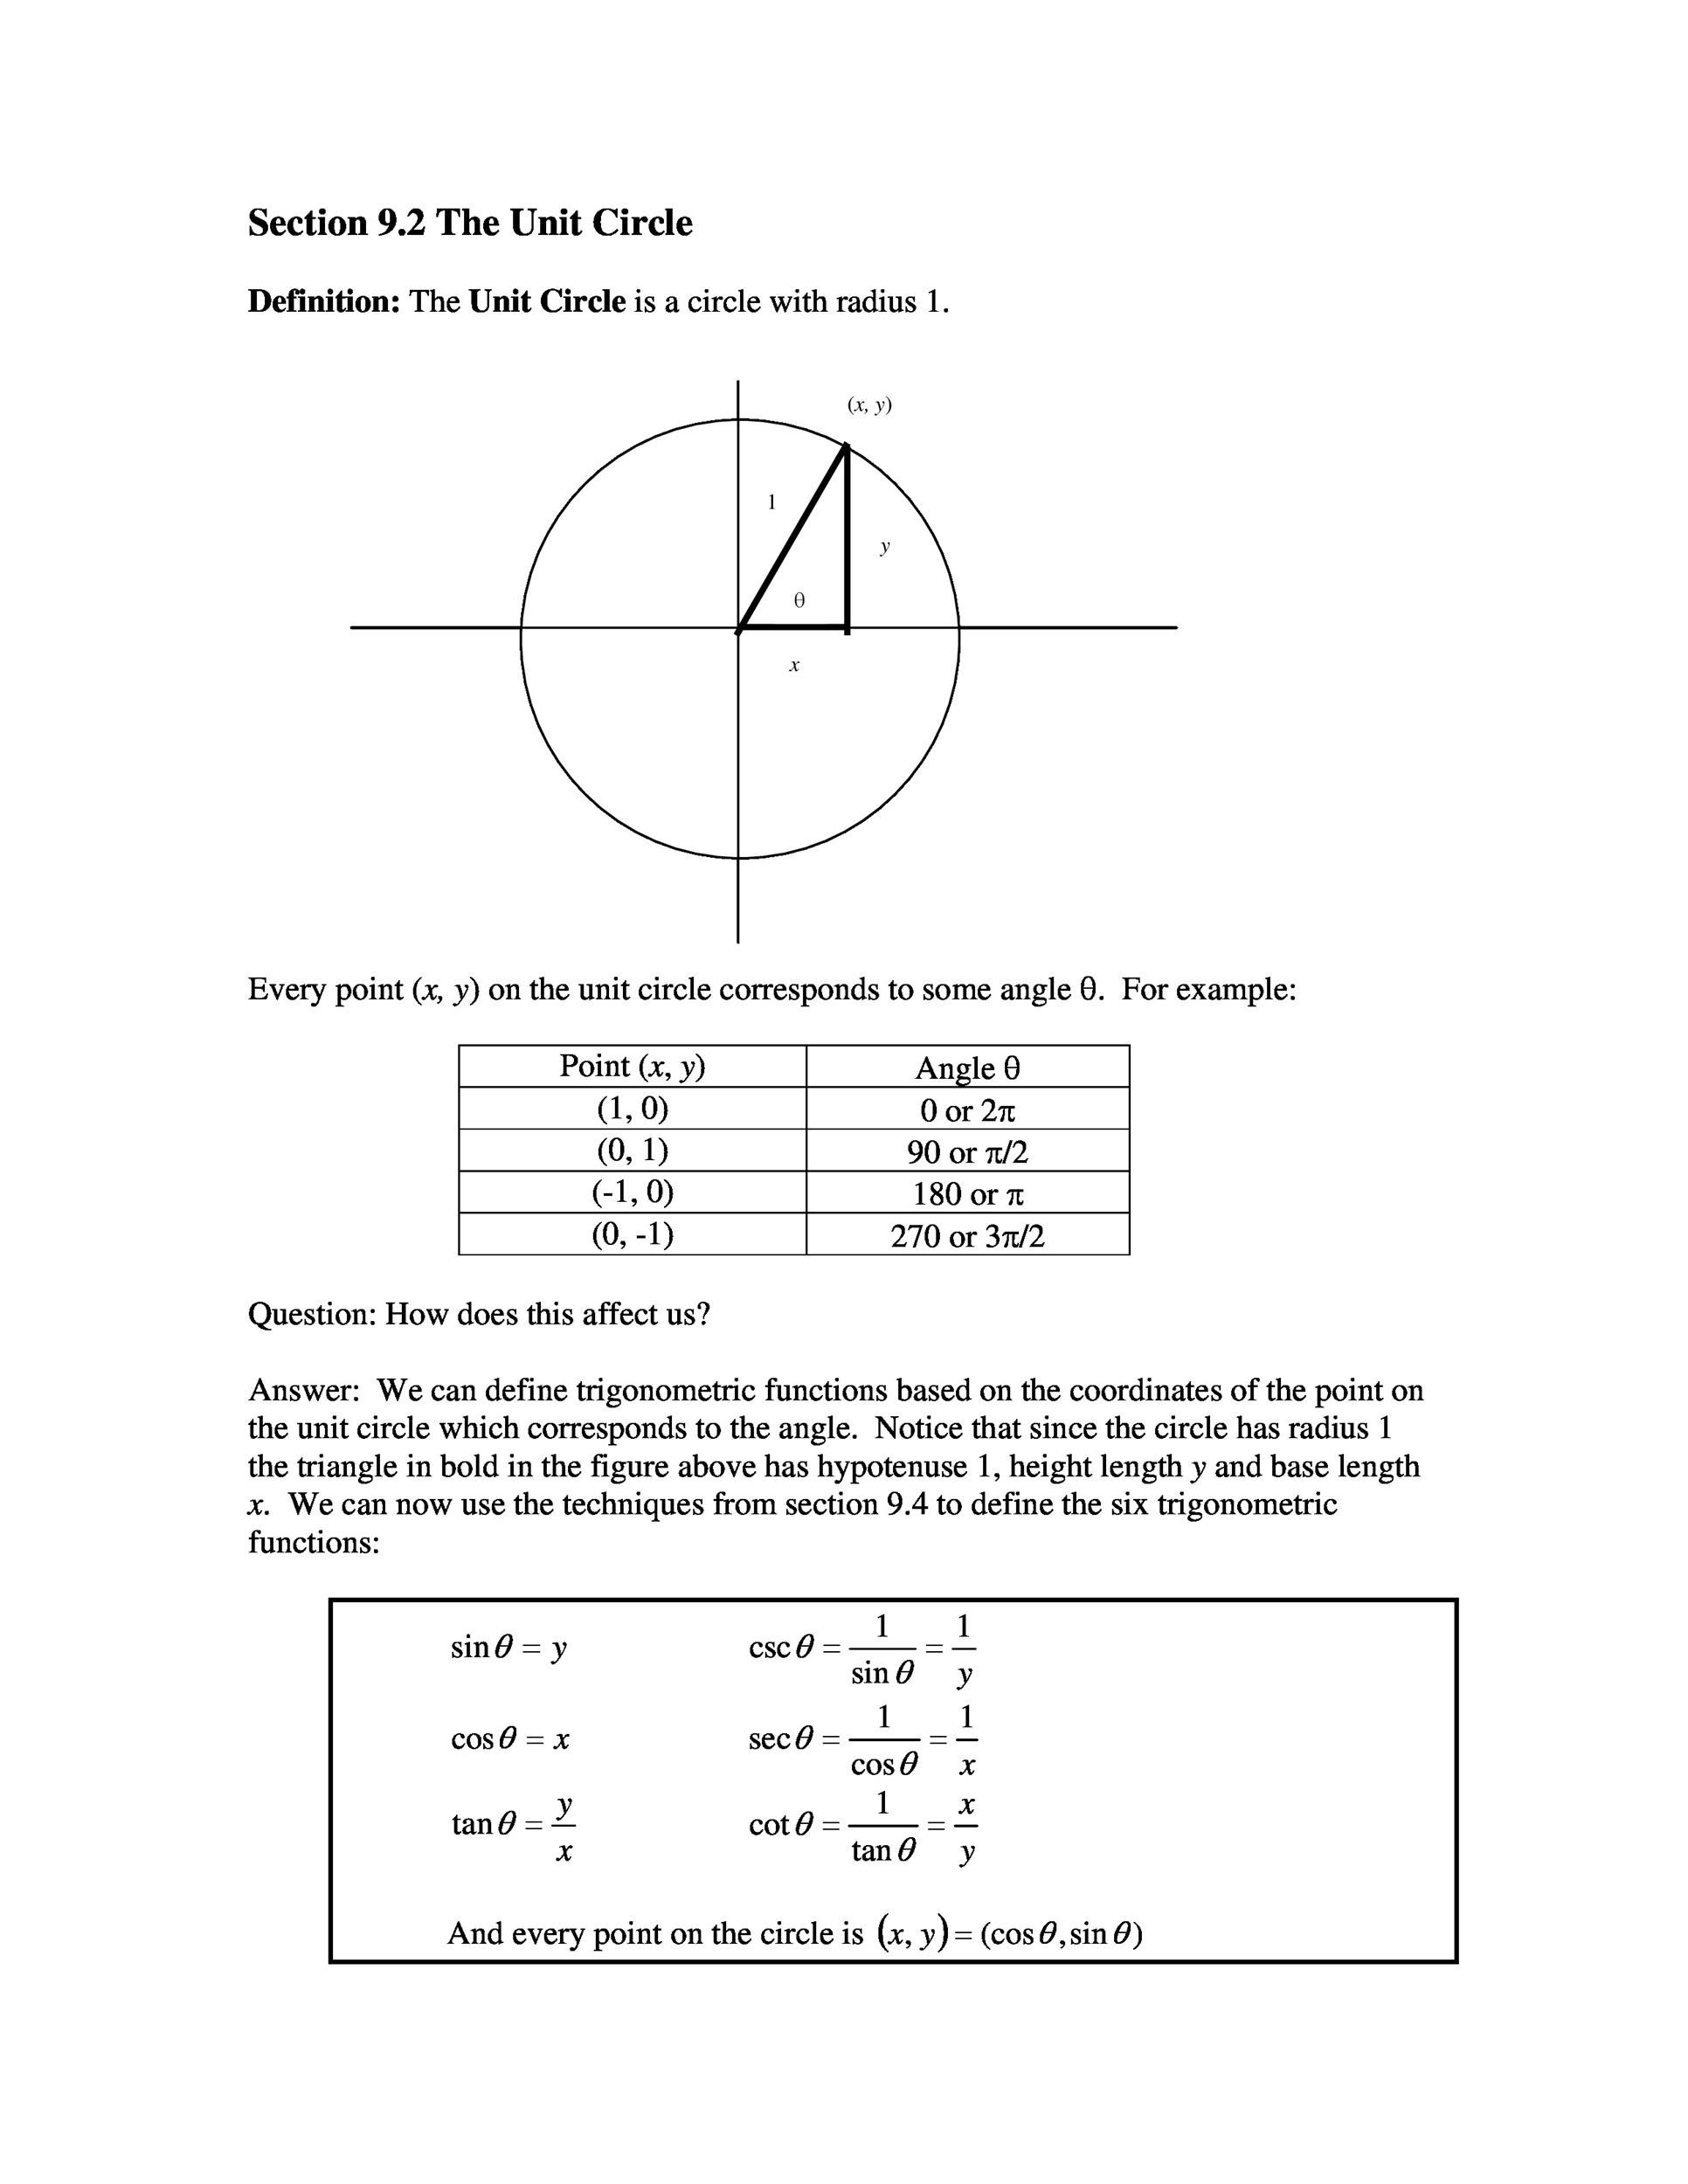
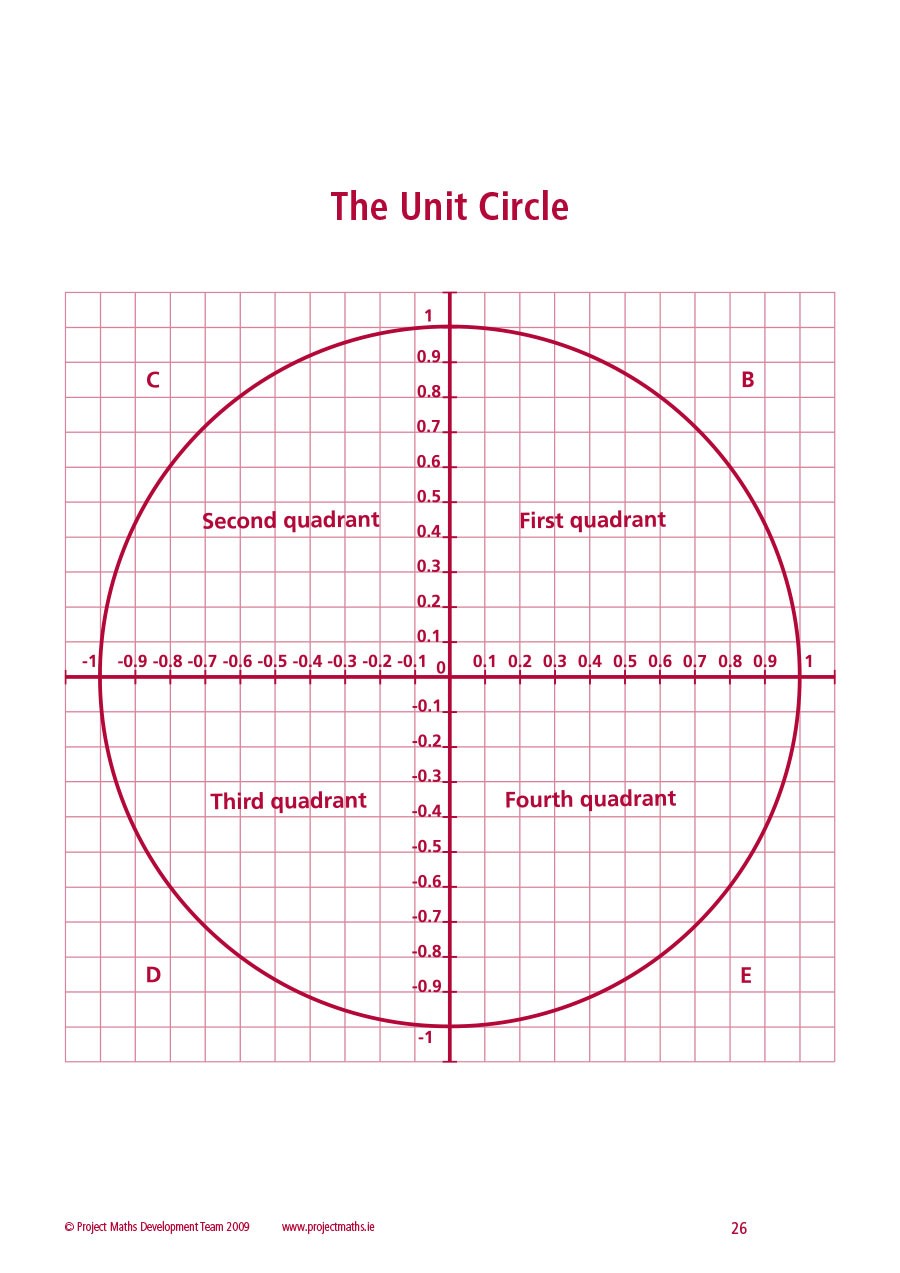
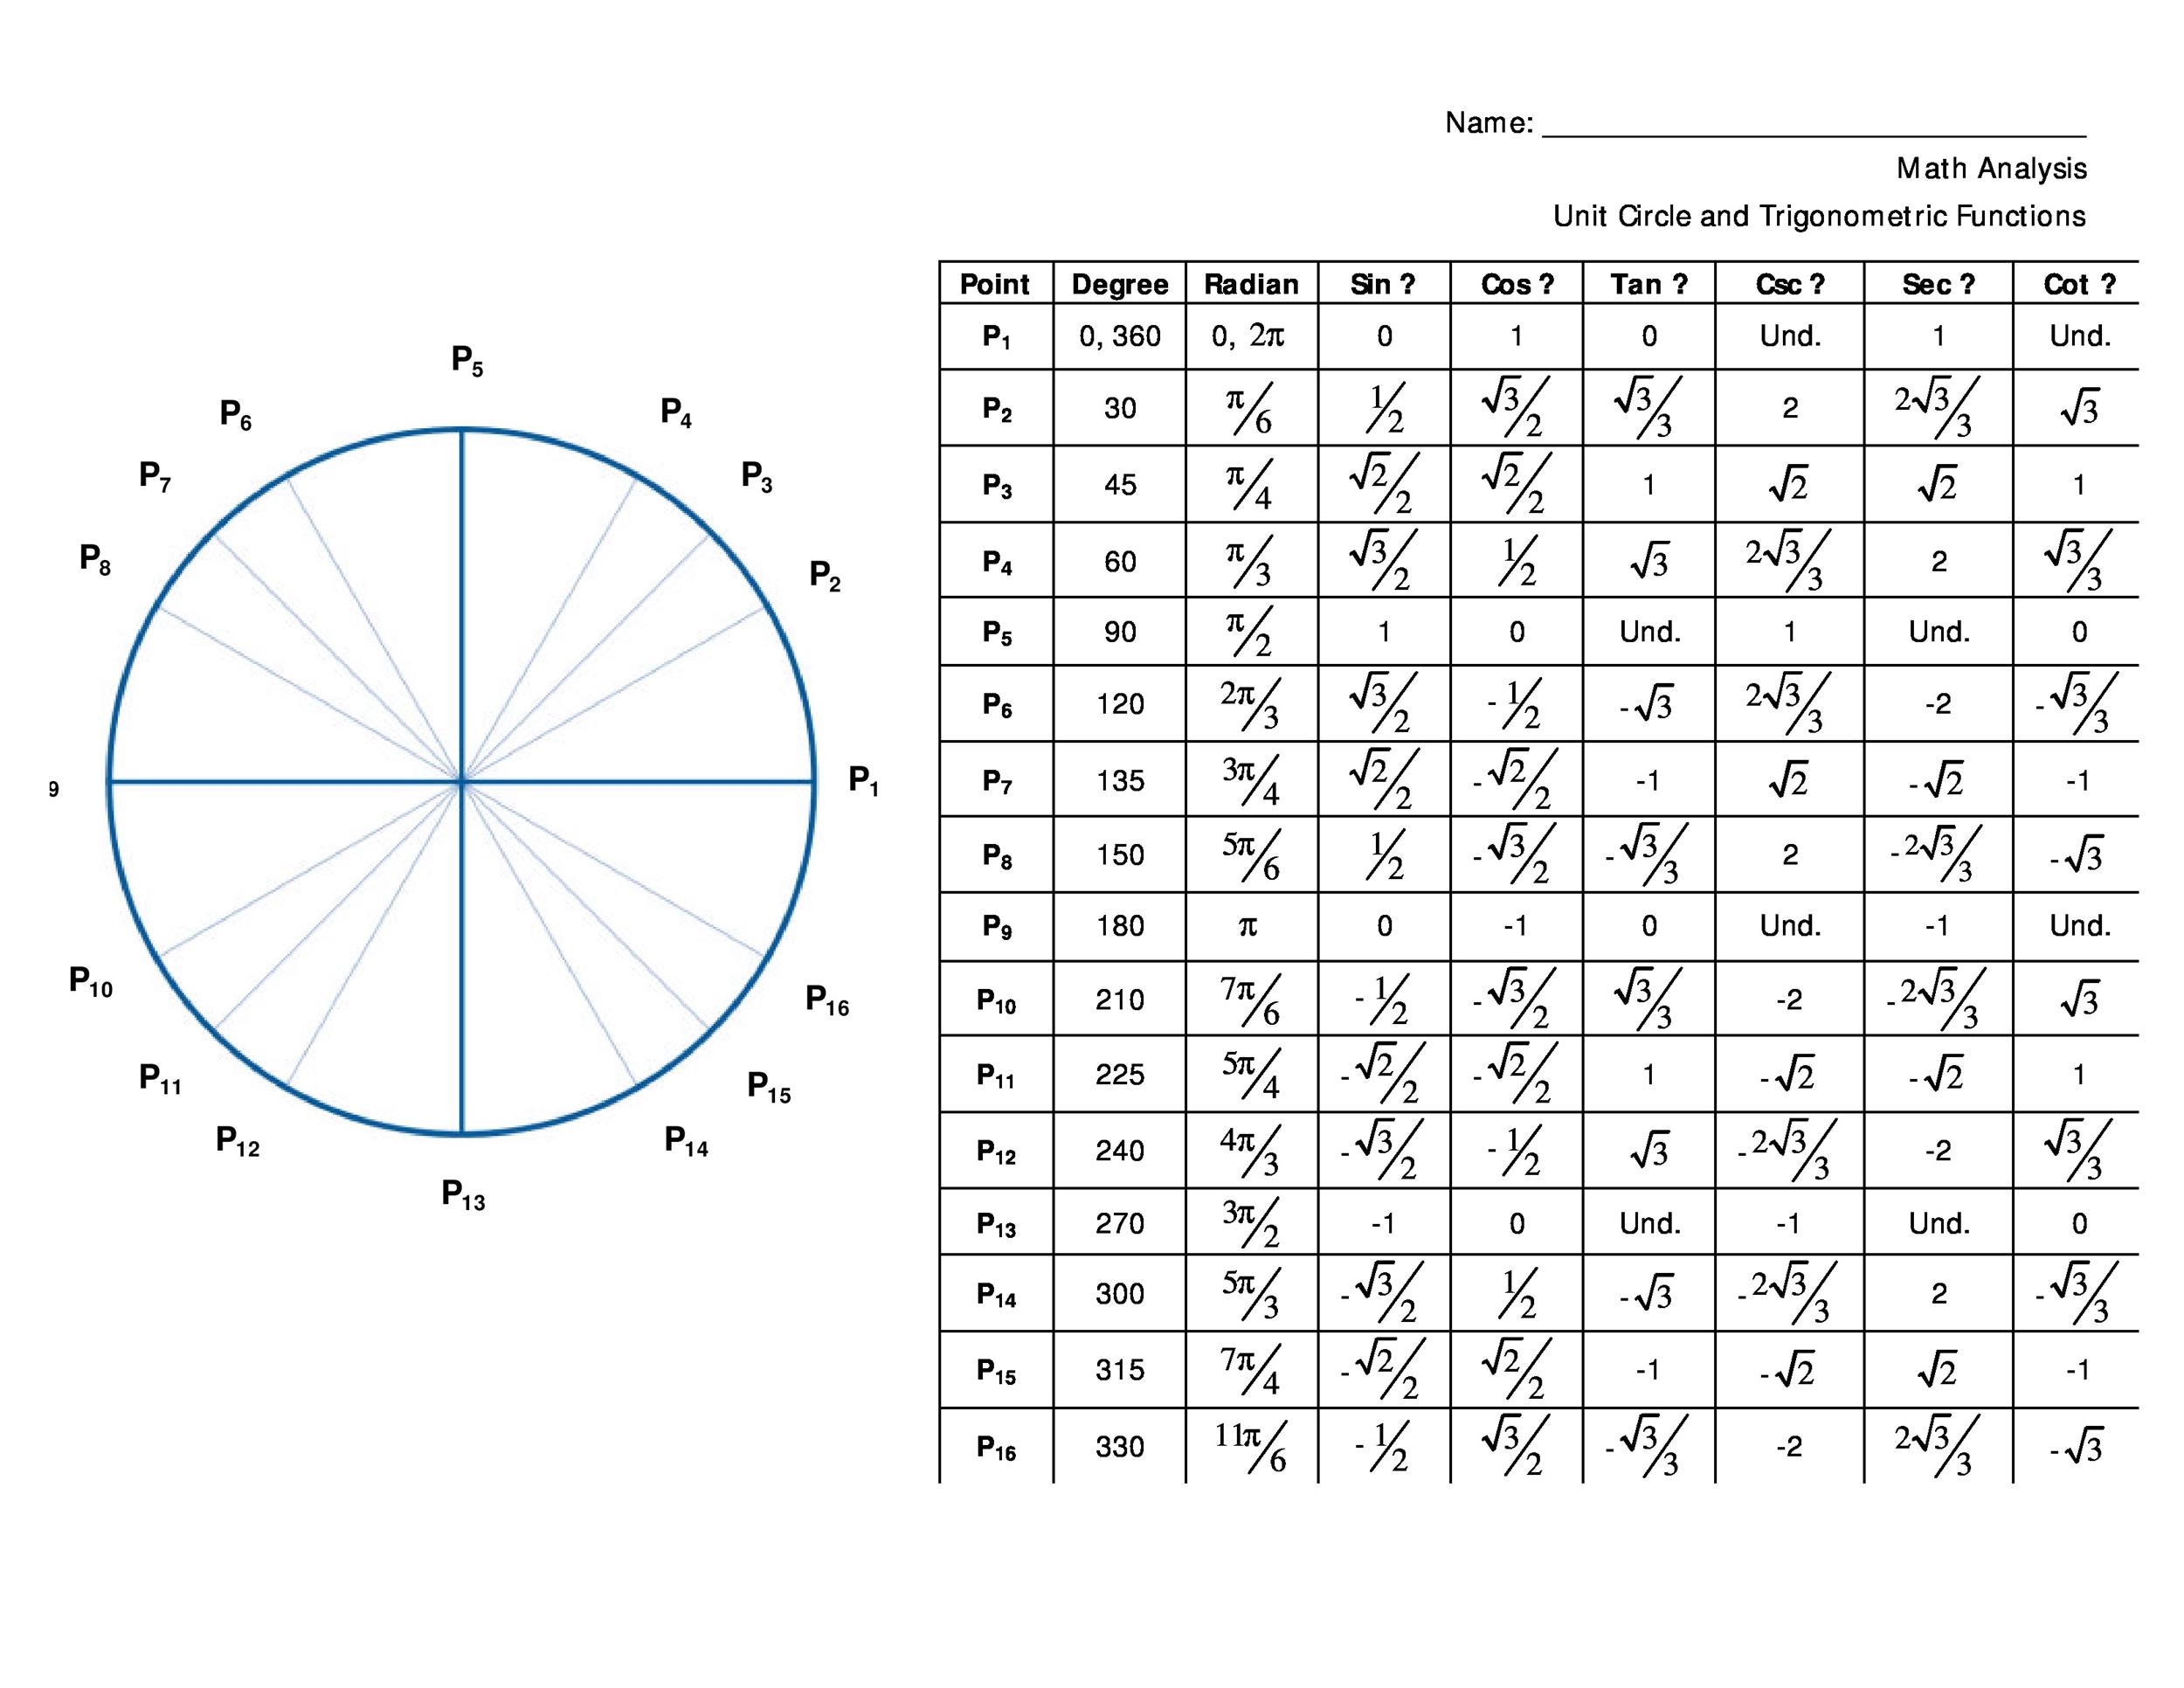
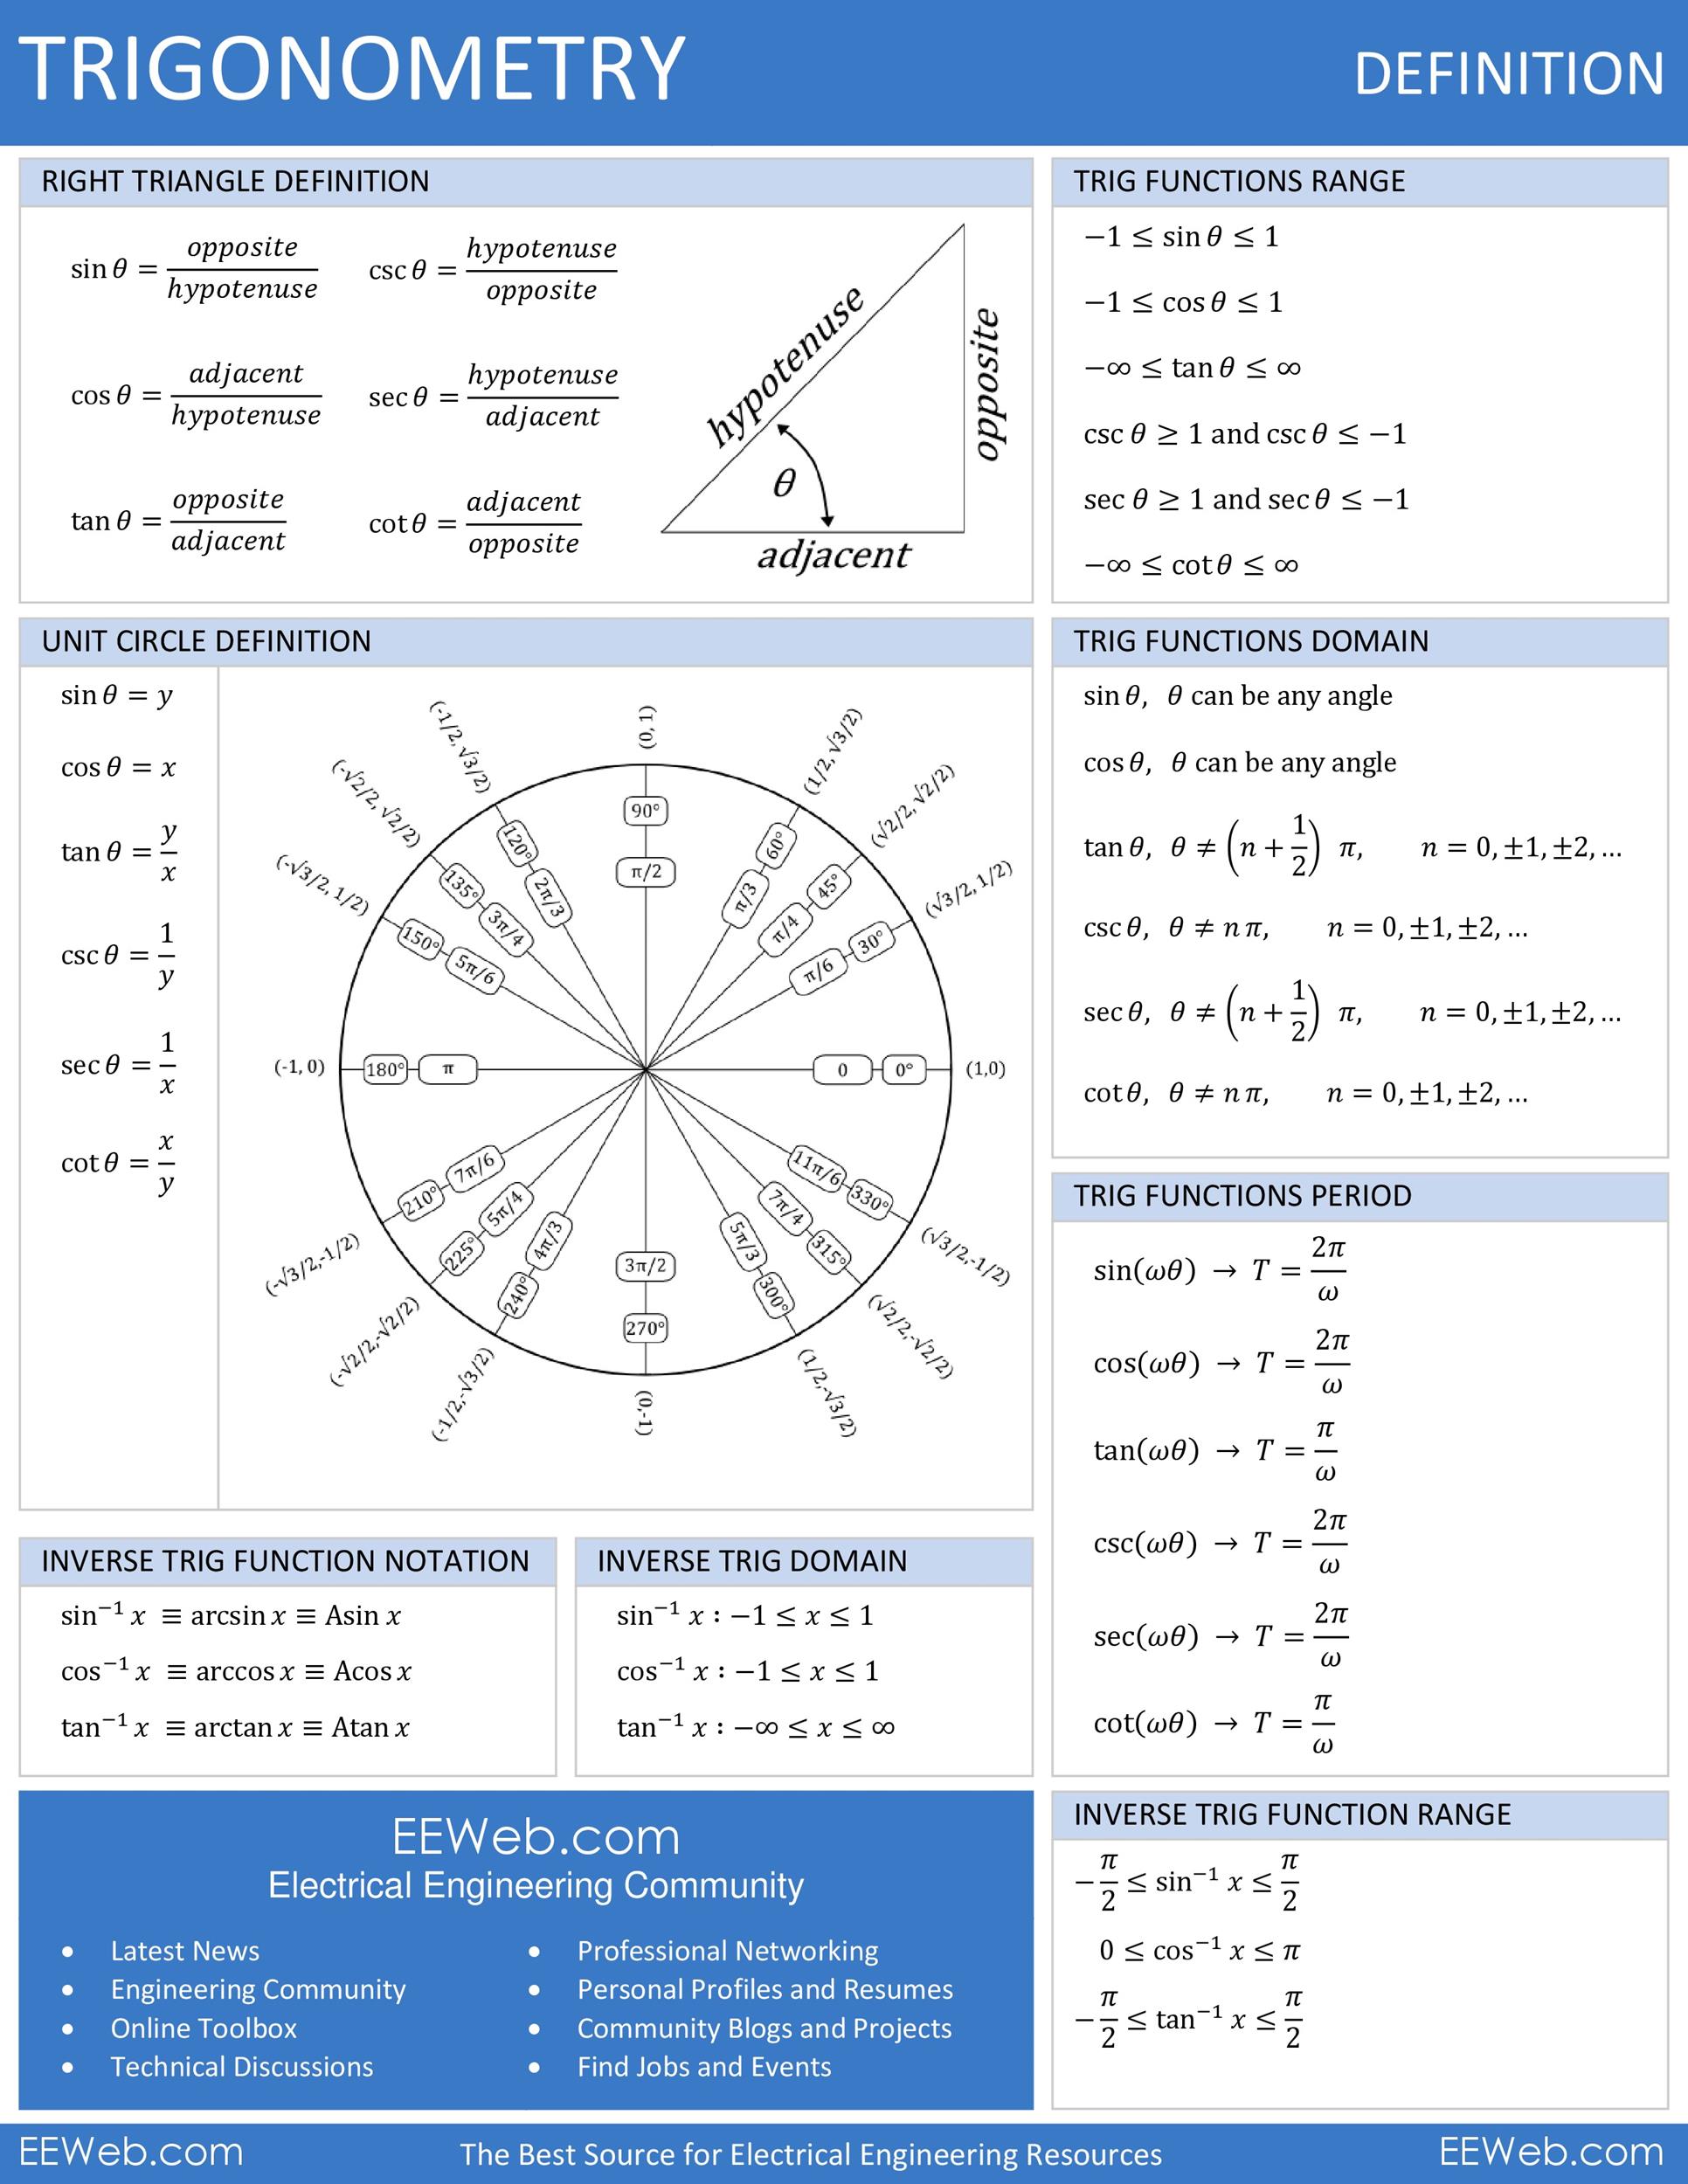
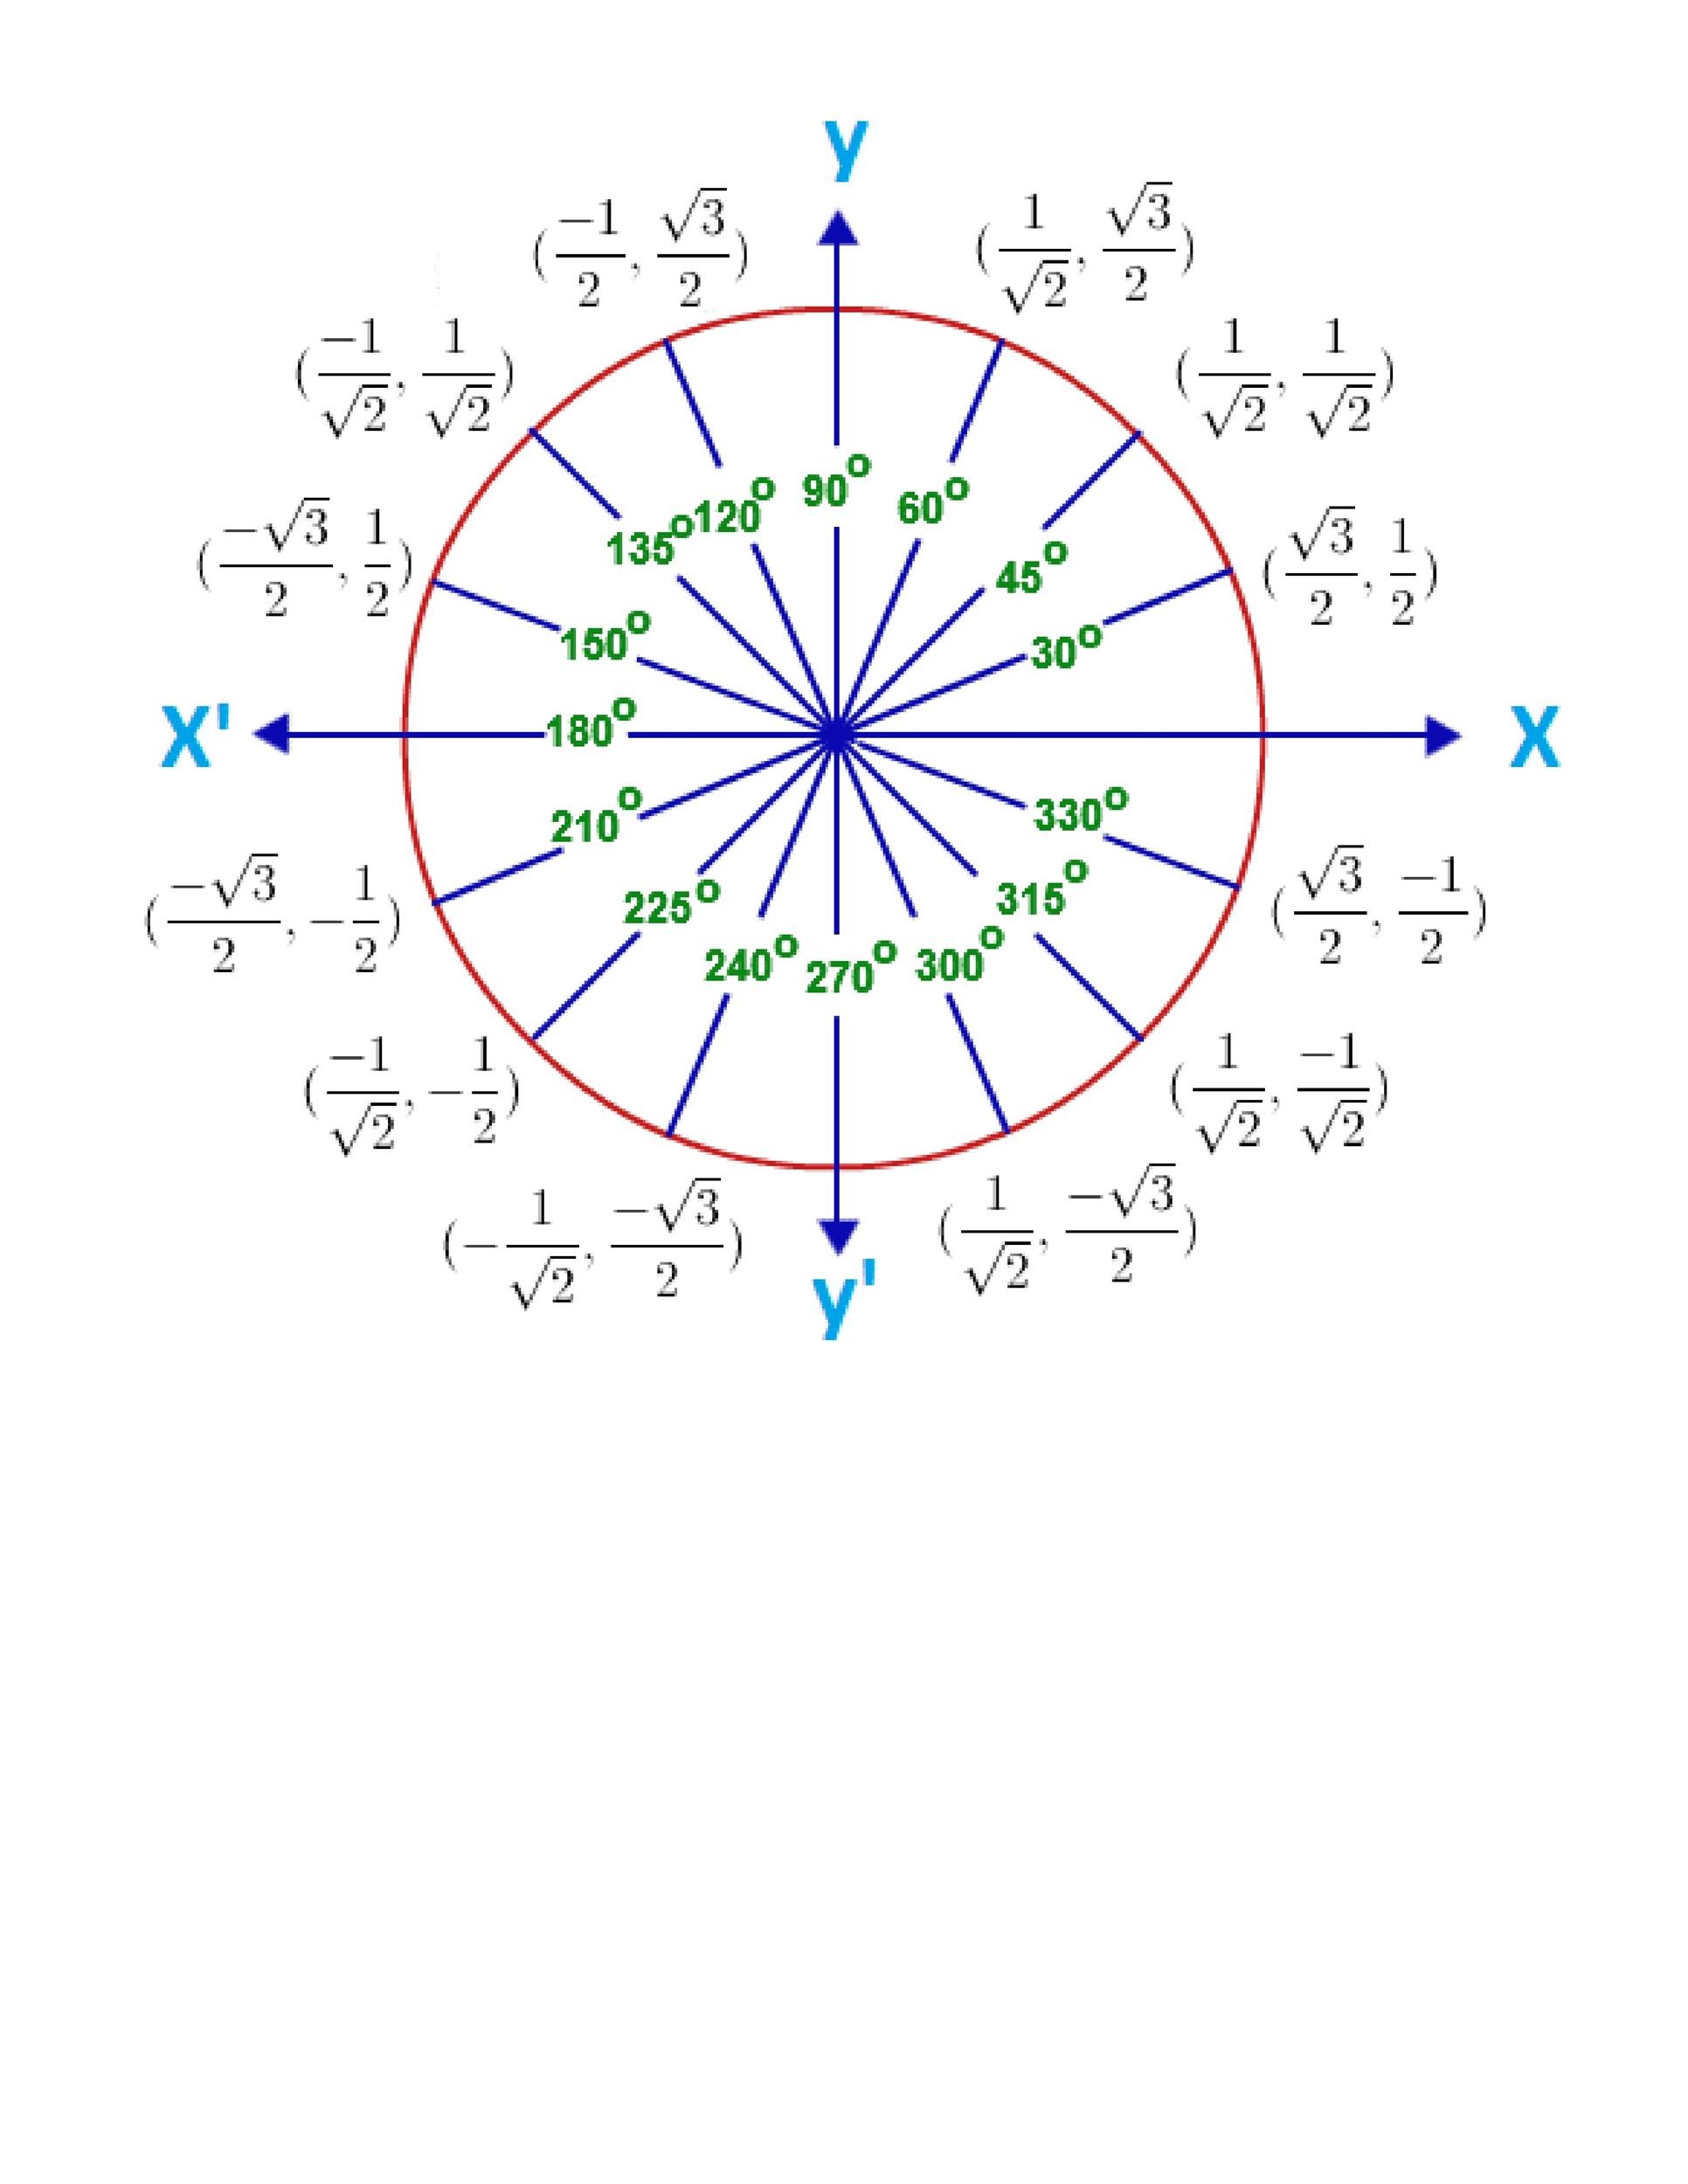
A unit circle diagram is a platform used to explain trigonometry. You can use it to explain all possible measures of angles from 0-degrees to 360-degrees. It describes all the negatives and positive angles in the circle.
In short, it shows all the possible angles which exist. A circle provides a much broader range for measuring angles. This is why people use this shape instead of a right triangle.
Table of Contents
In a unit circle, you measure the positive angles using the initial side of the positive x-axis. Then you move towards the terminal side. Do so in a counterclockwise direction around the point of origin.
The diagram would show positive angles labeled in radians and degrees. Terminal sides of angles form lines which are straight. Some examples of these angle measurements are 30 and 210-degrees, 60 and 240-degrees, and so on.
This is a fact that’s expected when the angles are 180-degrees apart. This is because straight angles measure 180-degrees. When you use a trig circle/trigonometry circle chart, you’ll be able to see the relevance of this fact.
Unit Circle Charts
Aside from positive angles, unit or radian circle charts also show negative angles. In fact, a lot of basic angles have negative values and multiples of themselves. In order to get these values, you need to measure the angles in a clockwise direction.
For instance, a 30-degree angle is the same as a -330-degree angle. This is because their terminal sides are the same.
However, there are more ways you can name angles. When you perform a complete rotation of the circle, you can get endless angle measures. You can do this when you add or subtract 360-degrees during the rotation.
Do these before you settle on the terminal side of the angle. Then you can get positive and negative values of the same basic angle.
Getting confused yet? Let’s clarify with an example. If you have an angle that measures 60-degrees, it would have the same terminal side as the other angles. These angles are the 420-degree angle and the -300-angle.
In fact, the same 60-degree angle would have a lot of different names in both radians and degrees.
You may think that the different angle names are just pointless and confusing. But there’s more to these different names. The angles connected to one another have trig functions which are also connected, if not the same.
Unit Circle Diagrams
Creating a unit circle chart
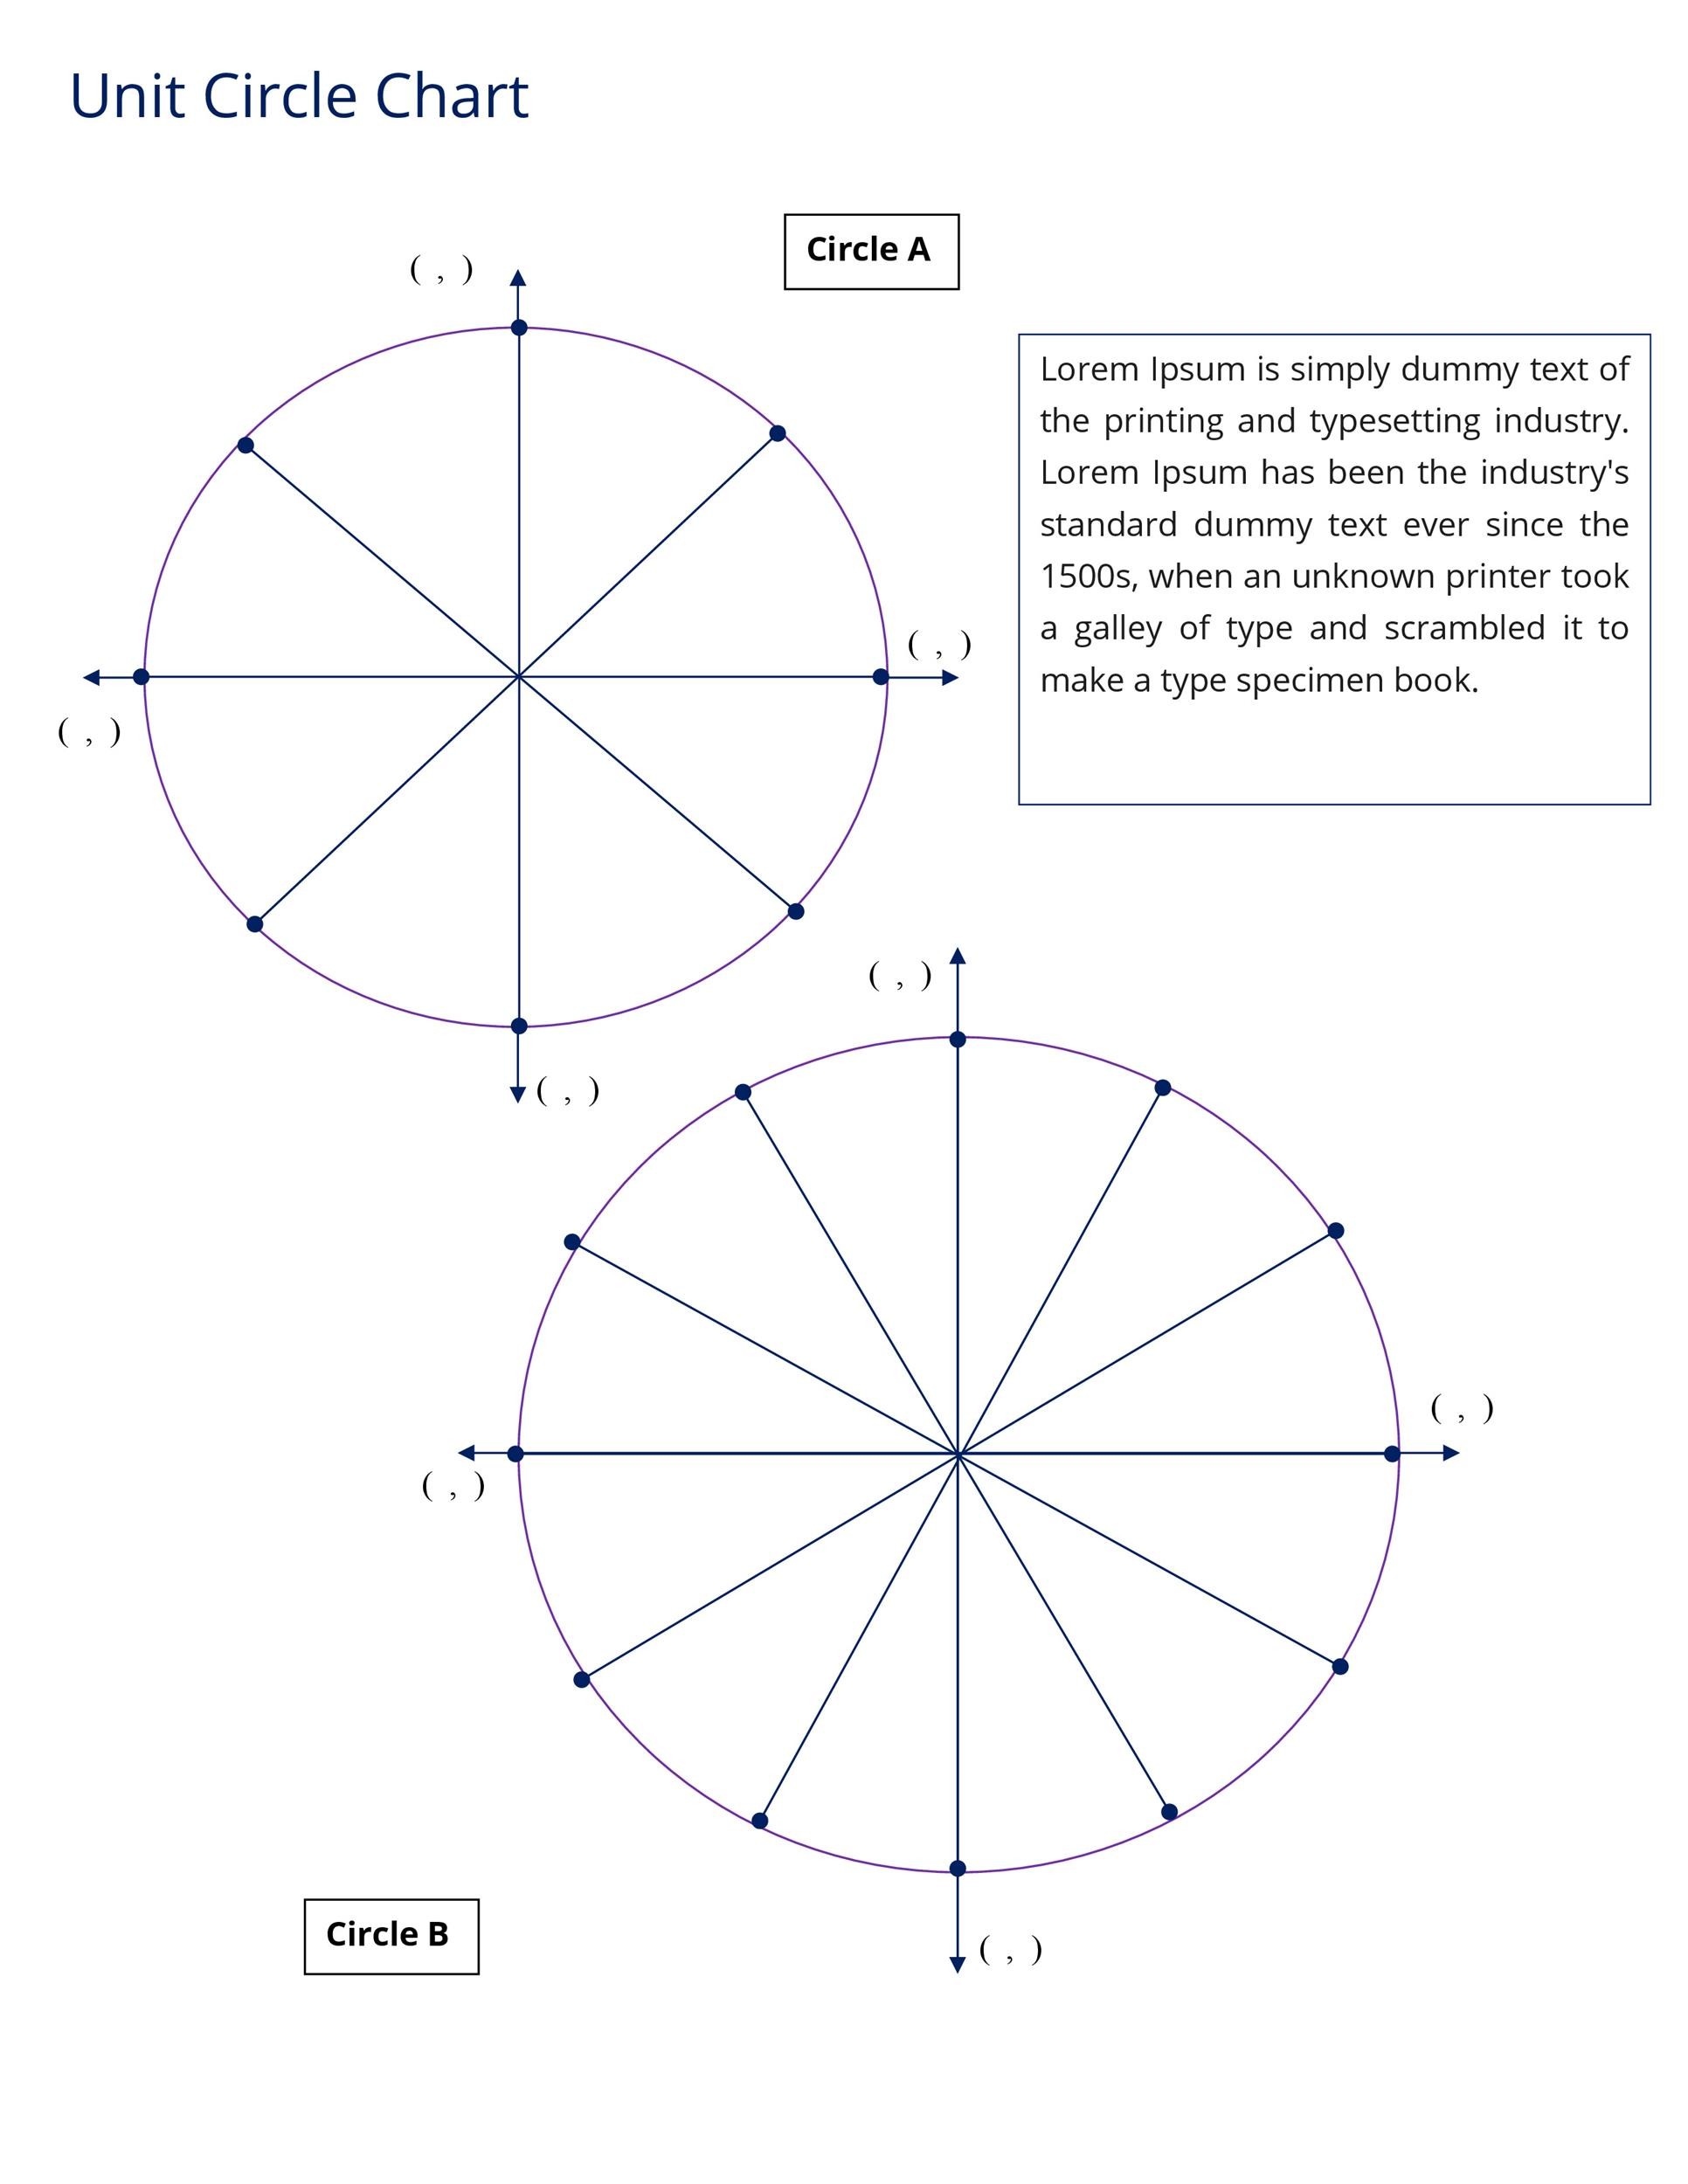
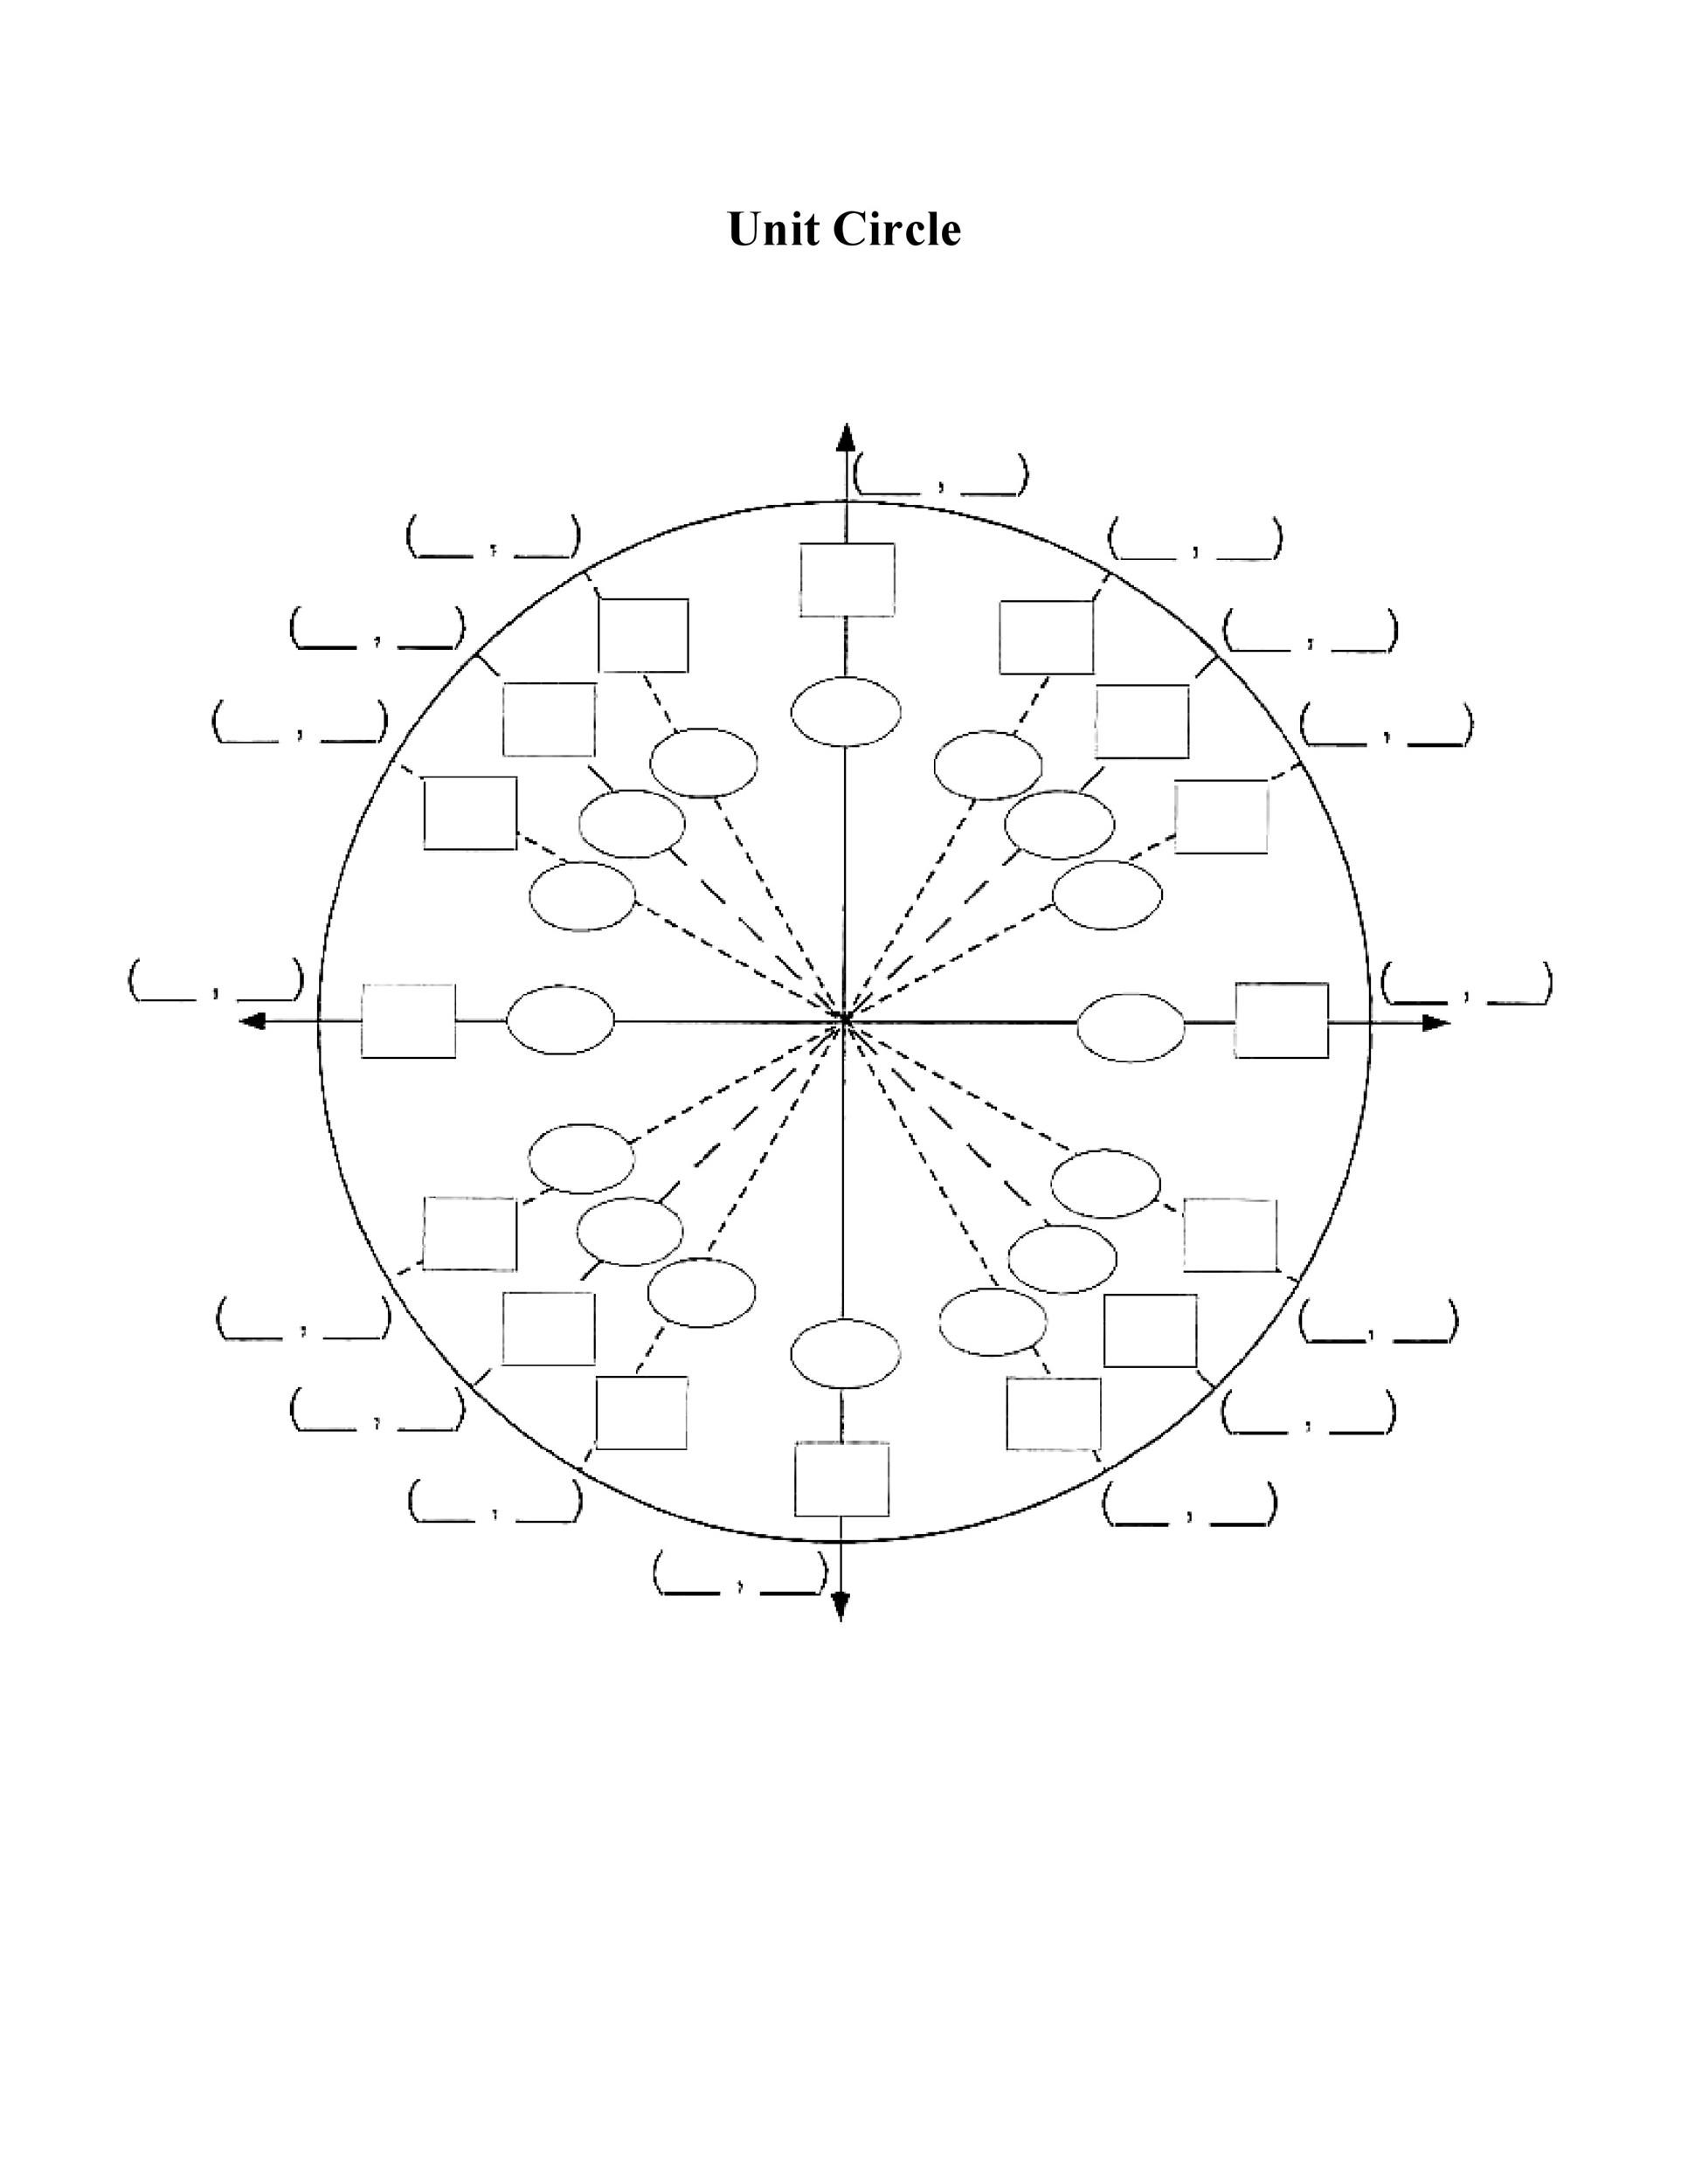
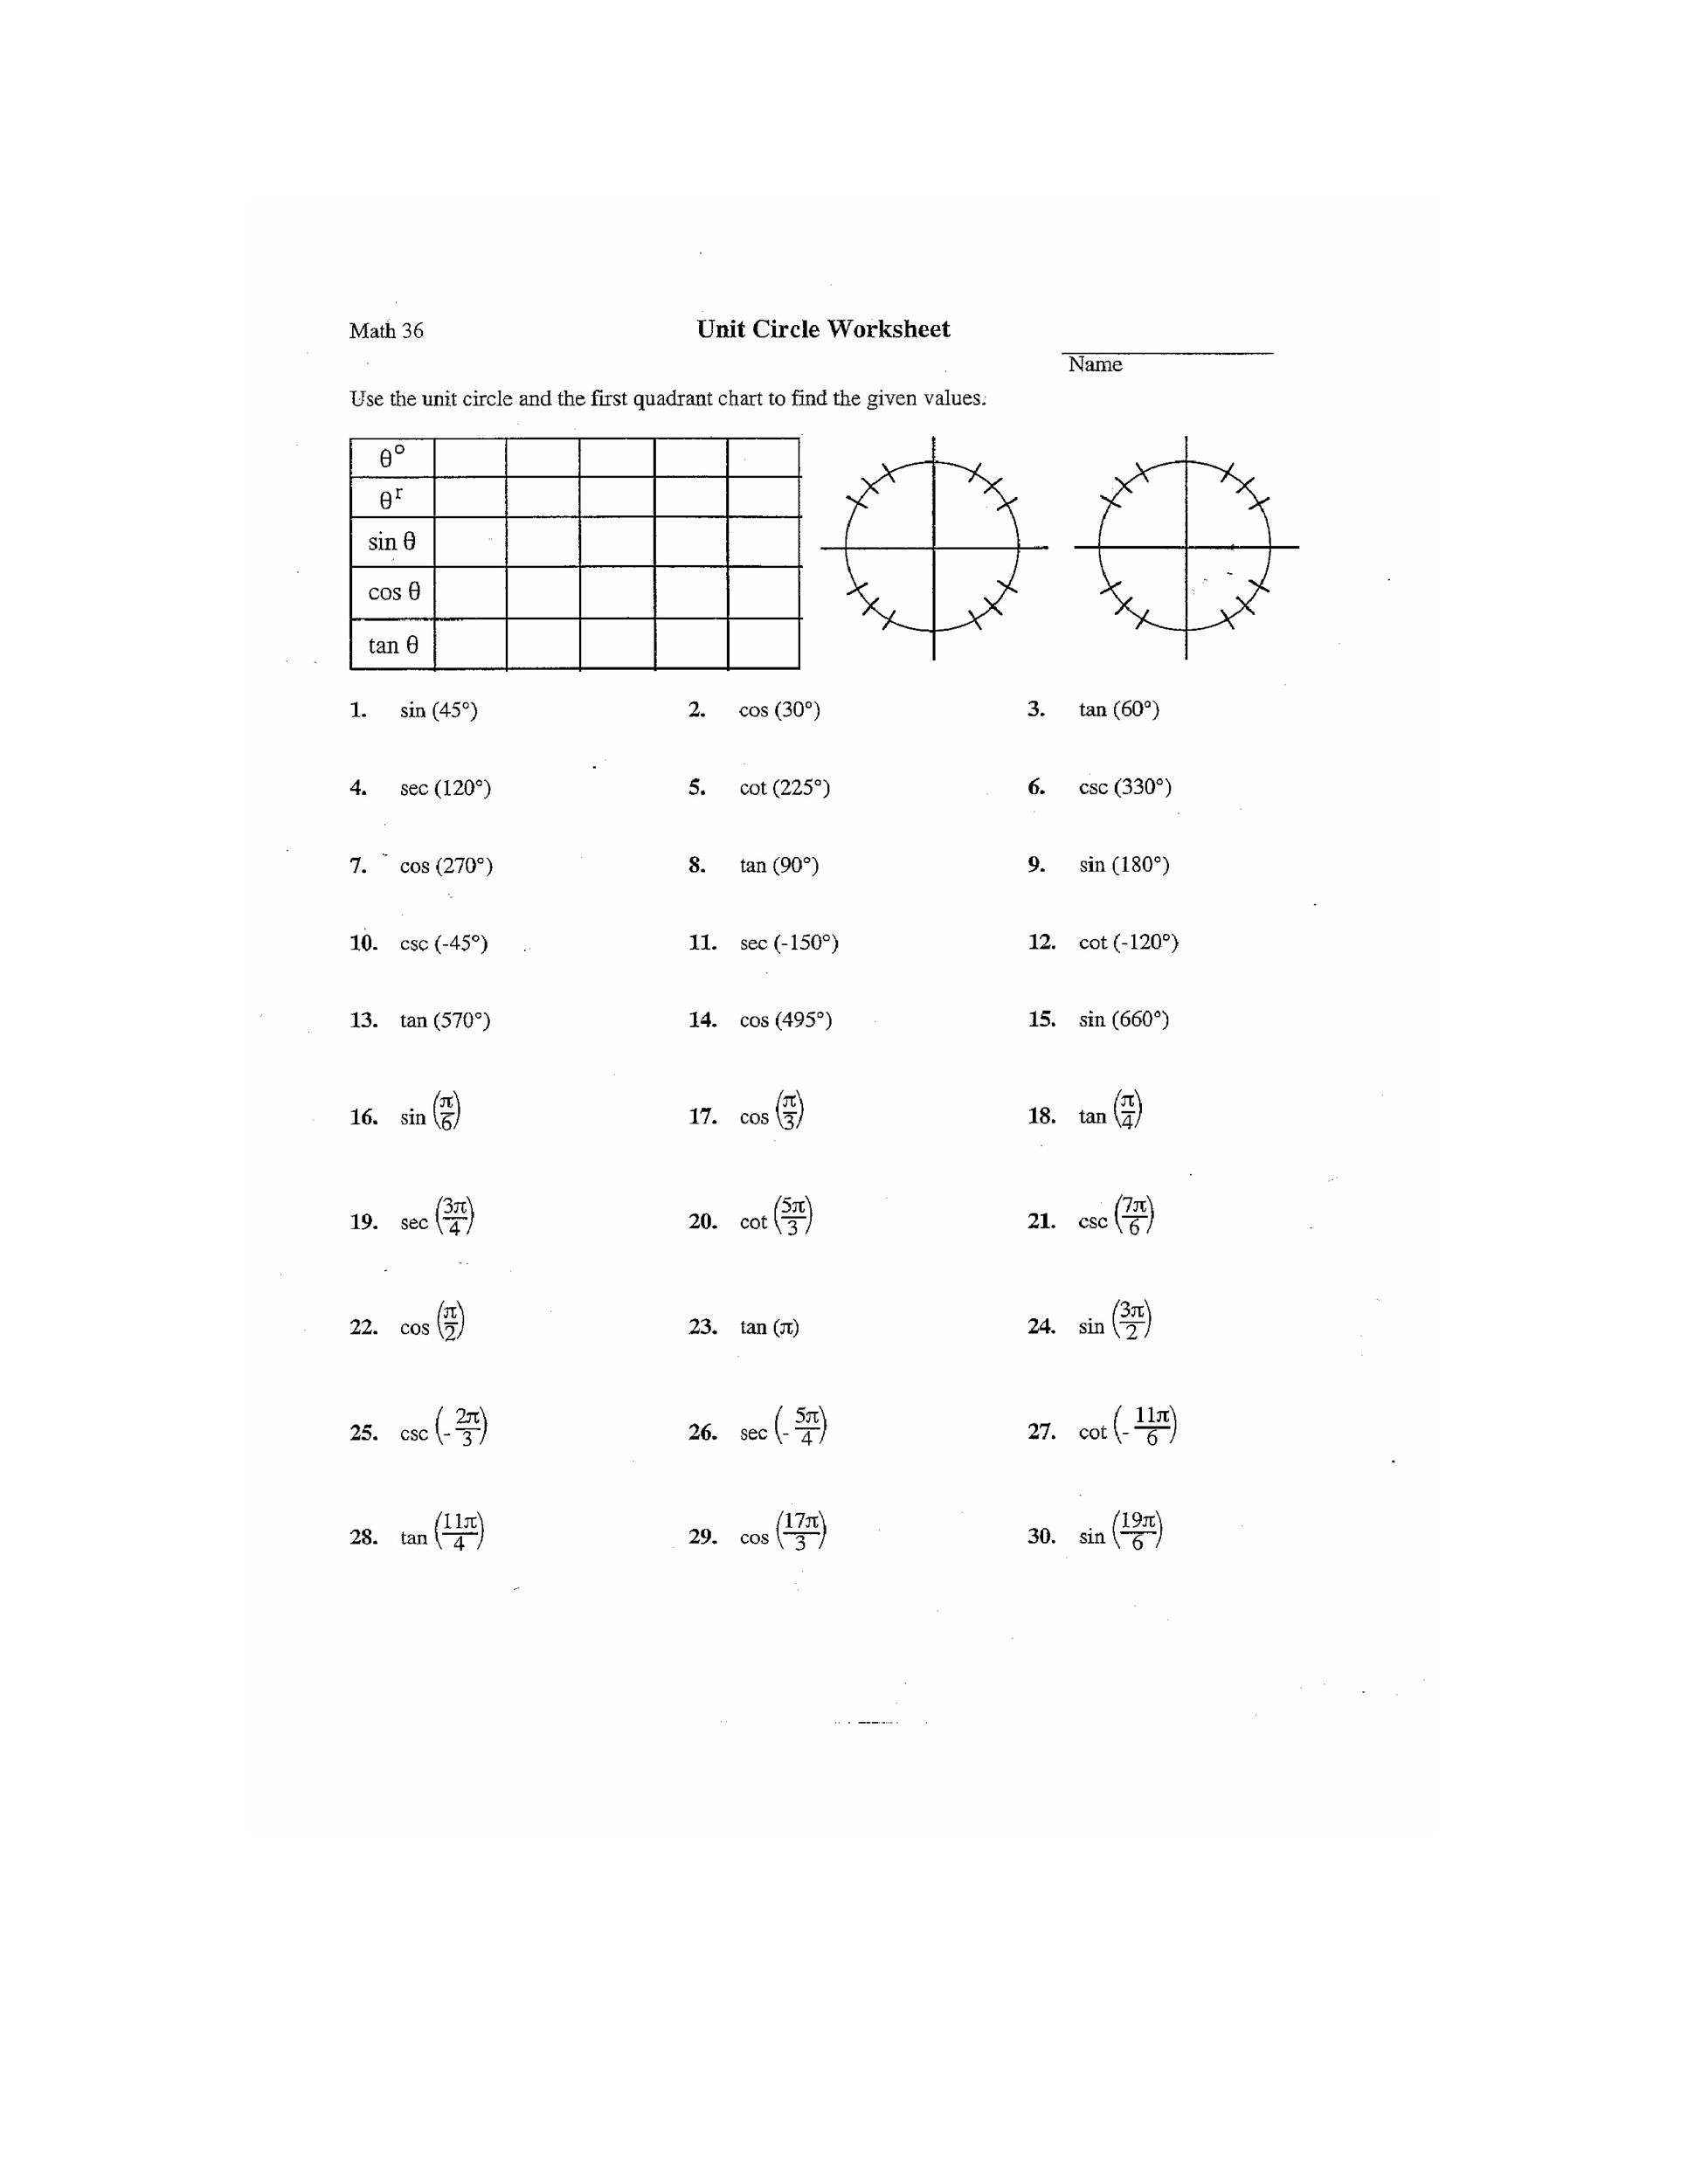
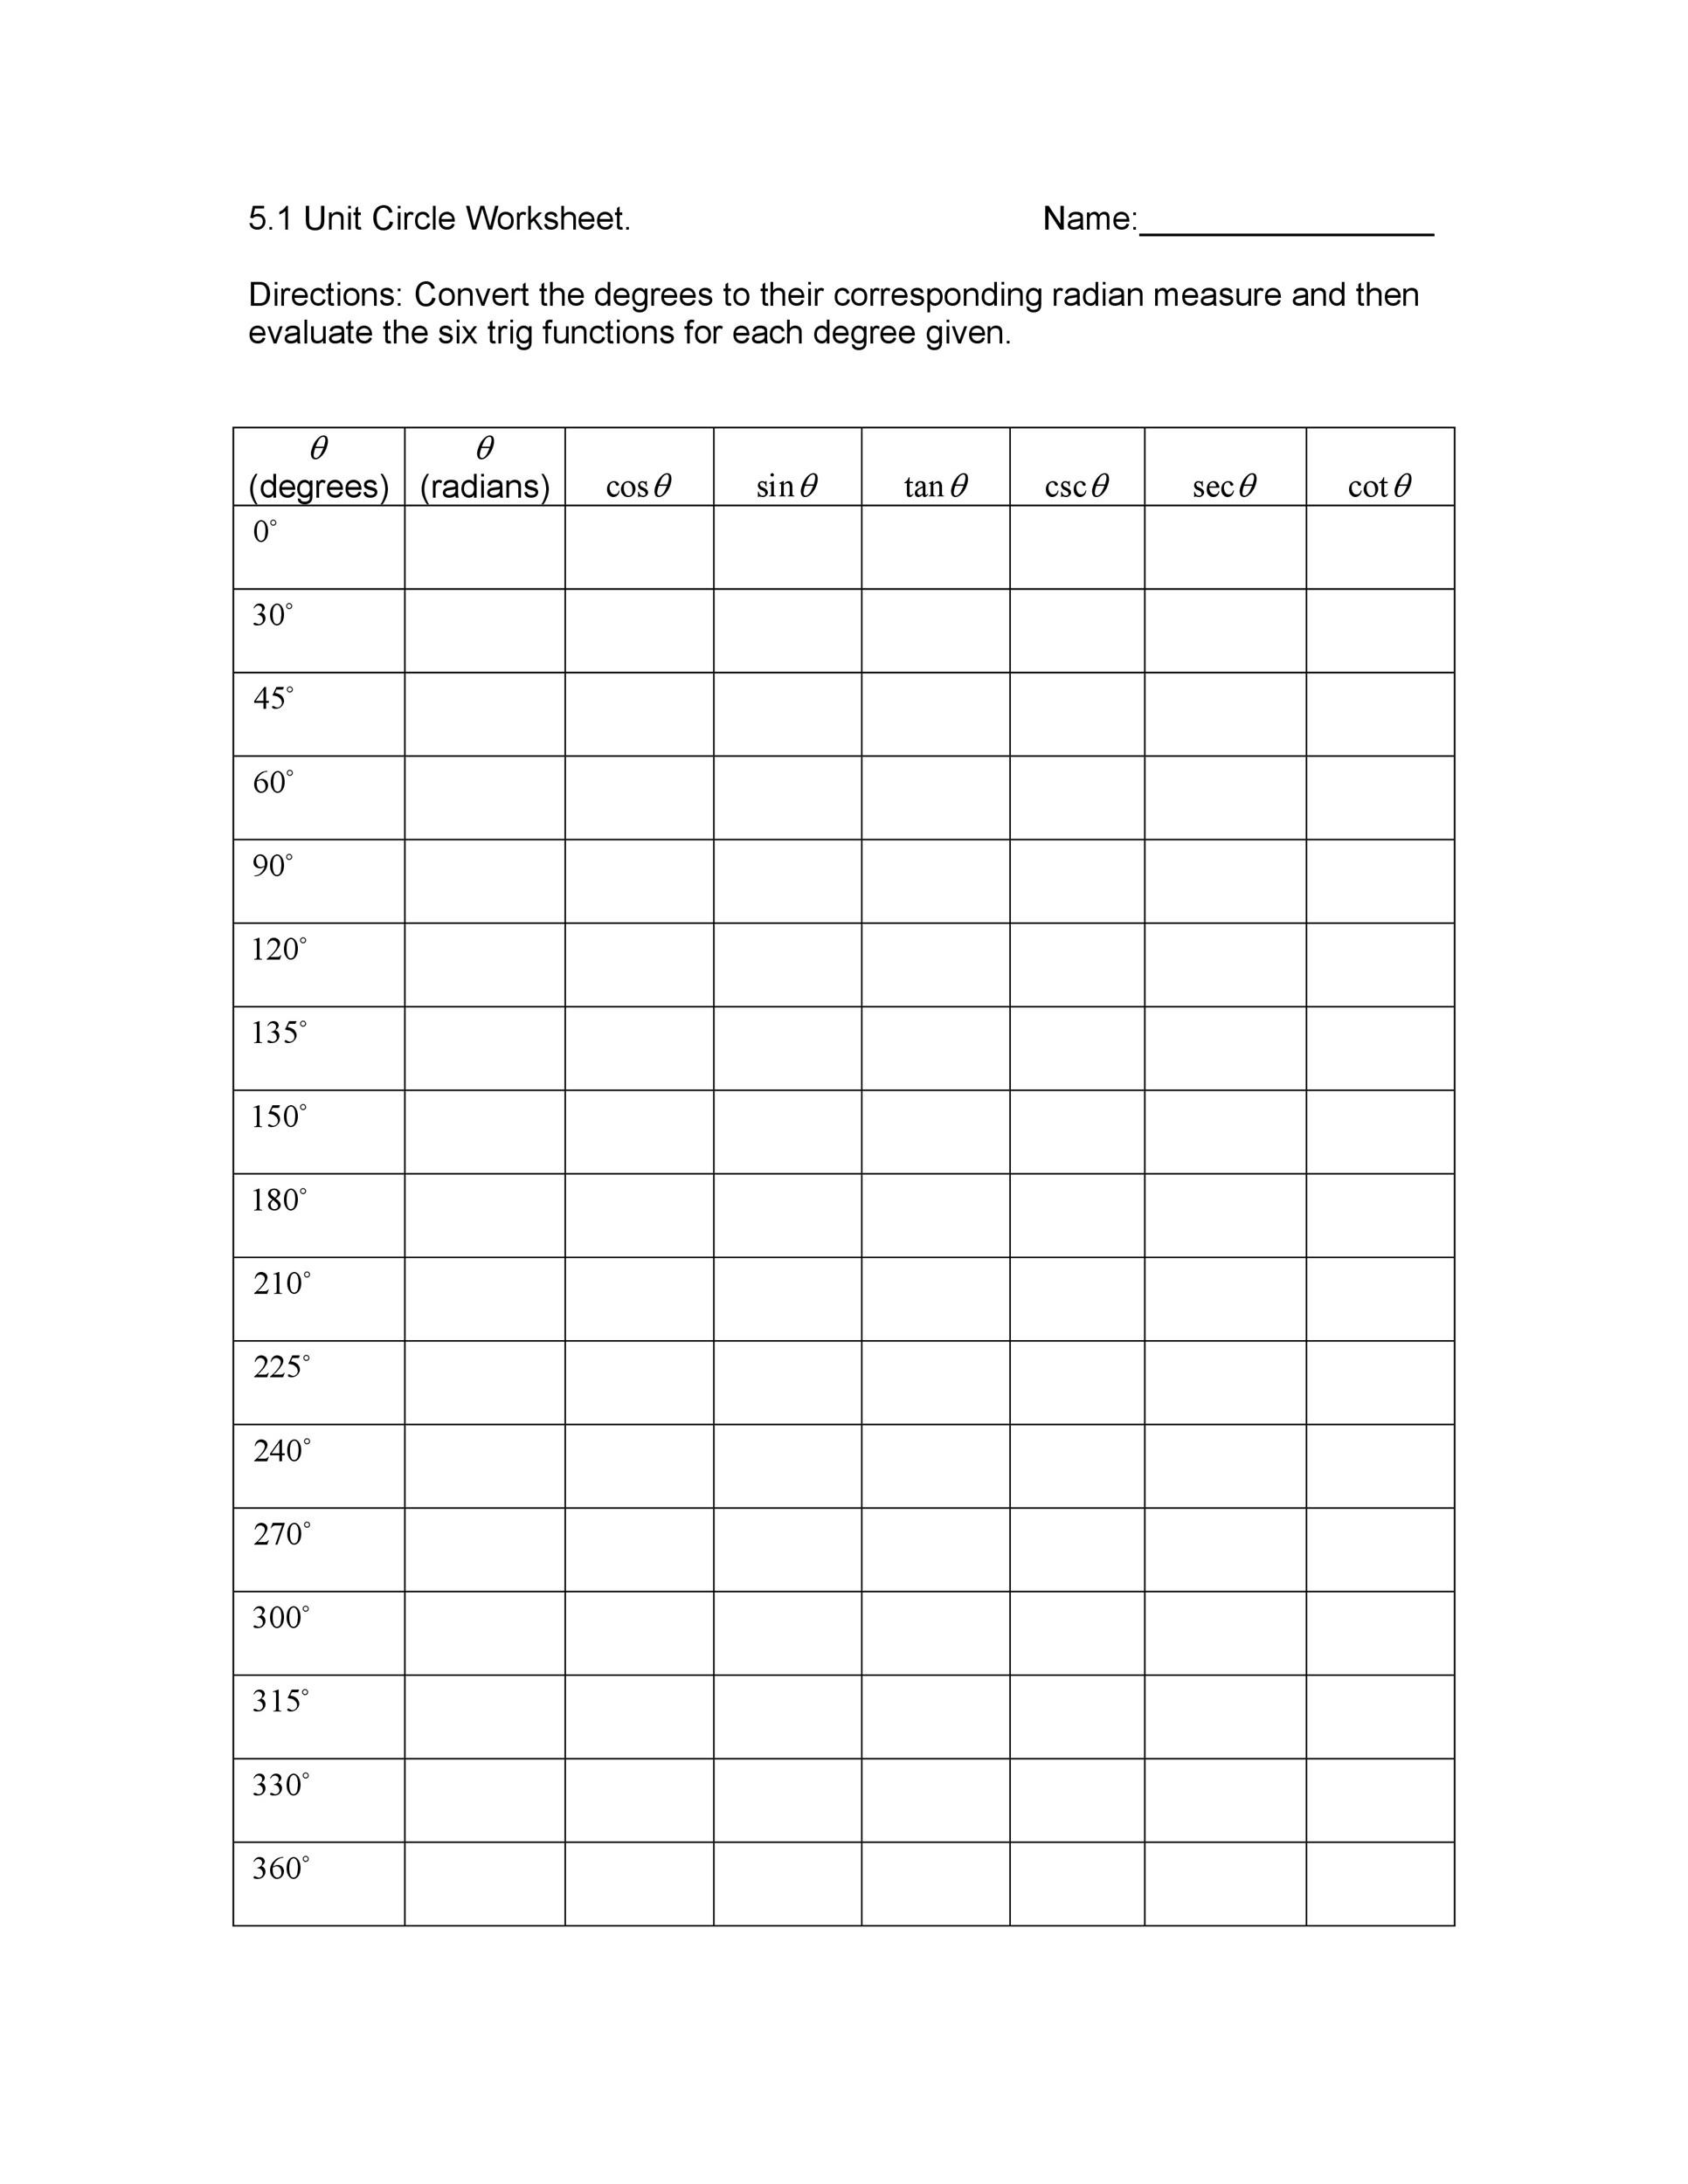
Although it may seem confusing, creating a unit circle diagram is quite simple. That is if you have all the steps to do so. Otherwise, you can download a unit circle printable and work with that. Take all the right triangles and the angles of the unit circle. Then put them together, this will create the complete unit circle. As you do this, you need to create special triangles one at a time. You need to do this as they are all specific points on a coordinate plane.
No matter how long the sides you use are for the angle in a triangle, the trig function values would remain the same. To make things easier, mathematicians made all the sides of the triangle smaller.
Unit Circle Printables
They did this so that all the angles would fit into the whole unit circle. Here are some tips you can use to make your own unit or radian circle chart:
- Start in the first quadrant on a graph. In that quadrant, make a 30-degree angle for your unit circle.
- Draw the angle carefully and link it to the origin with the use of a straight line.
- Make sure that the terminal side of your 30-degree angle is in the first quadrant. Also, make sure that the angle’s size is fairly small. It should only be a third of the way between 0 and 90-degrees.
- Next, draw a perpendicular line. In doing this, you’ll be able to create a right triangle.
- The hypotenuse of the triangle would serve as the radius of your unit circle. One of the legs would be on the x-axis while the other leg would be on the y-axis.
- Next, you need to find the hypotenuse’s length. Keep in mind that with a unit circle, the radius is always 1. This means that the triangle’s hypotenuse would also be 1.
- You also need to find the length of the triangle’s other sides. In order to do this, start with the shorter side. Find the length by dividing the value by 2. For the long side, you need to multiply the value of the short side by 2.
- After this, you need to identify the point on your circle. A unit circle is on a coordinated plane which has the origin at its center. So each point on the circle has distinct coordinates. By now, you should be able to assign a name to the point at the 30-degree angle on your unit circle.
- Once you’ve done all these steps, it would be a lot easier to find the points of the other angles on your circle too.
- Let’s have an example. Find the point in your unit circle chart marked 45-degrees. Use that point to draw a triangle. You can do so by using the first and second step.
The hypotenuse of the triangle would still be 1, which is also the radius of your unit circle. Once you’ve drawn your triangle, you can start finding the lengths of the sides. After this, you can name this point in your unit circle. - The second and fourth quadrants are simply mirror images of quadrant 1. However, the signs differ because the points on the circle are in varying locations of the plane.
Radian Circle Charts
Here are some facts you need to know about a trig circle/trigonometry circle chart:
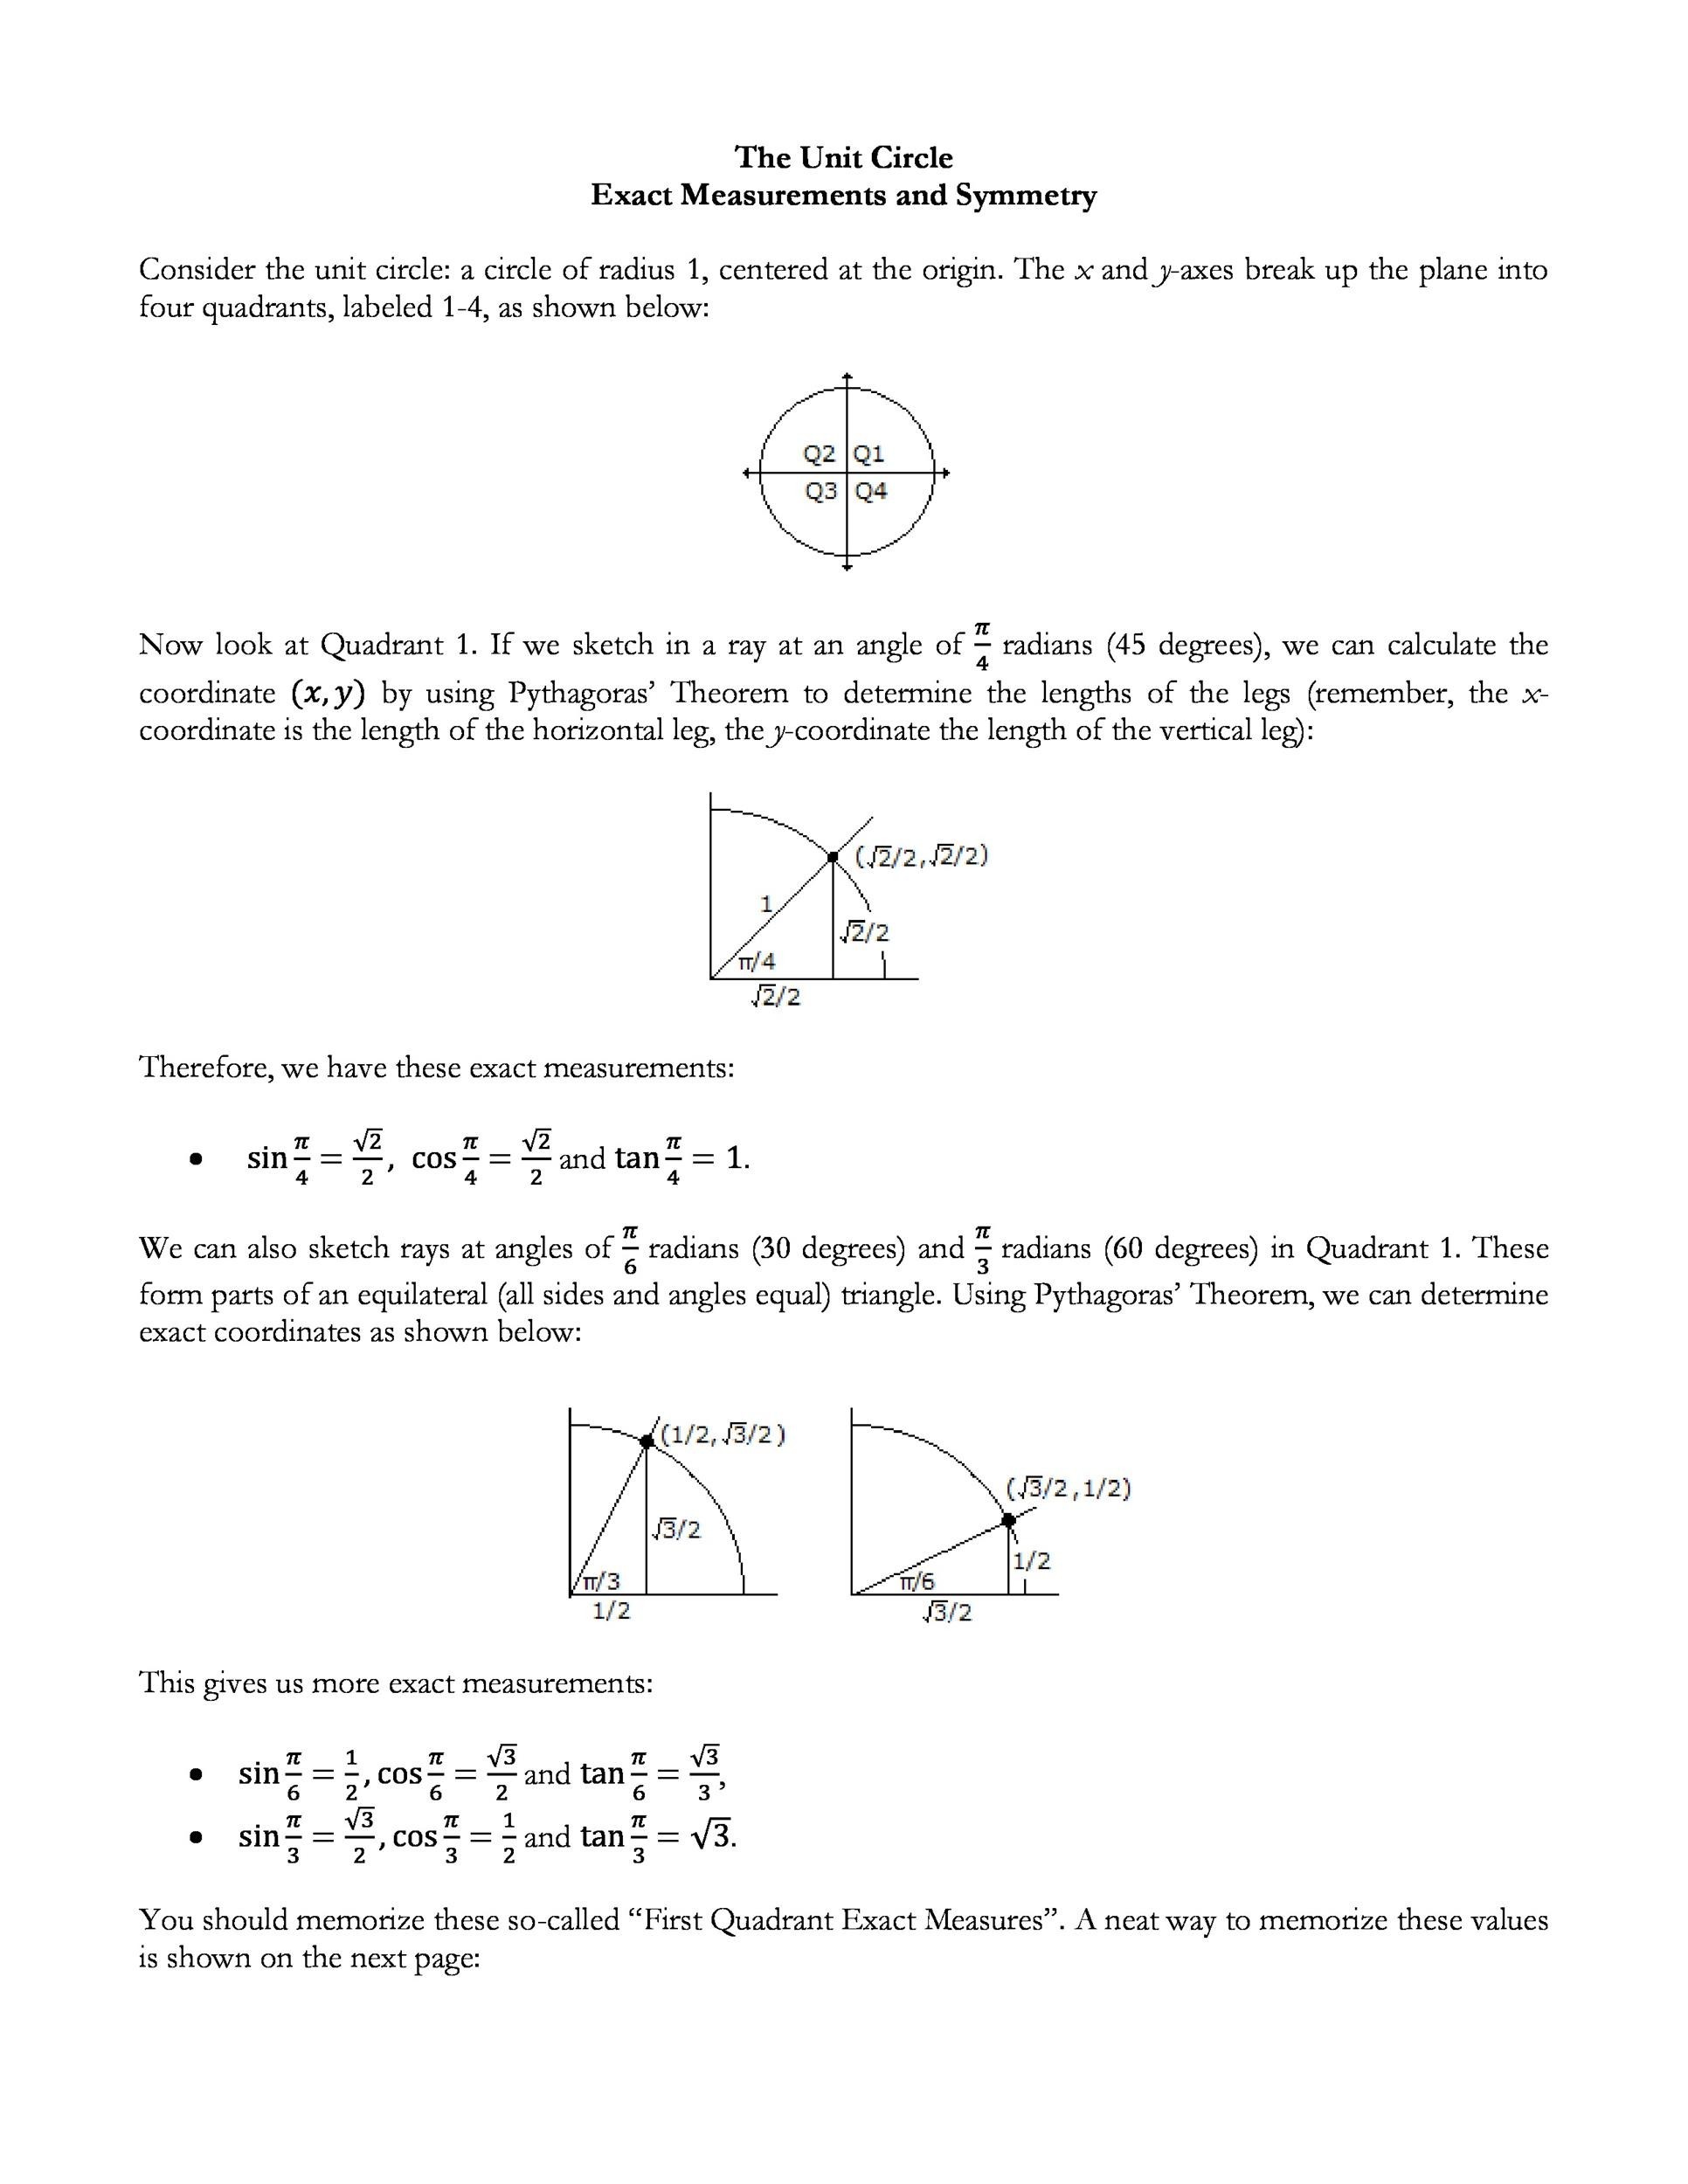
- In the first quadrant, you’ll have positive x and y values.
- In the second quadrant, you’ll have a negative x value and a positive y value.
- In the third quadrant, you’ll have negative x and y values.
- In the fourth quadrant, you’ll have a positive x value and a negative y value.
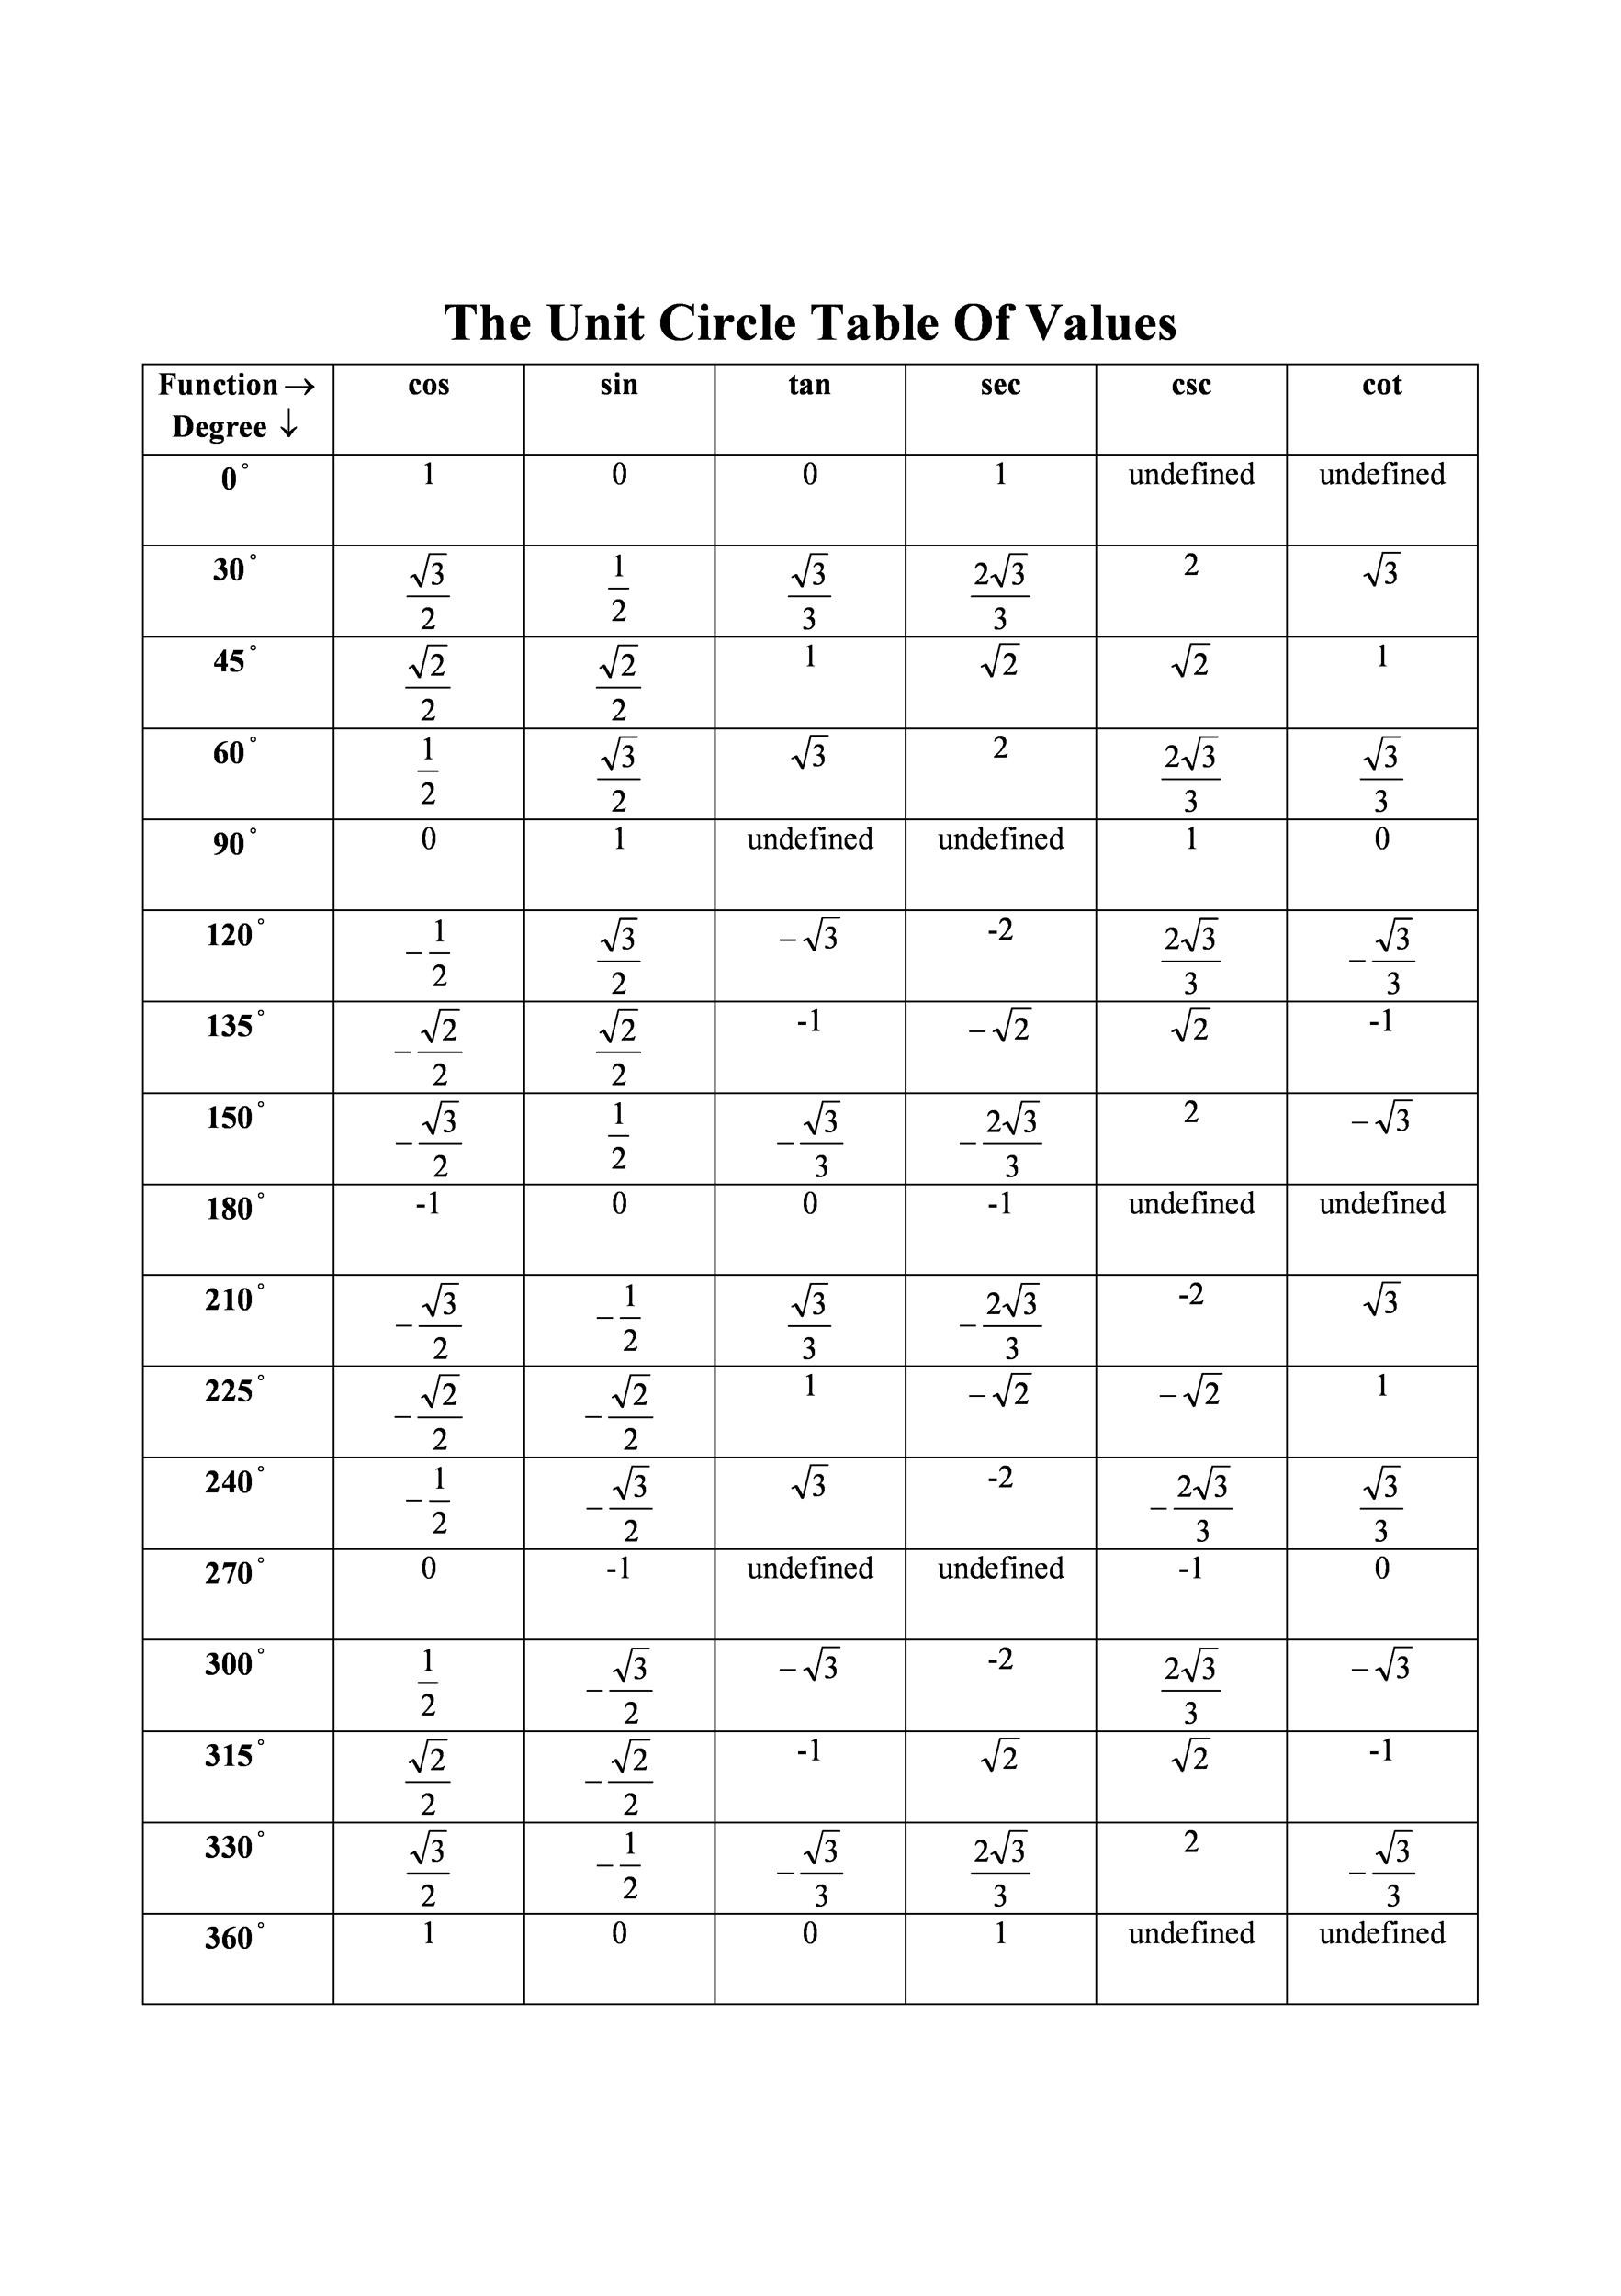
All these are parts of the entire unit circle. The unit circle chart also involves sin, cos, tan, sec, csc, cot. Fortunately, you don’t have to memorize everything involved in the entire unit circle.
All you need to do is apply the basic concepts you know about the circle and about right triangles.
Understanding a unit circle chart
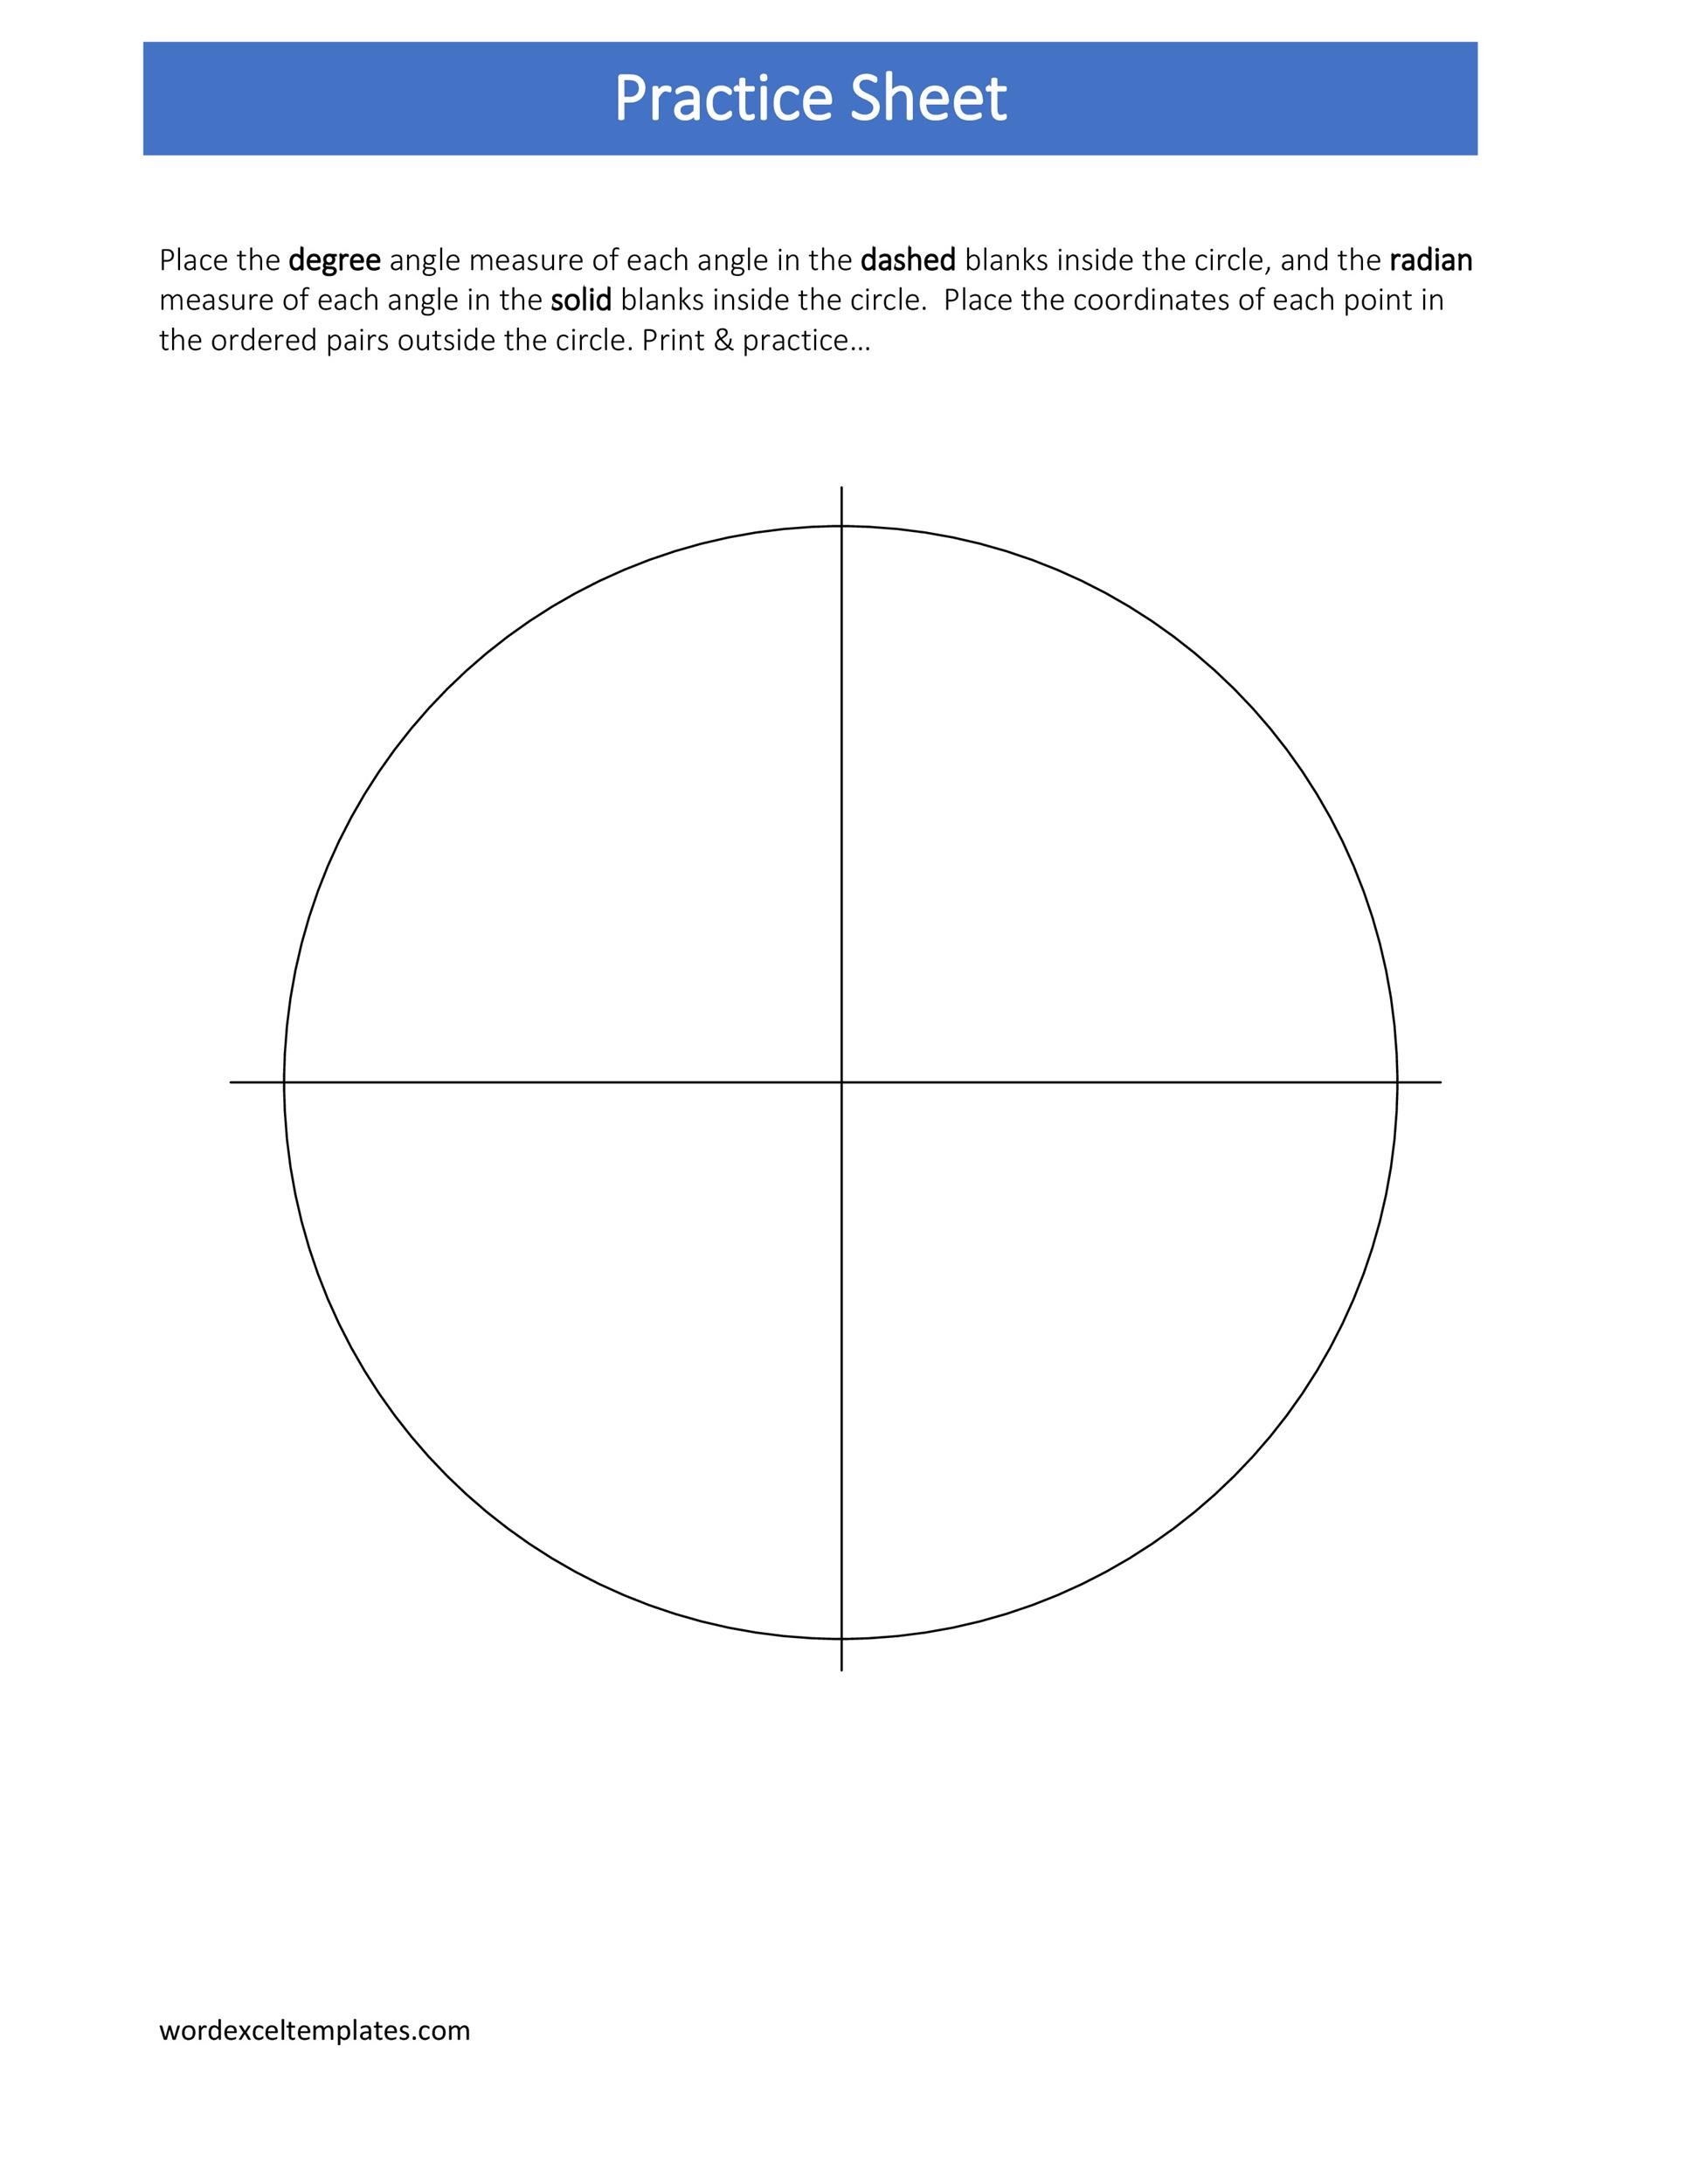
When you’re dealing with trigonometry, you can use a unit circle diagram. In fact, it’s one of the best tools which you can use. Rather than making your own unit circle, you can download a unit circle printable and work with it.
Either that or make a blank unit circle to use. If you can understand this concept and what it does, trigonometry will become a lot easier. You’ll be able to comprehend it too. Here are some tips to help you out:
Know what a unit circle is
Before you can understand it, you should first know what it is. Actually, a unit circle is simply a circle with a radius of 1 that’s centered at the origin. You can use this circle to find special trigonometric functions and ratios.
You can also use it to help you plot graphs. There’s also a number line wrapped around the unit circle. This serves as the input value when you’re evaluating trig functions.
Know the 6 basic trig ratios
A unit circle chart has sin cos tan sec csc cot ratios. To understand the chart, you need to know them:
- sinθ equals opposite/hypotenuse
- cosθ equals adjacent/hypotenuse
- tanθ equals opposite/adjacent
- cscθ equals 1/sinθ
- secθ equals 1/cosθ
- cotθ equals 1/tanθ.
Know what a radian is
By definition, a radian is an alternative way to measure angles. A single radian is an angle you need. So the radius length would be equal to the enclosed arc length. The size or the orientation of the circle isn’t significant.
However, you should know how many radians are there in the whole circle. To make things easier for you, a full circle has 2π radians.
Be able to competently convert between degrees and radians
If you want to understand a radian circle chart, you need to be able to convert values competently. In the last point, we’ve established that a full circle has 2π radians. So here are some quick conversions for you:
- 2πradian equals 360degree and vice versa.
- Radian equals (360/2π) degree and vice versa.
- Radian equals (180/π) degree and vice versa.
Know the “special” angles
There are some special angles which you need to know and remember. These are π/6, π/3, π/4, π/2, π, and all their multiples.
Know and remember the trig identities which provide the 6 basic trig functions for angles
There are trig identities which provide the 6 basic trig functions for angles. If you want to understand unit circles, charts, and diagrams, you should know them. Here are the identities of a unit circle chart sin cos tan sec csc cot:
- sinθ equals y
- cosθ equals x
- tanθ equals y/x
- csc equals 1/y
- sec equals 1/x
- cot equals x/y
Locate and remember the 6 basic trig functions for the angles on the axes
It’s quite easy to locate the trig functions of angles which are the multiples of π/2. These include 0, π/2, π, 3π/2, 2π, and so on. All you need to do is imagine the angle on the axes. If the angle’s terminal side is along the y-axis, its sin will either be 1 or -1.
Then its cos will automatically be 0. On the other hand, if the angle’s terminal side is along the x-axis, its sin will be 0. Then its cos will either be 1 or -1.
Locate and remember the 6 basic trig functions of π/6, which is a special angle
To do this, start by drawing the π/6 angle on your unit circle. Remember that special triangles have varying side lengths. These are 45-45-90 and 30-60-90. The short side of the triangle is half of the hypotenuse.
This means that the y-coordinate is equal to 1/2. On the other hand, the long side is √3 times the shorter side or (√3)/2. This means that the x-coordinate is equal to (√3)/2. So the points of the special angle are ((√3)/2,1/2). So it means that:
- sinπ/6 equals 1/2
- cosπ/6 equals (√3)/2
- tanπ/6 equals 1/(√3)
- cscπ/6 equals 2
- secπ/6 equals 2/(√3)
- cotπ/6 equals √3
Locate and remember the 6 basic trig functions of π/3, which is a special angle
This angle is less complicated than the previous one. It has a point on the circle’s circumference. At that point, the x-coordinate equals the y-coordinate in the π/6 angle.
For this angle, its y-coordinate is identical to the x-coordinate. So the angle’s point is (1/2, √3/2). So it means that:
- sinπ/3 equals (√3)/2
- cosπ/3 equals 1/2
- tanπ/3 equals √3
- cscπ/3 equals 2/(√3)
- secπ/3 equals 2
- cotπ/3 equals 1/(√3)
Locate and remember the 6 basic trig functions of π/4, which is a special angle
Here’s another special angle for you to remember. For this one, you’ll use the ratios for a 45-45-90 triangle. It has sides of 1 and a hypotenuse of √2. So if plotted on a unit circle, the basic trig functions are:
- sinπ/4 equals 1/(√2)
- cosπ/4 equals 1/(√2)
- tanπ/4 equals 1
- cscπ/4 equals √2
- secπ/4 equals √2
- cotπ/4 equals 1
Know which reference angle to make use of
By this point, you should have already understood the trig values of the special angles. These special reference angles are π/6, π/3, and π/4. But all these angles are in the first quadrant.
If you need to locate a function of a smaller or larger special angle, you need to know which reference angle to use. Generally, the reference angle you need belongs to the same family of angles.
To determine, you need to reduce the fraction as much as you can. After that, you need to look at the number at the bottom. Then:
- If it stands alone, it belongs to the π family
- If it’s a 2, it belongs to the π/2 family
- If it’s a 3, it belongs to the π/3 family
- If it’s a 4, it belongs to the π/4 family
- If it’s a 6, it belongs to the π/6 family

