Regardless of your profession or industry, creating flowcharts is a valuable skill. Without the stress of creating from scratch, flowchart templates will simplify operations and optimize processes in your company.
Process flow chart templates provide a clear picture of business processes and the actions involved in a workflow from beginning to end. With this visual representation, you’ll find areas within your company that need improvement and optimization.
Table of Contents
- 1 Flow Chart Templates
- 2 What Is a Flow Chart Template?
- 3 Flow Charts Symbols
- 4 What are the Components of a Flow Chart Template?
- 5 What are The Best Practices for Making Process Flow Diagrams?
- 6 How To Make a Flowchart in 7 Easy Steps
- 7 The Process flow chart
- 8 How To Measure The Effectiveness Of Flow Chart Templates
- 9 How To Create a Business Process Flow Chart in Excel
- 10 How to Create a Flowchart in Word
- 11 Detailed flow charts
- 12 How To Create a Flow Chart in PowerPoint
- 13 Conclusion
In this article, we’ll run through the fundamentals of workflow charts, how they can improve your business, and the procedures for creating your own.
Flow Chart Templates


What Is a Flow Chart Template?
A flow chart, often referred to as a process flowchart or process/workflow diagram, is a graphic representation of a company’s workflow, or a business process. It involves several phases and decision points to accomplish a specific objective.
A flowchart has a beginning point, a sequence of steps, decision-making points, and a final endpoint. Using a complex process will guarantee that you cover the necessary ground to achieve your goals.
In a flow chart, each element is represented by symbols and arrows. These workflow diagrams’ are different in size, and shape or are color-coded to make each step in the process easy to understand.
That said, let’s look in detail at the components of a flow chart template.
Flow Charts Symbols


What are the Components of a Flow Chart Template?
Flowcharts consist of symbols, lines, arrows, and text boxes. A process flow chart uses shapes and symbols to create a map of your business’s workflow process.
In a flowchart diagram, each shape, shape color, shape size, and shape symbol represents a different step.
That said, it’s not always necessary for you to use symbols when designing your process flow chart templates. As long as the different steps used in the workflow are described, it still qualifies as a workflow chart.
What are The Best Practices for Making Process Flow Diagrams?
Flow diagrams can be used to explain, improve, and potentially automate your company’s workflow. This highlights the importance of having a flow diagram that accurately depicts your work processes.
With a poor process flow, company operations are at risk. Let’s go over five of the best practices to adopt while creating process flow diagrams for your company:
- Use Reliable Design Components
Use consistent design elements while developing your process flow diagram. In other words, try and keep the colors, forms, lines, and boxes uniform.
Having an inconsistent design defeats the purpose of a flow diagram, affects the company’s efficiency, and makes it challenging for team members to understand important decision-making elements. - Provide Precise Instructions
It’s important to establish who does what and when for workflow operations that involve a range of different team members. To differentiate the duties of the different team members, use horizontal or vertical lines to divide the team structure and process flow.
In the flow chart template, each horizontal or vertical line can represent a team member’s lane. You could also use these lanes to represent the responsibilities within different groups or departments.
With their lane on the flowchart, team members can be assigned specific instructions on how to complete a task. This makes tracking effectiveness, progress, and performance simpler. - Break Up Lengthy Procedures.
Long business procedures and workflows can be confusing. In your diagram, you can set these apart into various continuous flows. This is where you’ll start to use your flow chart symbols.
Breaking up bigger processes into smaller parts makes it a lot easier for employees to understand the vision. The company is likely to experience fewer faults if everyone is on the same page. - Describe the Flow Chart Template’s Use.
You should spend some time instructing your team on how to use your flow chart template after you’ve finished building it.
Team members won’t need to experiment by trial and error if the features of the business process flow chart template are explained to them. In addition, it will make it easier to train new team members on how to use your workflow templates. - Use a Flow Chart Template That Can Be Edited.
Not everybody has the time to spend creating symbols and arrows in various colors. If you lack the time to be creative with your flowchart, you can create a general template that will fit with any process flow that you apply to it.
Thanks to new technology, you can create the perfect flow chart template that works for you. In today’s modern times, you can download free flowchart templates and edit them accordingly.
It’s that easy. However, make sure the free flowchart template is simple to use and editable in Word, Excel, or PowerPoint. That said, there are a few services for creating flowcharts that provide tools for altering pre-made templates.
How To Make a Flowchart in 7 Easy Steps
Flowcharts should be easy to understand, straightforward, and be able to describe each stage of the process clearly.
Ensure that your flowcharts are visually appealing and simple to understand. This can be done by adhering to some fundamental structural, diagramming, and design principles.
Here are seven quick steps for creating process flowchart templates that check all the right boxes.
- Step 1: Determine Why You Are Using a Flowchart
It is essential to determine the purpose of your flowchart before learning how to create one that fits.
Here are a few reasons for using a flowchart:
Making a difficult task more understandable.
Finding faults in a current business process and making improvements.
Explaining or conveying a procedure to another person.
Making a process more efficient and consistent.
Knowing your flowchart’s intended use makes it simpler to select the appropriate flowchart type, the best template, and whether to prioritize design or functionality. - Step 2: Start With a Template
It can be daunting to start from the beginning when creating a flowchart. Fortunately, if you don’t want to, you don’t need to.
You can easily alter and adapt a variety of online flowchart templates. To save time and effort, choose a template designed expressly for your profession or company.
There are plenty of flowchart templates on the internet, but you can also create your diagram from scratch using pre-made flowchart content blocks.
A simple flowchart can also be made with the aid of programs like Microsoft Word or PowerPoint. This might be a decent alternative if you’re already confident in your diagramming abilities and don’t want to use pre-made templates. - Step 3: Include Symbols and Shapes
Every flowchart needs symbols and shapes to help it make sense. They specify the elements of your flowchart, and each symbol stands for a different concept.
After you’ve outlined the goal of your flowchart, you can start with the designing stage. The first thing you should do is design symbols for each different element in your flow chart.
You can also add blocks of pre-made flows with 3–4 shapes as well as link the basic shapes you’ve added using lines and arrows. If the process flow gets too complicated you can explain each symbol with a key box on the side. - Step 4: Connect Your Symbols With Lines and Arrows
After you’ve added all the necessary shapes, it’s time to connect them all using lines and arrows. If you want to specify a specific direction for your information flow, we advise using arrows flowing from one box to the next. - Step 5: Split Pathways or Add Decisions
To help visualize complicated processes, you can divide pathways and include decisions in your flowchart. For example, you might add two distinct paths depending on yes/no options that both carry different outcomes (and therefore different paths).
These paths can assist individuals to operate in specific ways in response to changing inputs and outputs. - Step 6: Make Your Flowchart Look the Way You Want It To
The visual design of your flow chart can be a representation of where you intend to use it. You can use forms, symbols, lines, text, and images to increase visual interest. Use a header to create a focal point and provide a clear description of the flow chart. - Step 7: Download or Distribute Your Flowchart
The time has come to download or distribute your flowchart to your intended audience.
Print it out, send it by email, or include your flowchart in other documents like presentations and reports. By posting your flowchart online and disseminating the URL, you may also share it with others. Producing an embed code and inserting your flowchart into any project or web page is another option to distribute it.
You can include interactivity if you intend to share your flowchart online as a web page, GIF, or video or if you want to embed it someplace on a website.
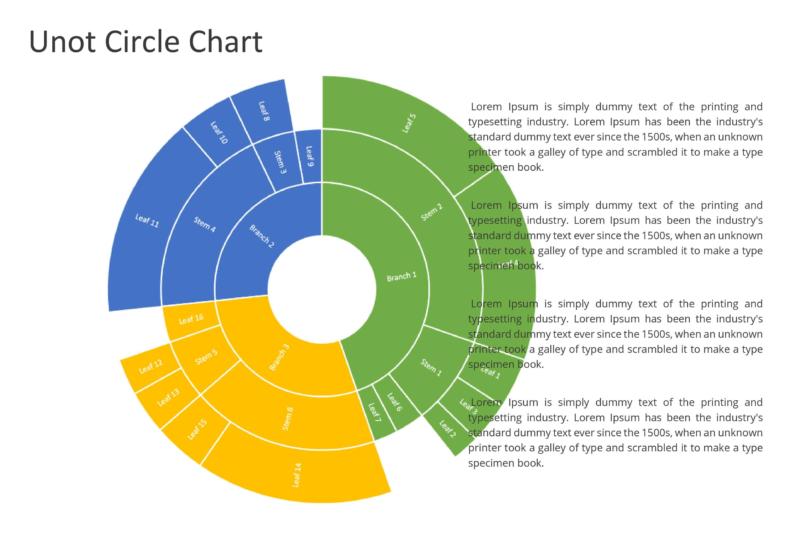
The Process flow chart


How To Measure The Effectiveness Of Flow Chart Templates
You can measure your business process success by setting key performance indicators. One example is the inventory KPI. Below you can find some key business metrics to measure whether or not your process flow chart is working:
- The efficiency of the process
- Process Harmonization
- Continuity of the process
- Procedural Cycle Time, Cost, and Process Efficiency
- Material Productivity
- Process Conformity
You can also make use of a scorecard to gauge the effectiveness of your flowchart template.
Here are three steps to take to ensure that your processes (and employees) are running smoothly
- Assess Compliance
You must first determine whether your team is following the stages in your flow chart. Spot-checking is an important stage in your process to ensure it is carried out correctly.
You are not required to examine each step or the occurrence of each stage. Simply verifying enough instances and actions will provide you with enough information to ensure that your employees consistently follow the process. - Assess Frequency
How frequently is the step taken? It probably isn’t worth measuring on a weekly scorecard if it’s only done once every three months. Having a few spot checks on a step that is carried out 20 times per week might be enough to provide you with the information you require. - Assess Outcome
This is a measurement of the desired outcome. The process should result in the right outcome if all the steps are carried out as instructed. These are the desired outcomes that we want to track on the scorecard.
How To Create a Business Process Flow Chart in Excel
Excel is among the simplest programs to use when making a flowchart.
PowerPoint, Microsoft Word, Google Docs, and other software platforms are also capable of producing business process diagrams. Below you will find instructions on how to create a flowchart in Excel.
- Create a fresh spreadsheet.
- Select the Insert tab.
- Pick Drawing from the menu.
- You have the choice to add shapes, arrows, texts, and colors in the drawing sheet’s top corner.
- After selecting these components, choose a flowchart symbol.
- Edit each symbol you’ve chosen to ensure consistency and uniformity.
- Once you’re happy with the design you can save and close it.
By creating a business process flowchart template, you can avoid the time-consuming task of creating new flow charts over and over again.
How to Create a Flowchart in Word
The Drawing Tools in Microsoft Word contain all of the resources required to create flowcharts. The drawing tools are available in all current Office versions. Start with the following three steps:
- Boost the size of your page.
- Show the grid by clicking the view tabs checkbox.
- Click layout – arrange – align – show grid.
From here you can make use of the Drawing Canvas. A drawing canvas is automatically created when any shape or “drawing” is included in a Word document. To fit the full flowchart within the canvas, you will need to resize it.
When employing various shapes (such as those in a flowchart), using Microsoft support, is helpful.
Start carefully adding your shapes and linking them all at this point. It helps to first sketch out the plan on paper before finalizing it in Microsoft Word. Although the procedure is straightforward, using this “planning tool” with some planning can save time.
Detailed flow charts


How To Create a Flow Chart in PowerPoint
- You can create a flow chart into a PowerPoint presentation – Do this by using a SmartArt graphic.
- Search for the Insert tab – Click SmartArt.
- In the SmartArt Graphic dialog box – Select Process.
- Click on a flow chart in the middle pane – This allows you to see its name and description.
- Select the flowchart examples that appeal to you – Proceed to then click ok.
- Once the flow chart is attached to your slide, replace the text placeholders with the relevant steps in your flow chart.
- You can then replace the text placeholders – Replace them with the steps in your flow chart.
The SmartArt graphic’s color and style can also be modified. Click the SmartArt tab on the ribbon while it is chosen on your slide, you can then Change Colors or open the SmartArt Styles portfolio to view your selections.
Conclusion
Using multiple flowcharts for your business will simplify your workflow, increase productivity in your workplace, and create a better organizational structure.
Whether you’re creating your template from scratch or downloading one from the internet, having a template on hand will make your life a lot easier.